Contracts creation guide
Overview
This guide explains how to give your customers access to TomTom Move products. It covers creating contracts, editing existing contracts, setting usage limits and assigning users to your contracts.
The Move contracts feature allows you to create and manage user access more conveniently by setting global rules for each contract and then assigning new users to them. With contracts, you can:
- Assign shared consumption limits for multiple users.
- Schedule product access in advance.
- Manage expiration dates for multiple users on the same contract with a single action.
- Add information and context with contract names or notes.
Creating product contracts in Move
To create a new contract:
- Click New contract in the top-left corner of the Contracts list.
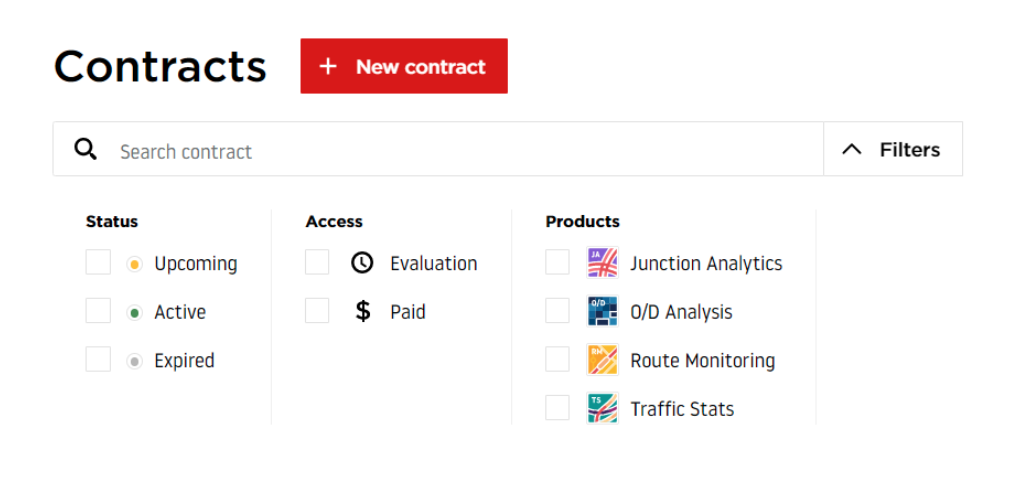
- Select the related products, provide the necessary information and click Create.

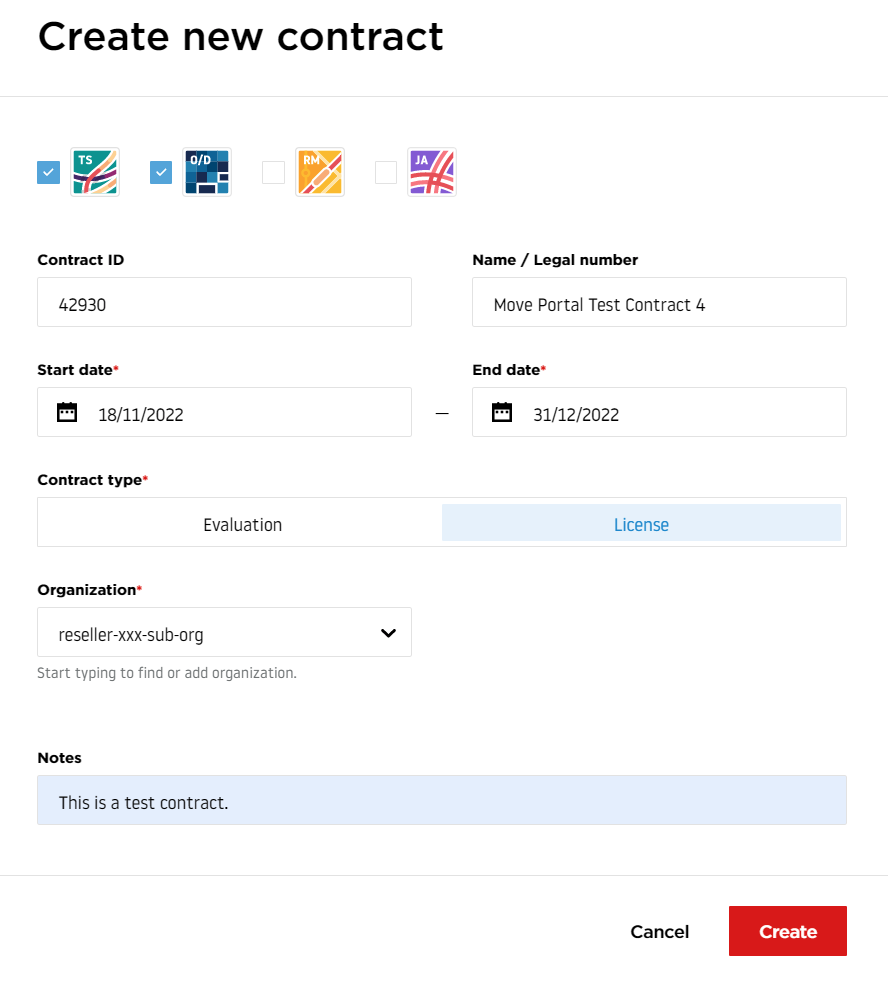
Field information:
- Product icons: Select the products that the contract provides to all its assigned users.
- Contract ID: Enter an optional number to identify the contract.
- Name / legal number: Give the contract a name so it appears clearly in the contracts list. You can name it after a company or project to make it easier to find. This field is optional. If left empty, the contract appears as an "unnamed contract."
- Start and end date: Specify when access to the selected products should begin and end for users in the contract. You can select the current day for immediate access or choose a future date.
- Contract type: Choose the type of access to provide to all users in the contract. The Evaluation type grants trial access to test Move products, while License provides full, paid access according to customer agreements.
- Organization: Specify the organization associated with this contract. You can select an existing organization or create a new one by entering its name.
- Notes: Use this optional field to add comments, remarks or other helpful information.
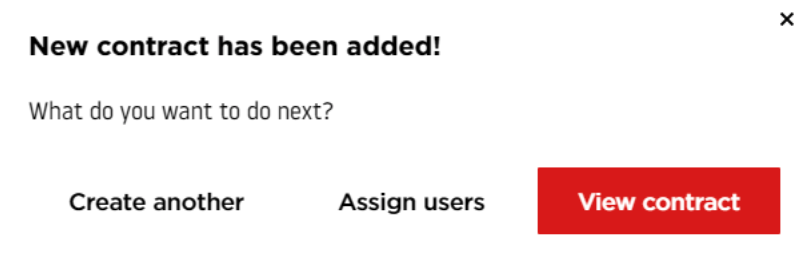
At this point, you can create another contract, assign users to the new one or view the contract you just added.
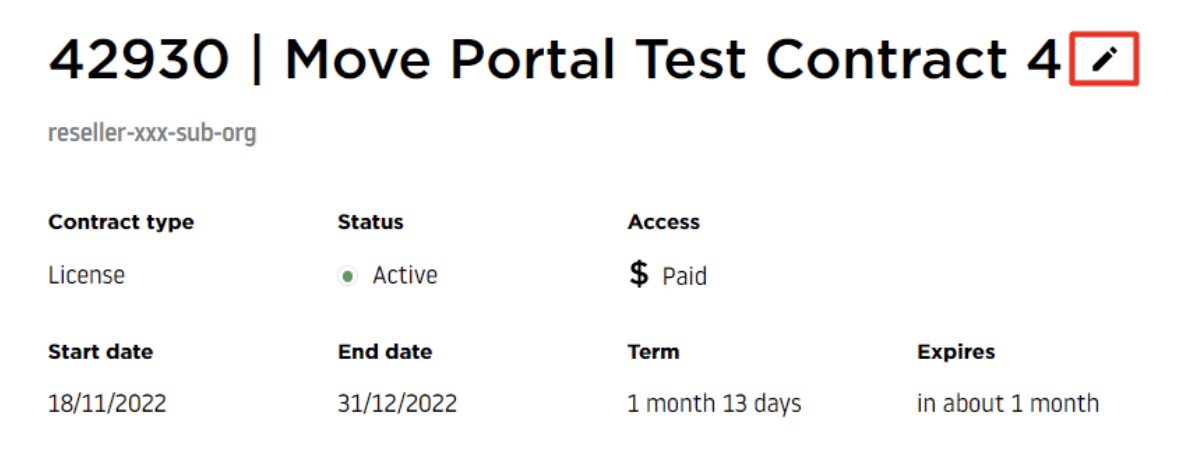
The following images show the result of the contract creation:
- Contact added with all related information.
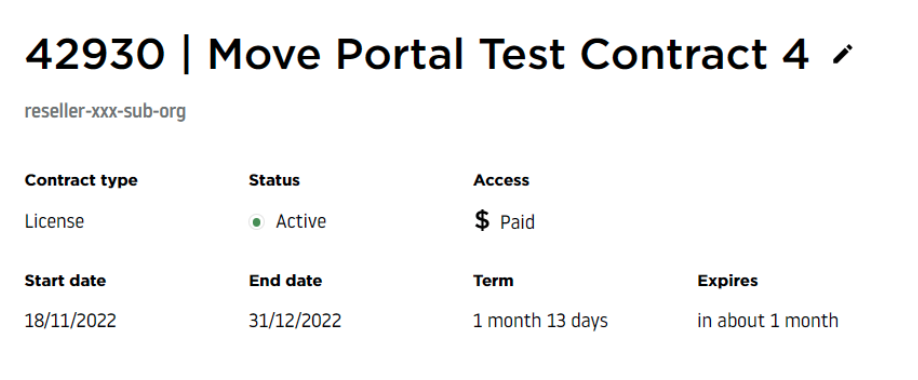
- Detailed contract view where you can manage all its settings and users.

Editing contracts and setting usage limits
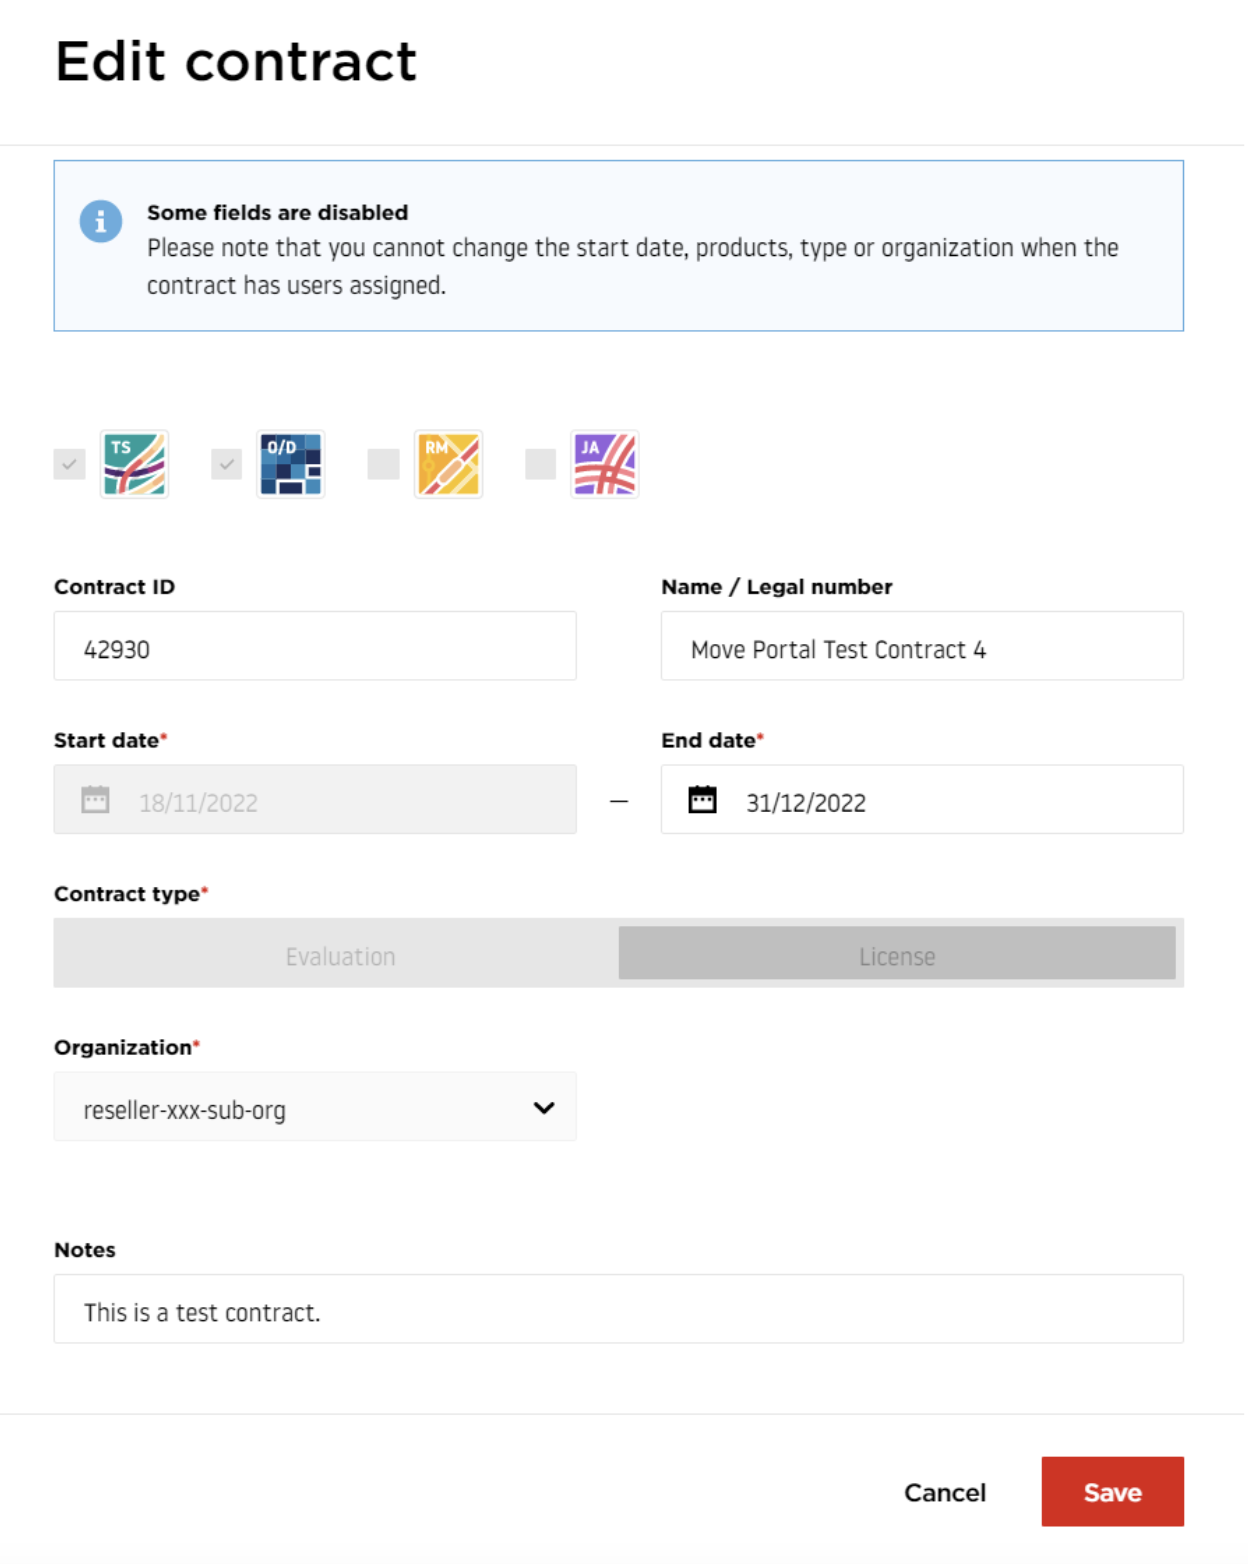
If you need to make adjustments to the contract, such as changing its name or product access dates, click the pencil button next to the contract name.
Editing contract details
Note It is not possible to change certain values if users are already assigned to the contract.
Editing contract information
The following example shows how to edit contract information:
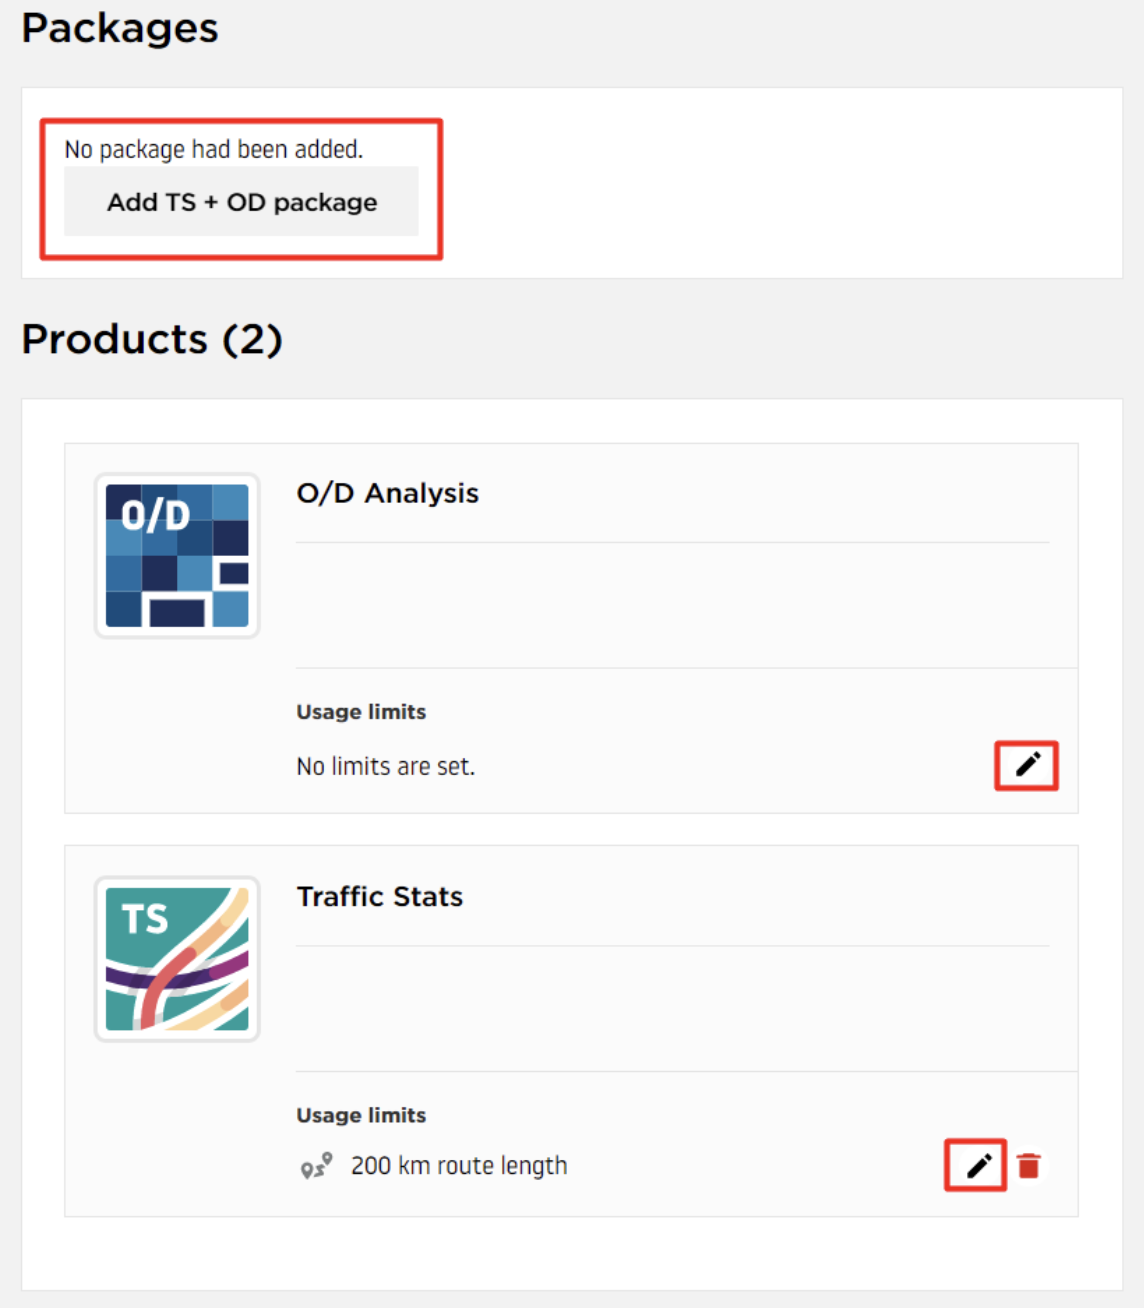
Adding new users
After creating a new contract, no limits are set or there may be some default limits in place. You can either change them by setting a package limit (between Traffic Stats and O/D Analysis only) or by clicking the pencil button next to each product.
Note Before adding new users to a contract, it is always a good idea to ensure that all product limits are set as intended. These limits will apply globally to all users assigned to the contract.
Example of setting a package limit:
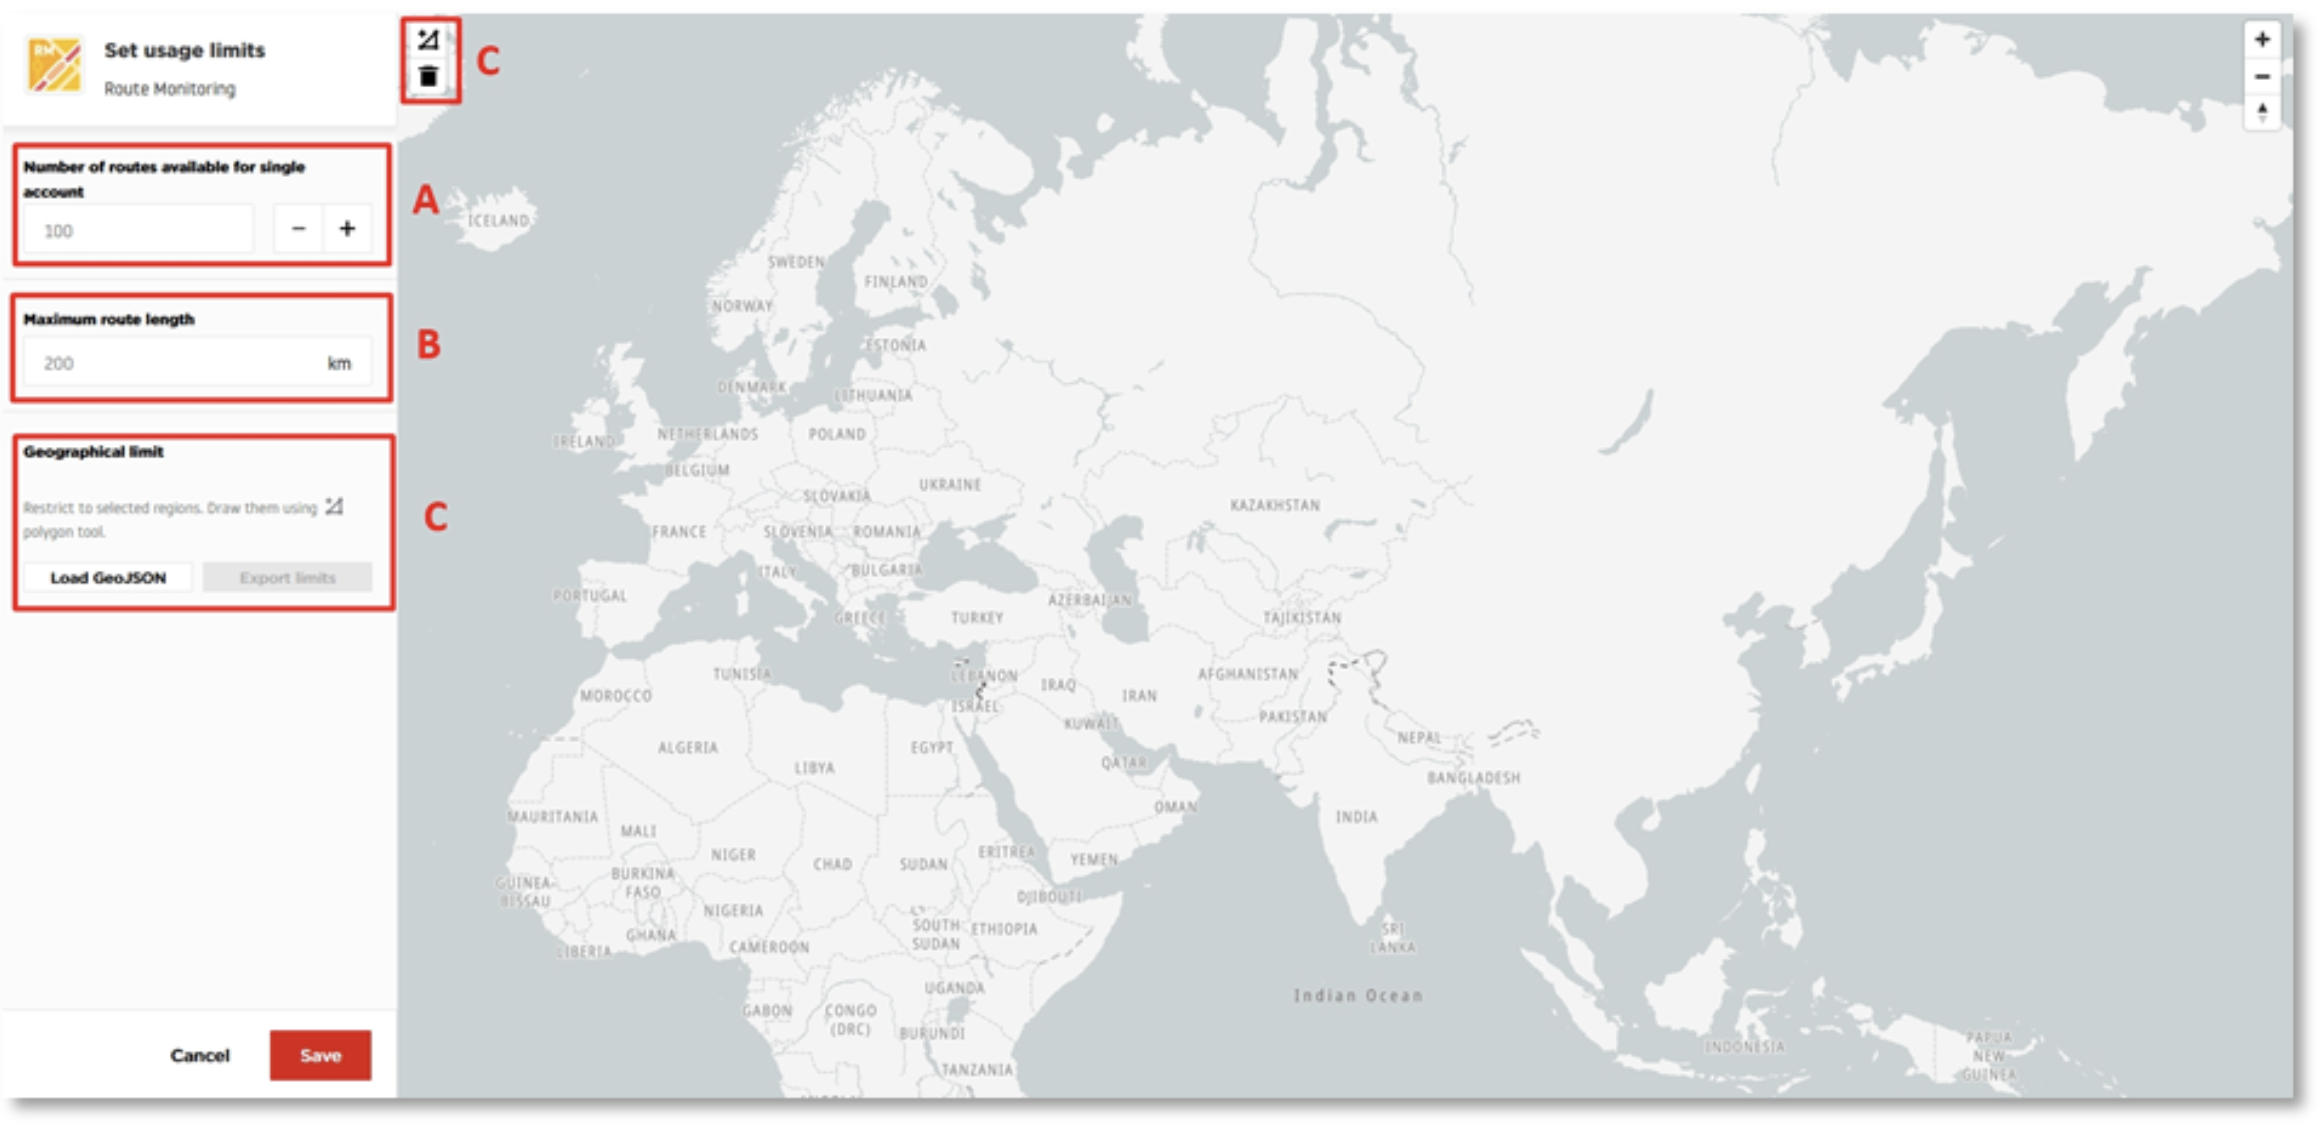
Route Monitoring
When setting up the limits for Route Monitoring application usage, you can specify the following values:
- Number of routes available for a single account: The total number of routes a user can create.
- Maximum route length: The maximum distance in kilometers that a single route can cover.
- Geographical limit: Load a GeoJSON file with predefined limitations or draw a specific region where the user can analyze road network data. The geographical limit can also be exported for reuse across multiple applications.
Example of Route Monitoring usage limits on the user account:

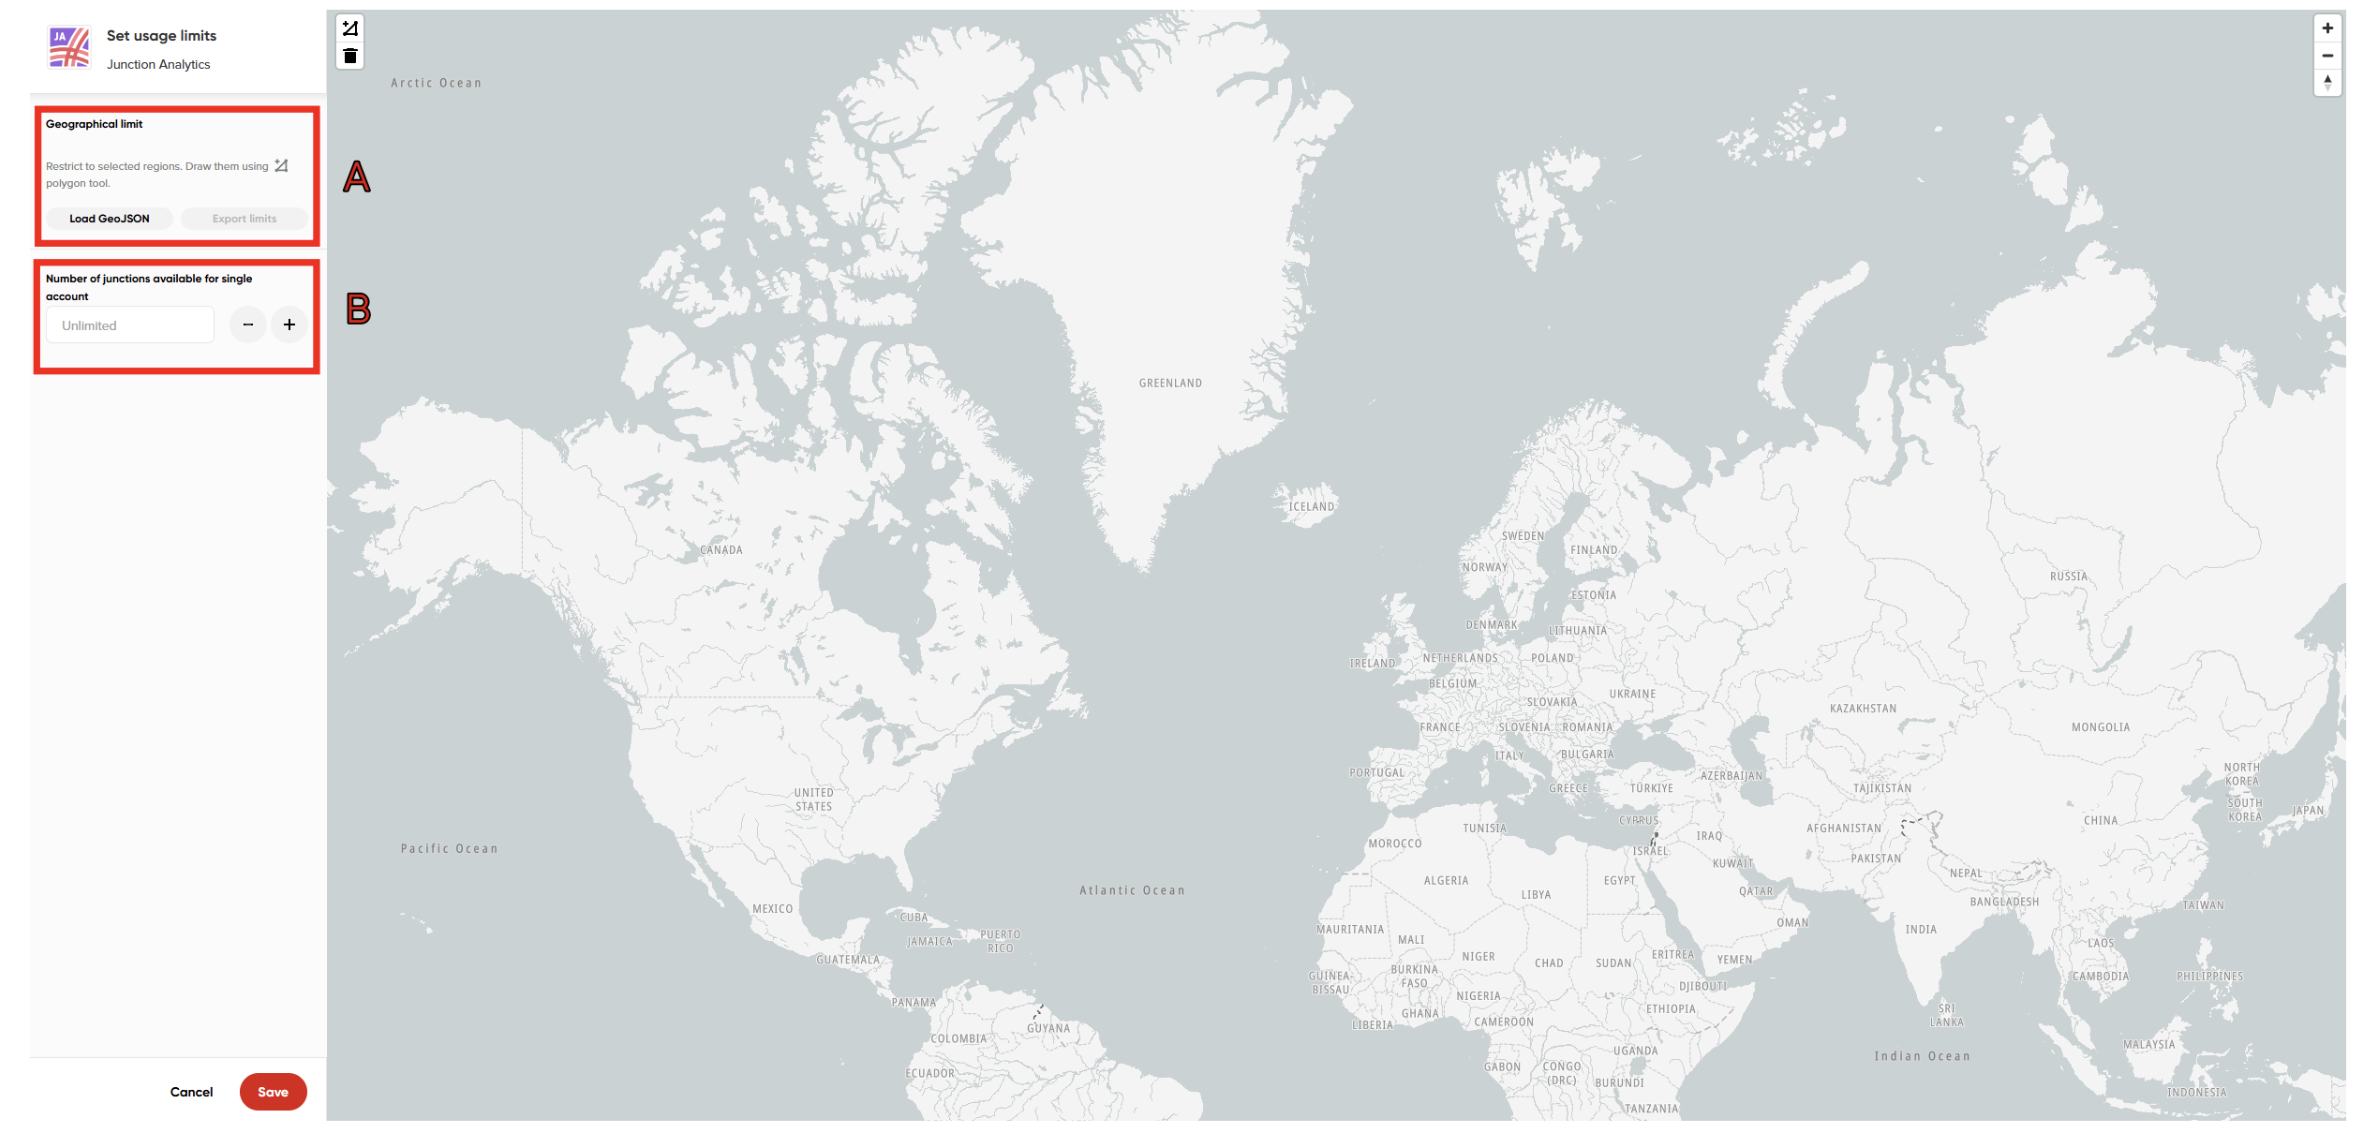
Junction Analytics
When setting up the limits for Junction Analytics application usage, you can specify the following values:
- Number of routes available for single account: The total number of routes a user can create.
- Geographical limit: Load a GeoJSON file with defined limitations or draw a specific region where the user can analyze road network data. The geographical limit can also be exported and reused in multiple applications.
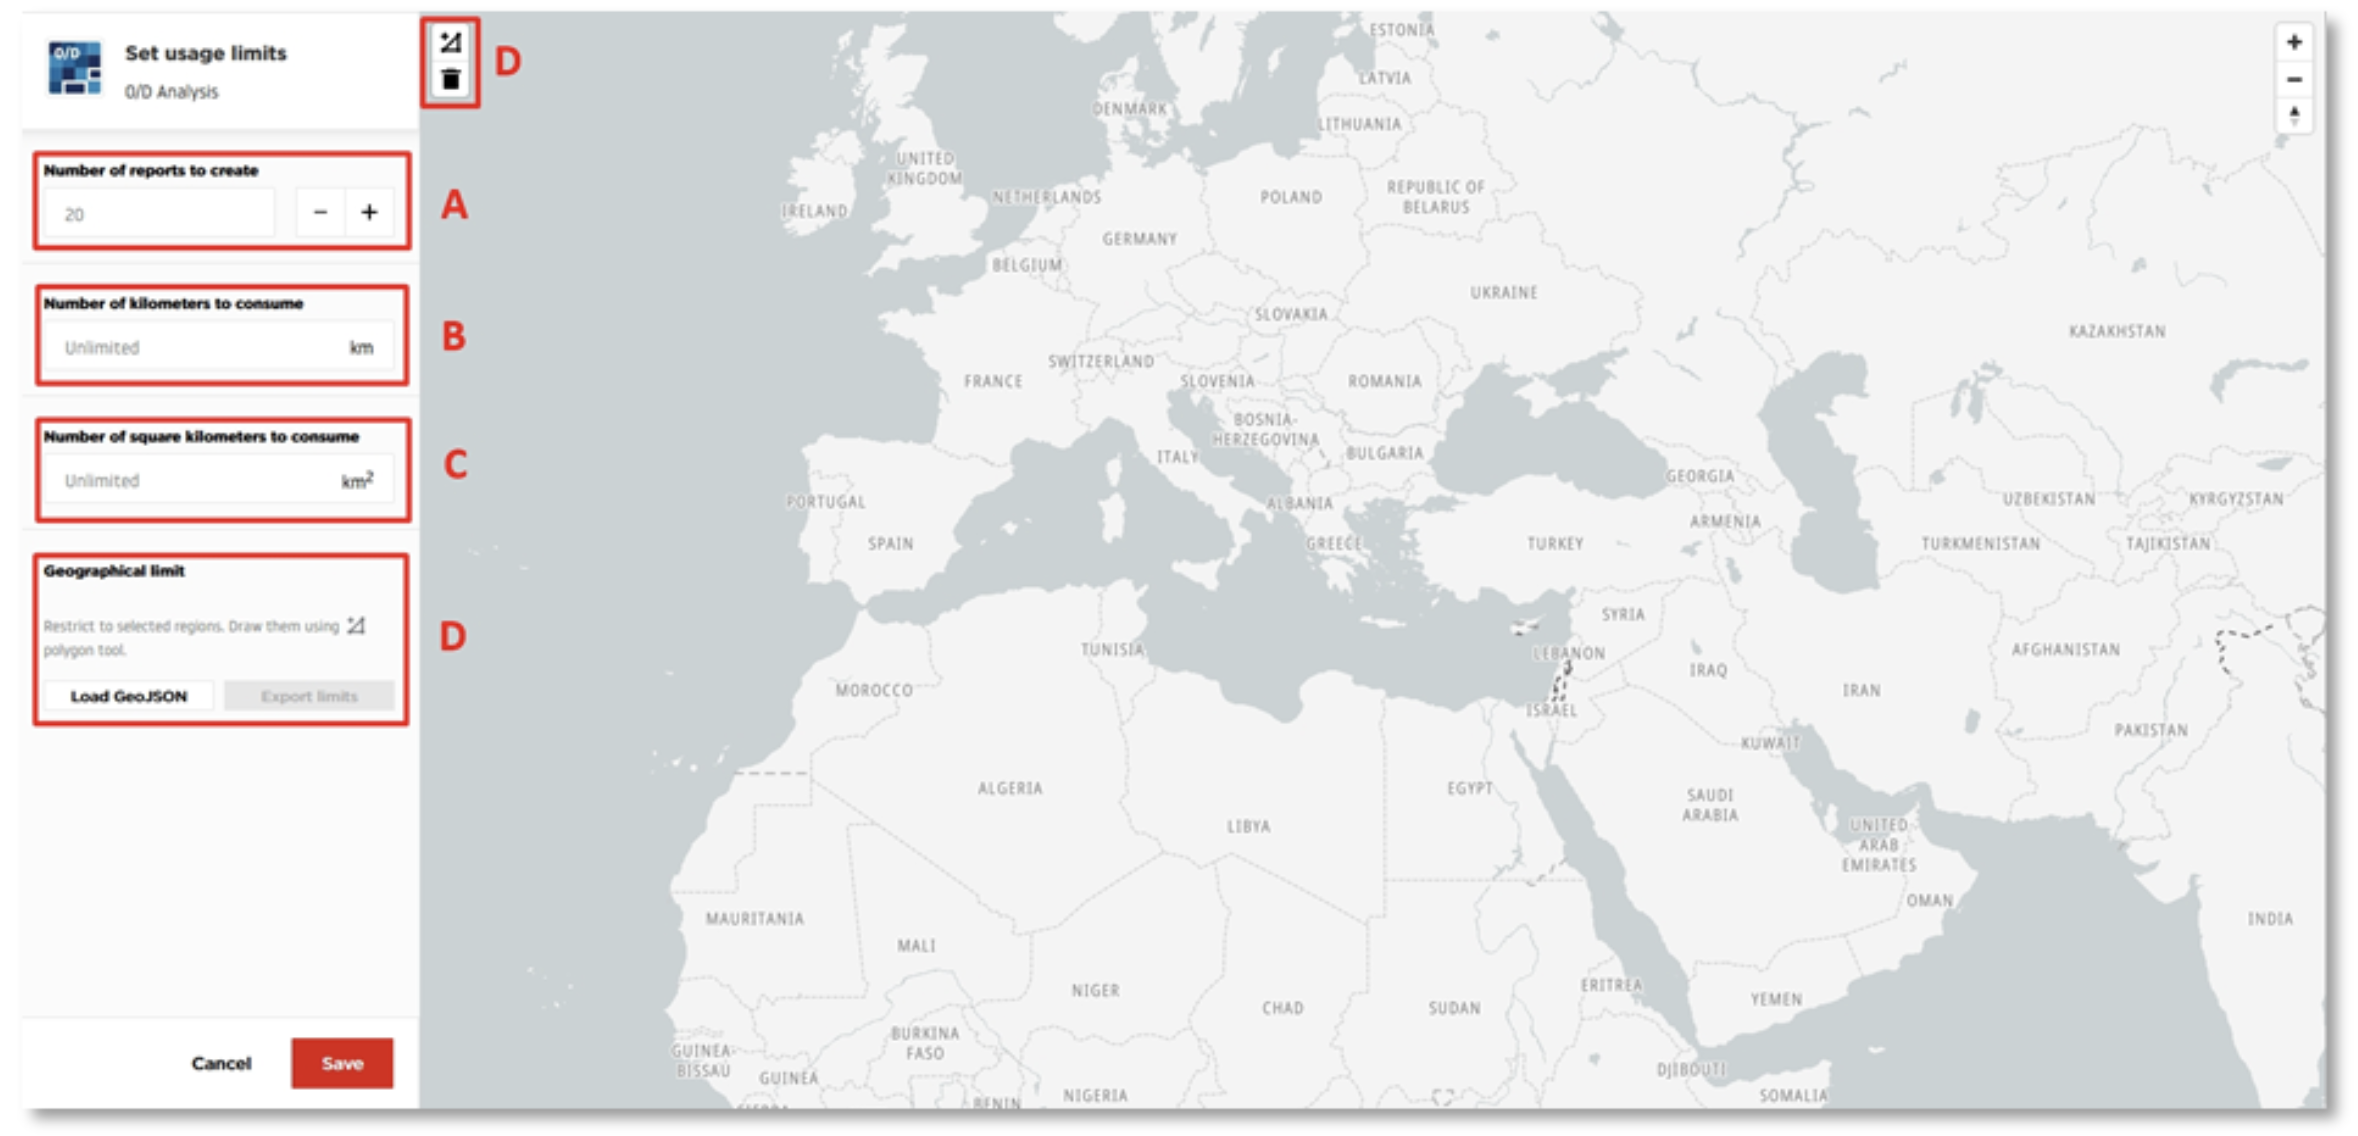
O/D Analysis
When setting up the limits for O/D Analysis application usage, you can specify the following values:
- Number of reports to create: The total number of separate analyses that can be created per account.
- Number of kilometers to consume: The total number of kilometers within the Road Network Coverage used for pricing purposes.
- Number of square kilometers to consume: The total area in square kilometers that the user can analyze across all O/D Analysis reports.
- Geographical limit: Load a GeoJSON file with predefined limitations or draw a specific region where the user can analyze road network data. The geographical limit can also be exported for reuse across multiple applications.
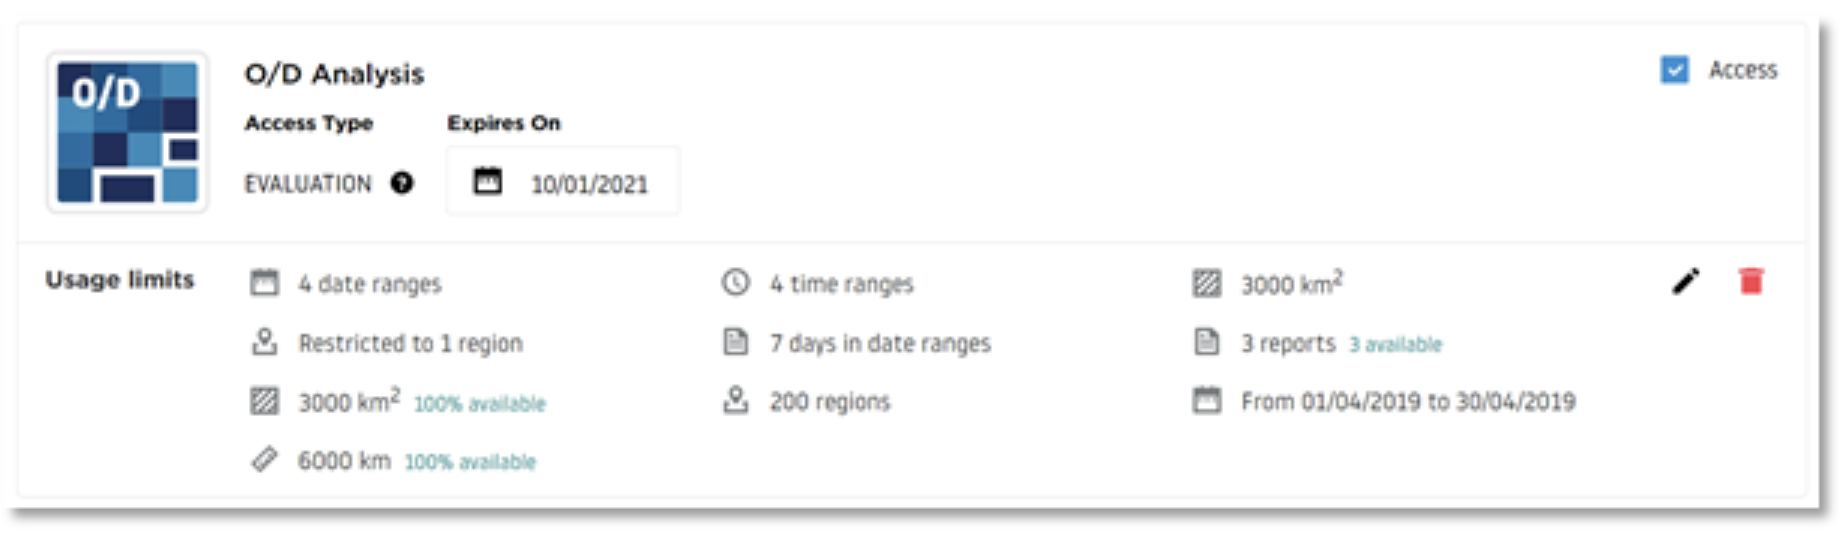
O/D Analysis example
Example of O/D Analysis usage limits on the user account:
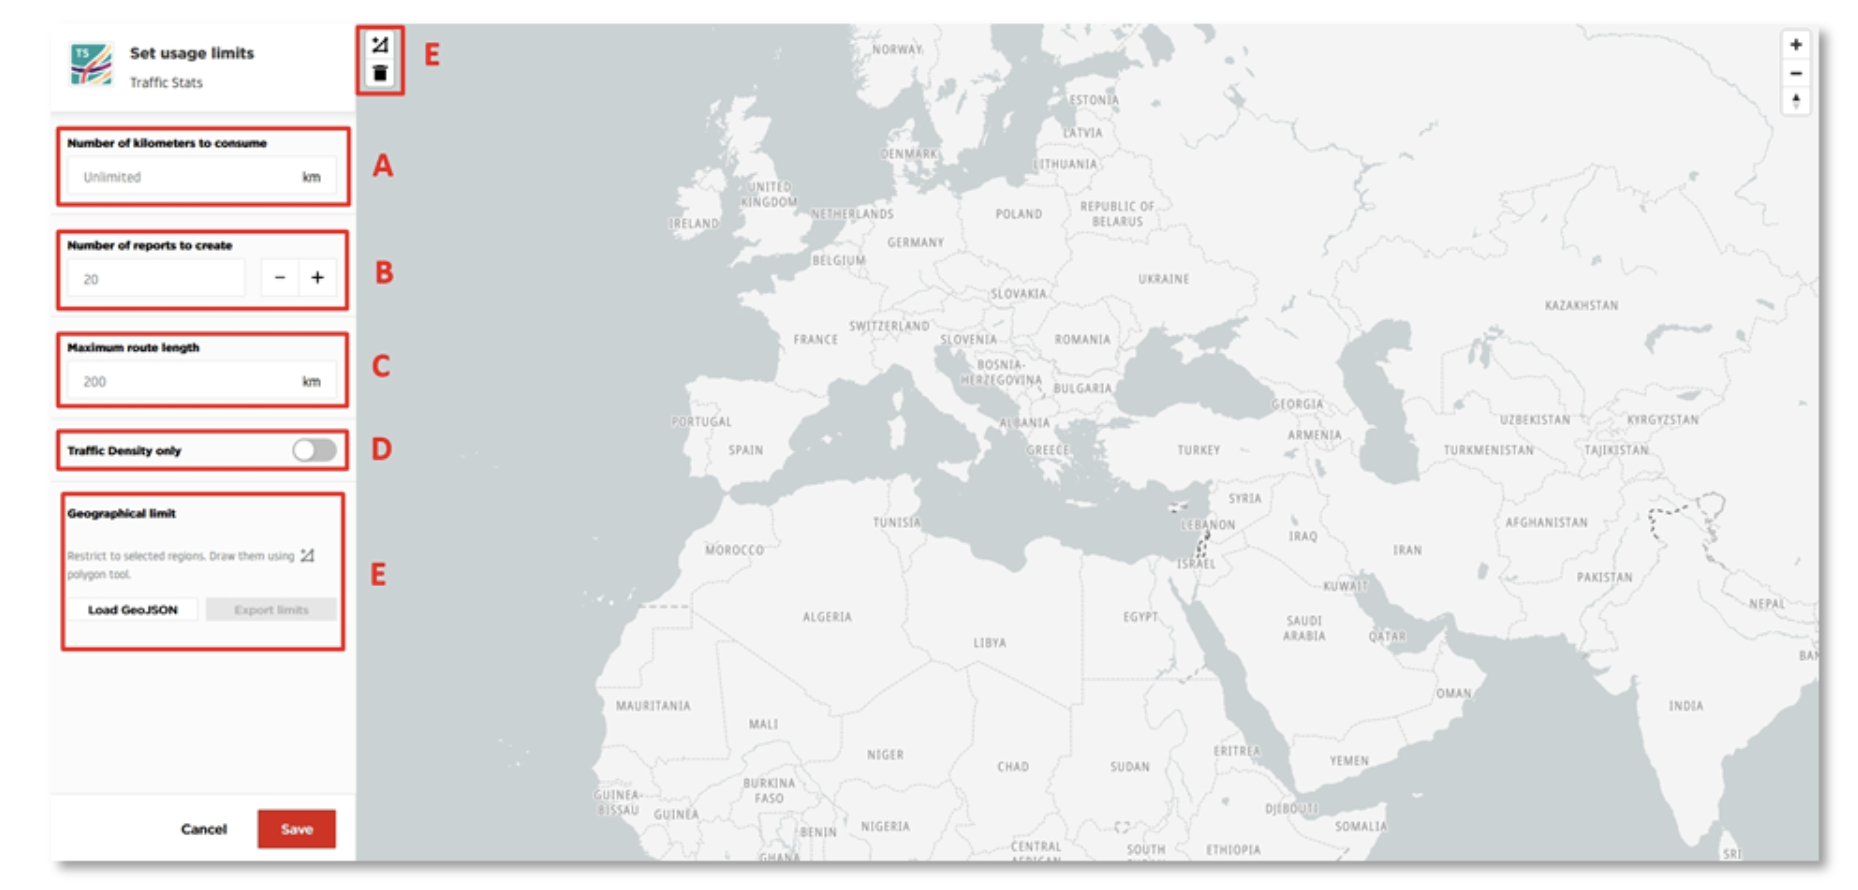
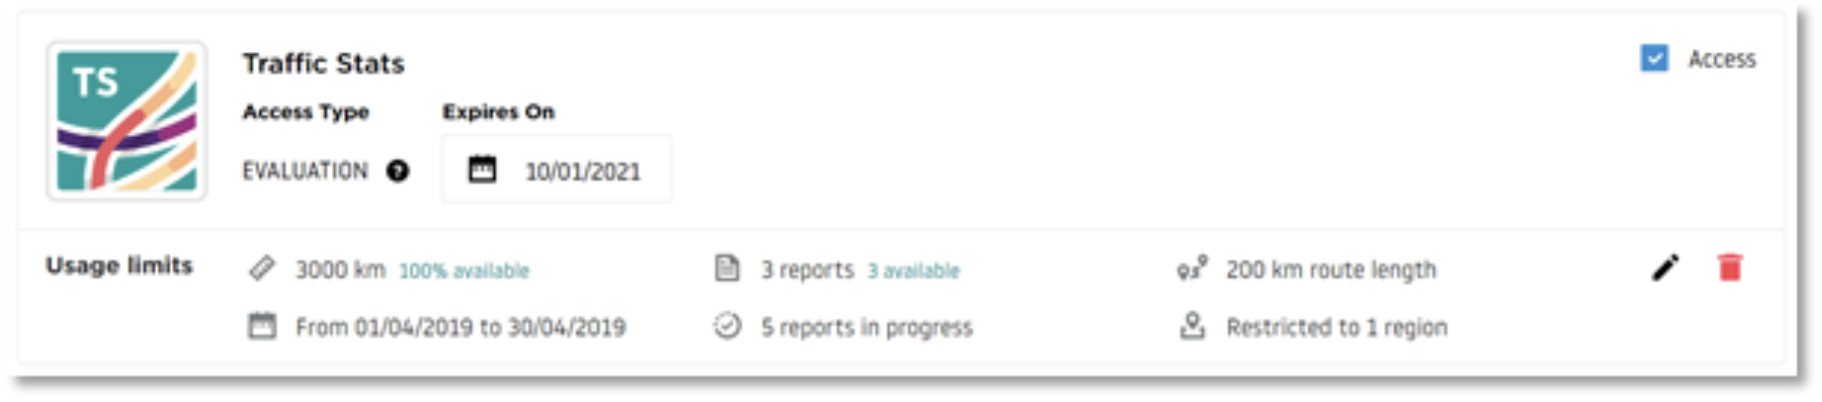
Traffic Stats
When setting up the limits for Traffic Stats application usage, you can specify the following values:
- Number of kilometers to consume: The total length in kilometers of the road network that the user can analyze in reports.
Note Segments with no data will not be counted toward the consumption limit.
- Number of reports to create: The total number of separate analyses that can be created per account.
- Maximum route length: The maximum distance in kilometers that a single route can cover in the analysis.
- Traffic Density only: Restricts the user to creating Traffic Density reports only.
- Geographical limit: Load a GeoJSON file with predefined limitations or draw a specific region where the user can analyze road network data. The geographical limit can also be exported and reused across multiple applications.
Traffic Stats example
Example of Traffic Stats usage limits on the user account:
If you're unsure what a specific limit value means, you can use the tooltips available in the user account settings. A brief explanation will appear in a message when you hover your pointer over the item. For example:
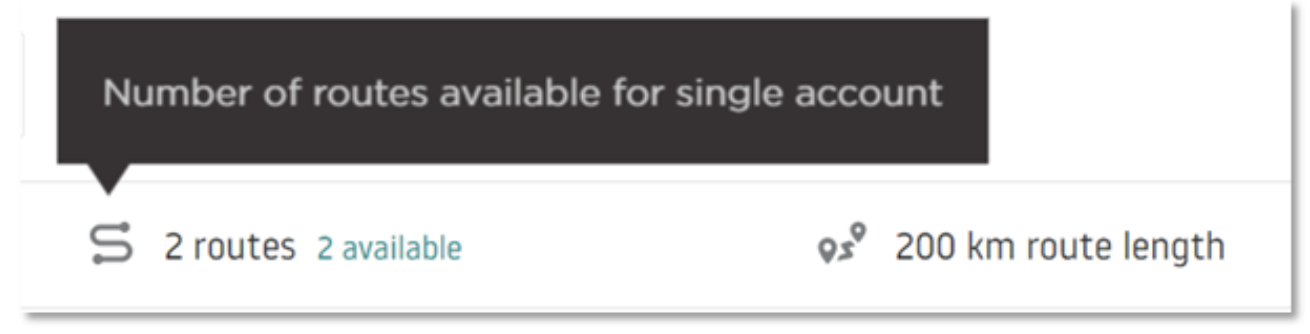
Limits example
Let's assume you're providing access to a 4,000-kilometer road network package for Traffic Stats only. In this case, simply set the Number of kilometers to consume value to 4,000.
| Description | Image |
|---|---|
| This image shows how to configure user limits in the admin panel. | 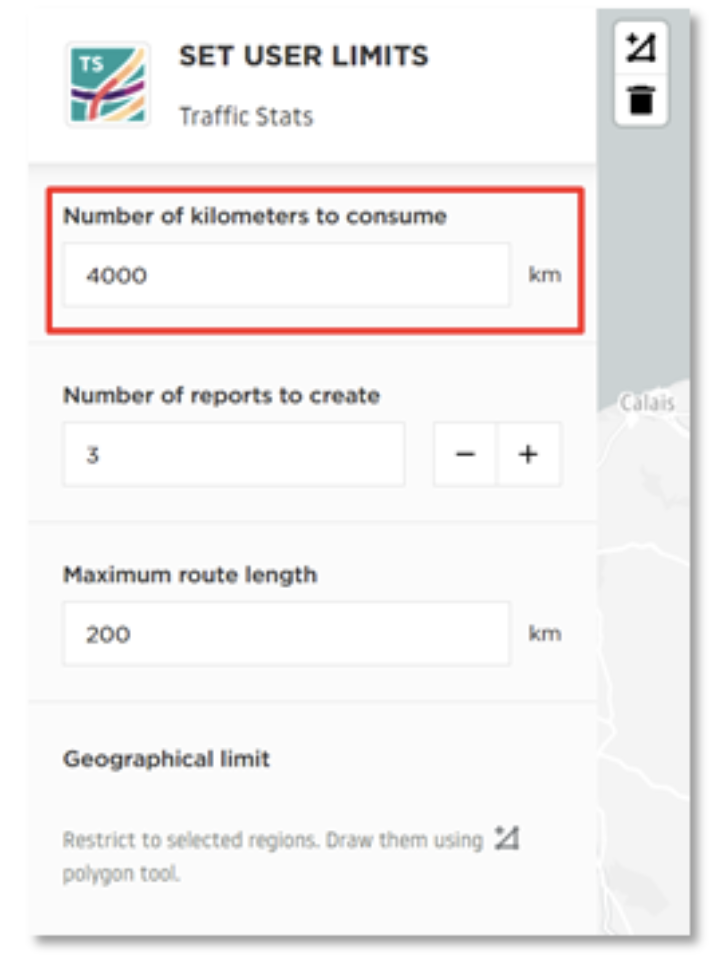 |
| Example of how these limits are displayed on the user side. | 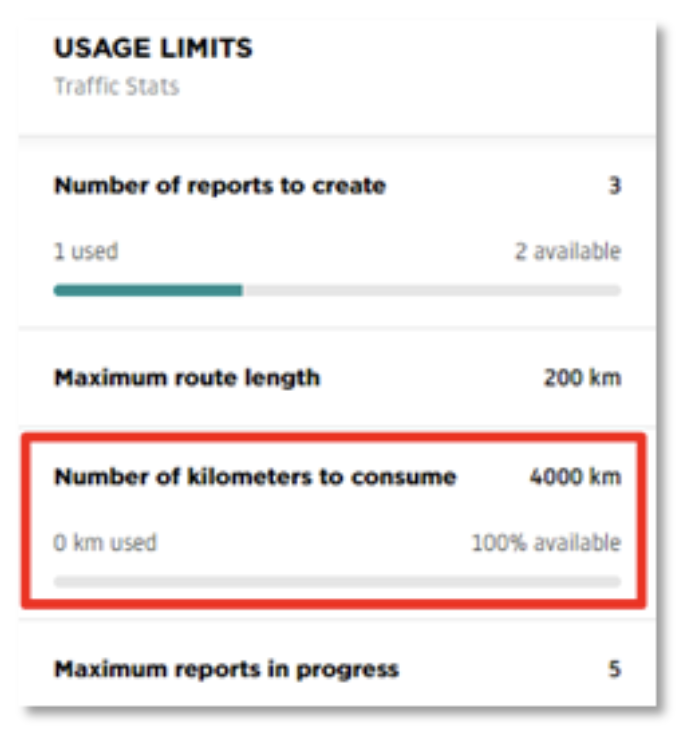 |
Traffic Stats + O/D Analysis package
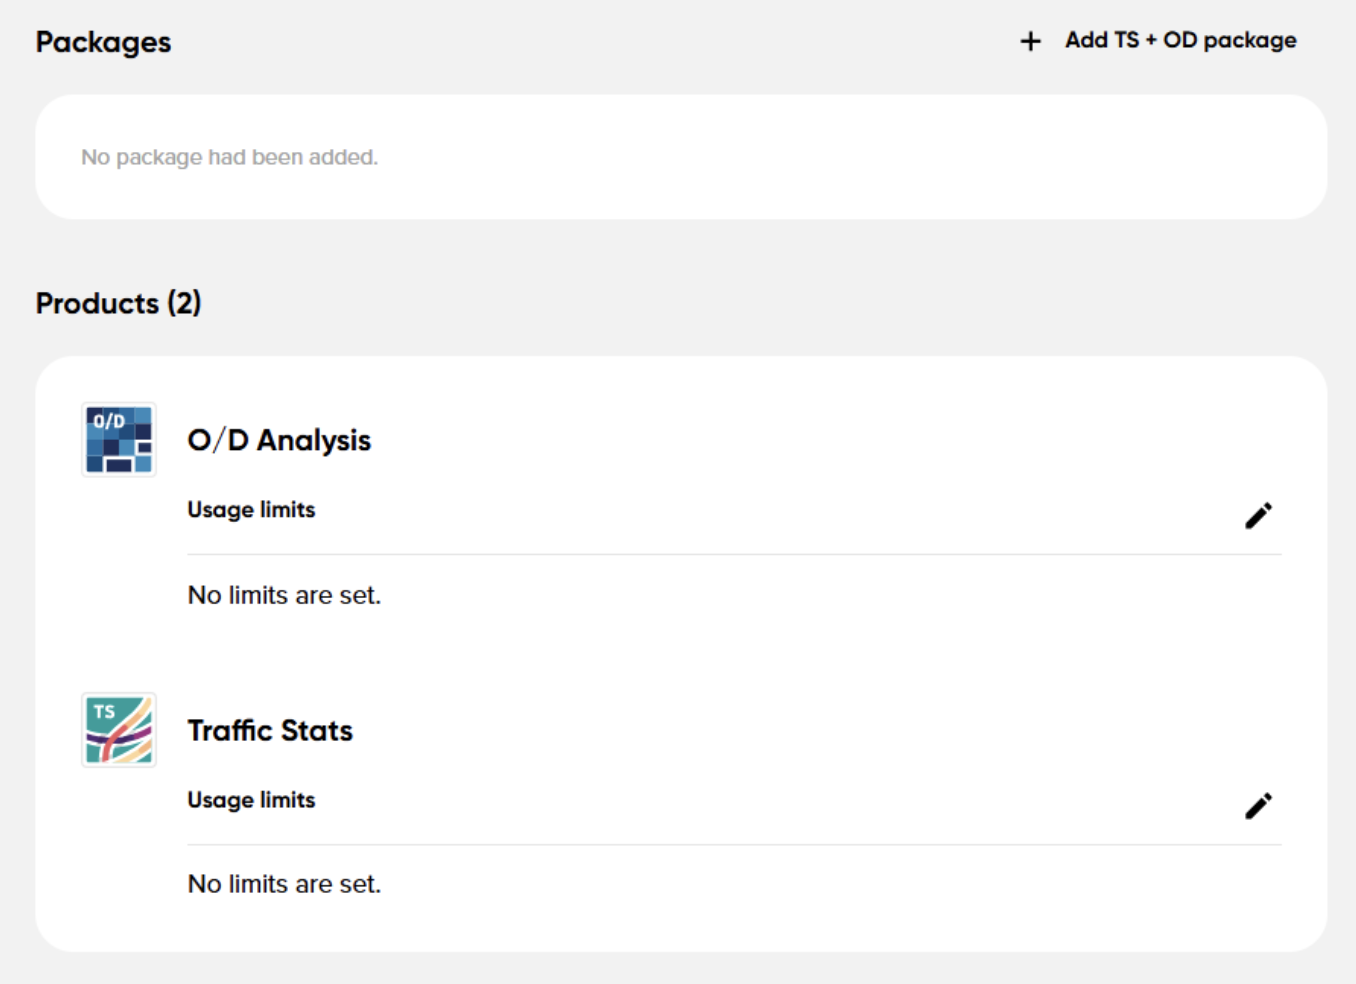
For a bundle sale where you want to grant access to a combined total of 4,000 kilometers, you need to select Add TS + OD package. This option is only available for contracts that include both O/D Analysis and Traffic Stats access and is located above the Contract products section.
Traffic Stats + O/D Analysis limits
| Description | Example |
|---|---|
| An additional window will appear, where you can provide the number of kilometers to consume: | 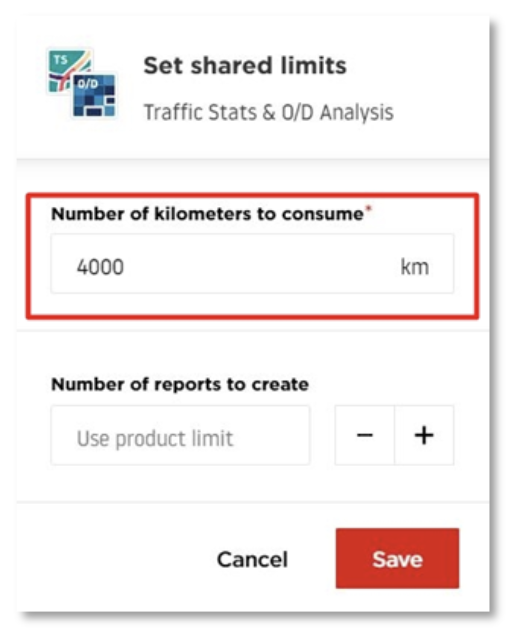 |
| You can also add a number of reports to create if applicable: | 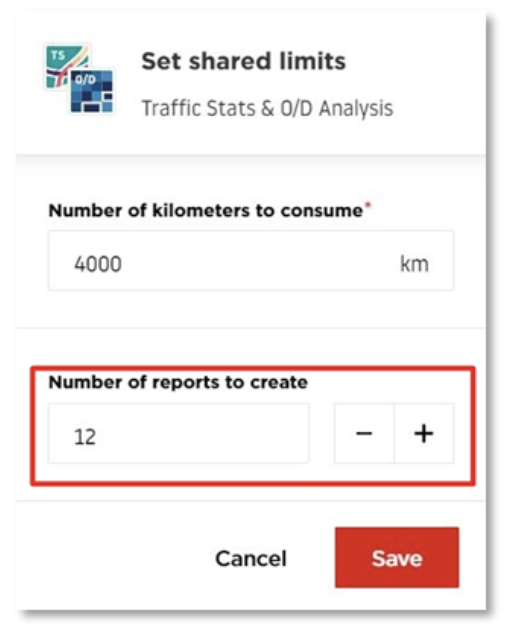 |
| You can see how these limits are displayed on the user end from the Dashboard: | 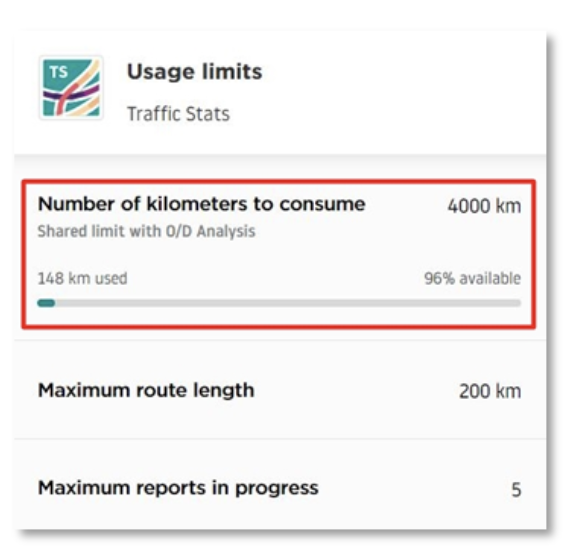 |
| The limits can also be viewed directly in the application: | 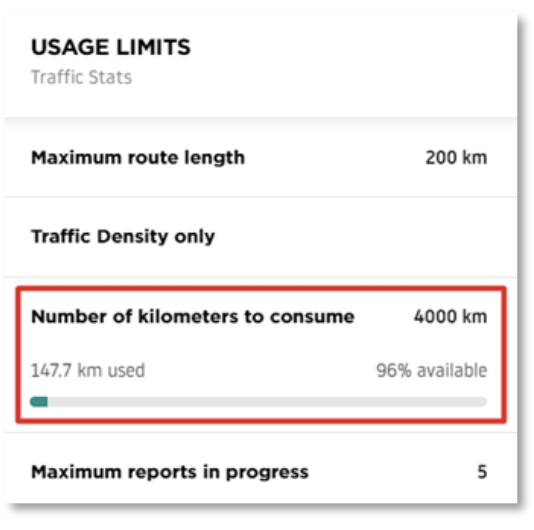 |
Adding users to contracts
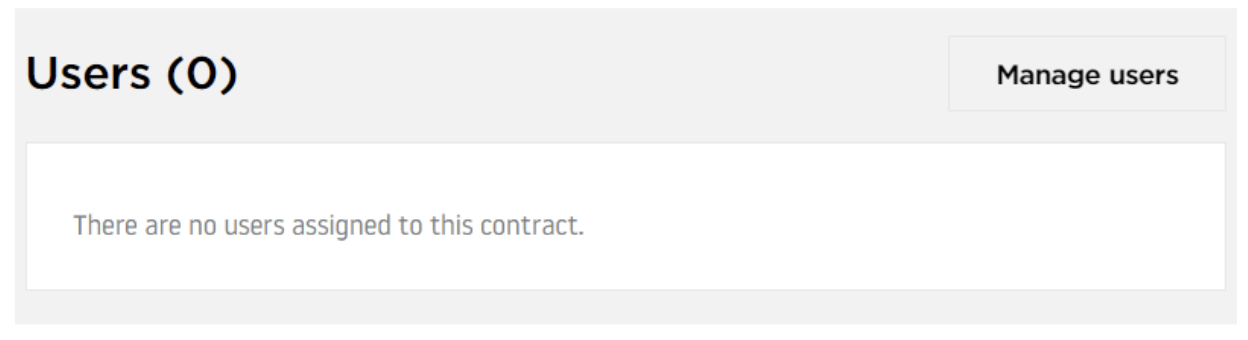
Once you've confirmed that the usage limits are set correctly, you can begin assigning users to the contract. To do this, click Manage users in the contract view.
-
Example of a list with all the users assigned to the contract and a button to add more users to it.
-
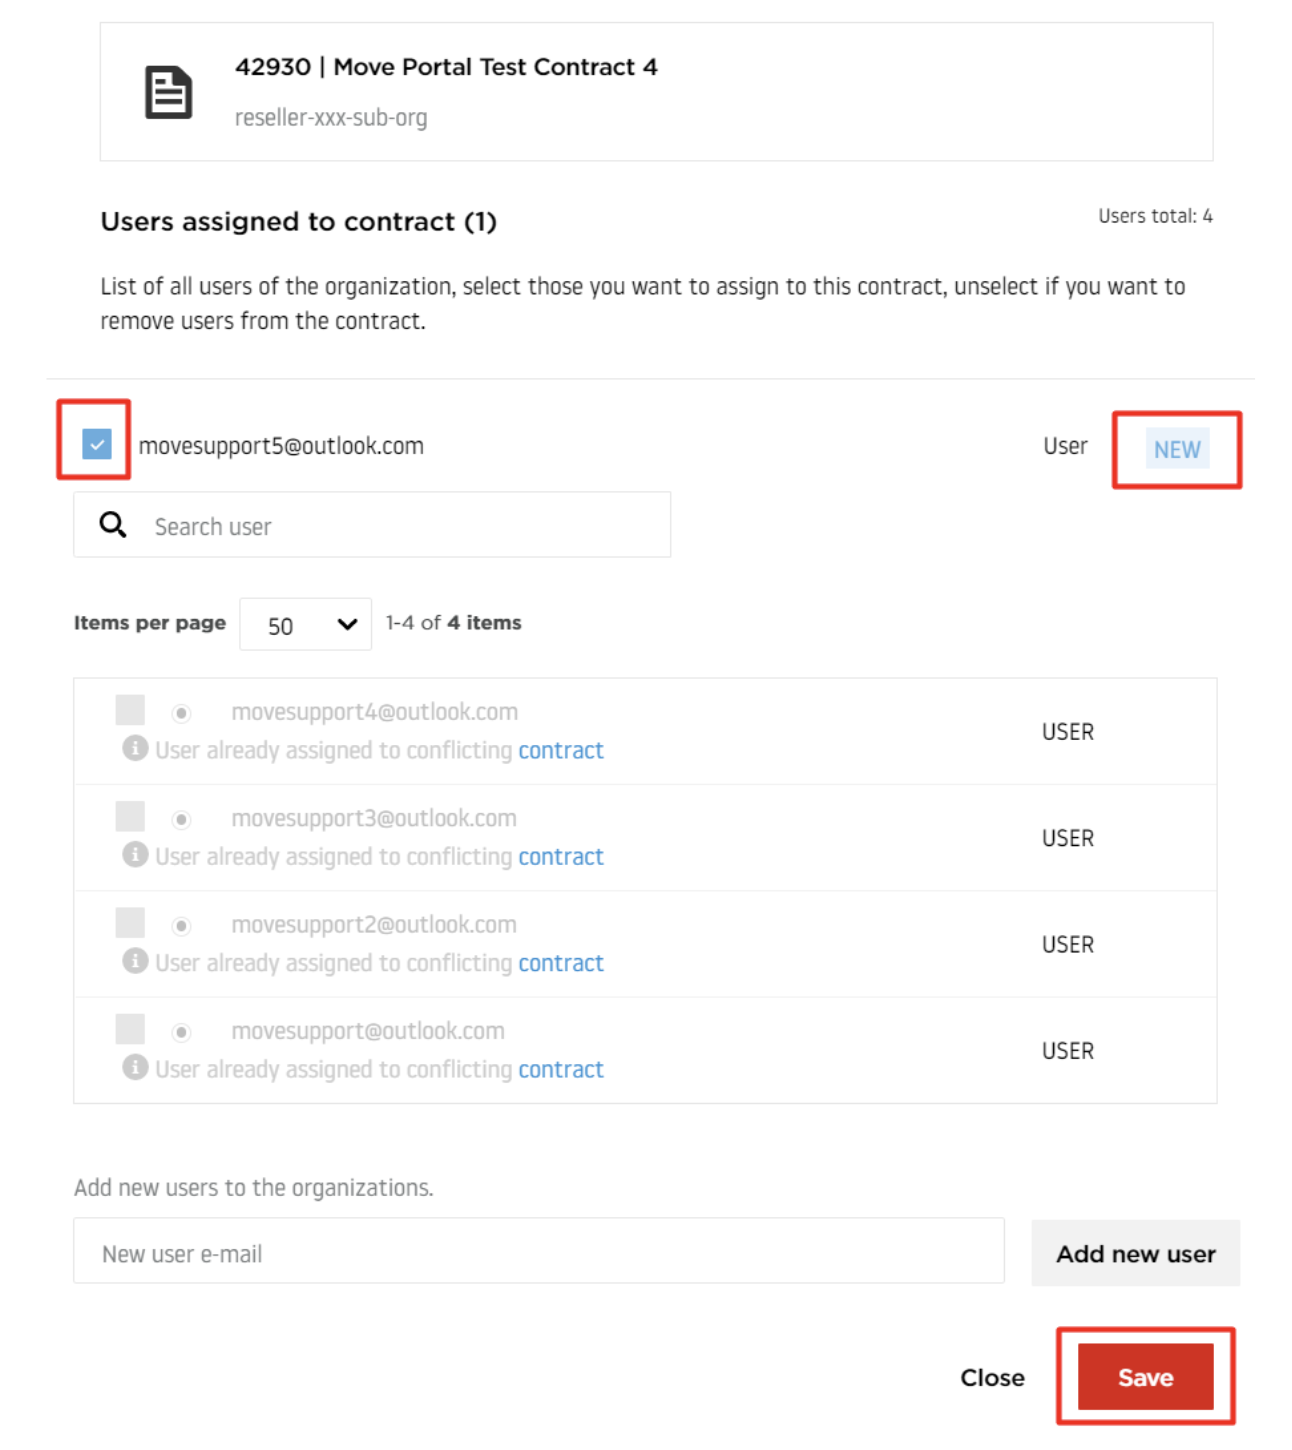
A window for assigning users will open. You can either select an existing user from the list and add them to this specific contract or create an entirely new user.
Note: You cannot assign users who are already linked to other contracts with conflicting settings (e.g., overlapping date ranges). Users can only be assigned to multiple contracts if the values specified do not conflict.
- Example of assigning users to an existing contract.
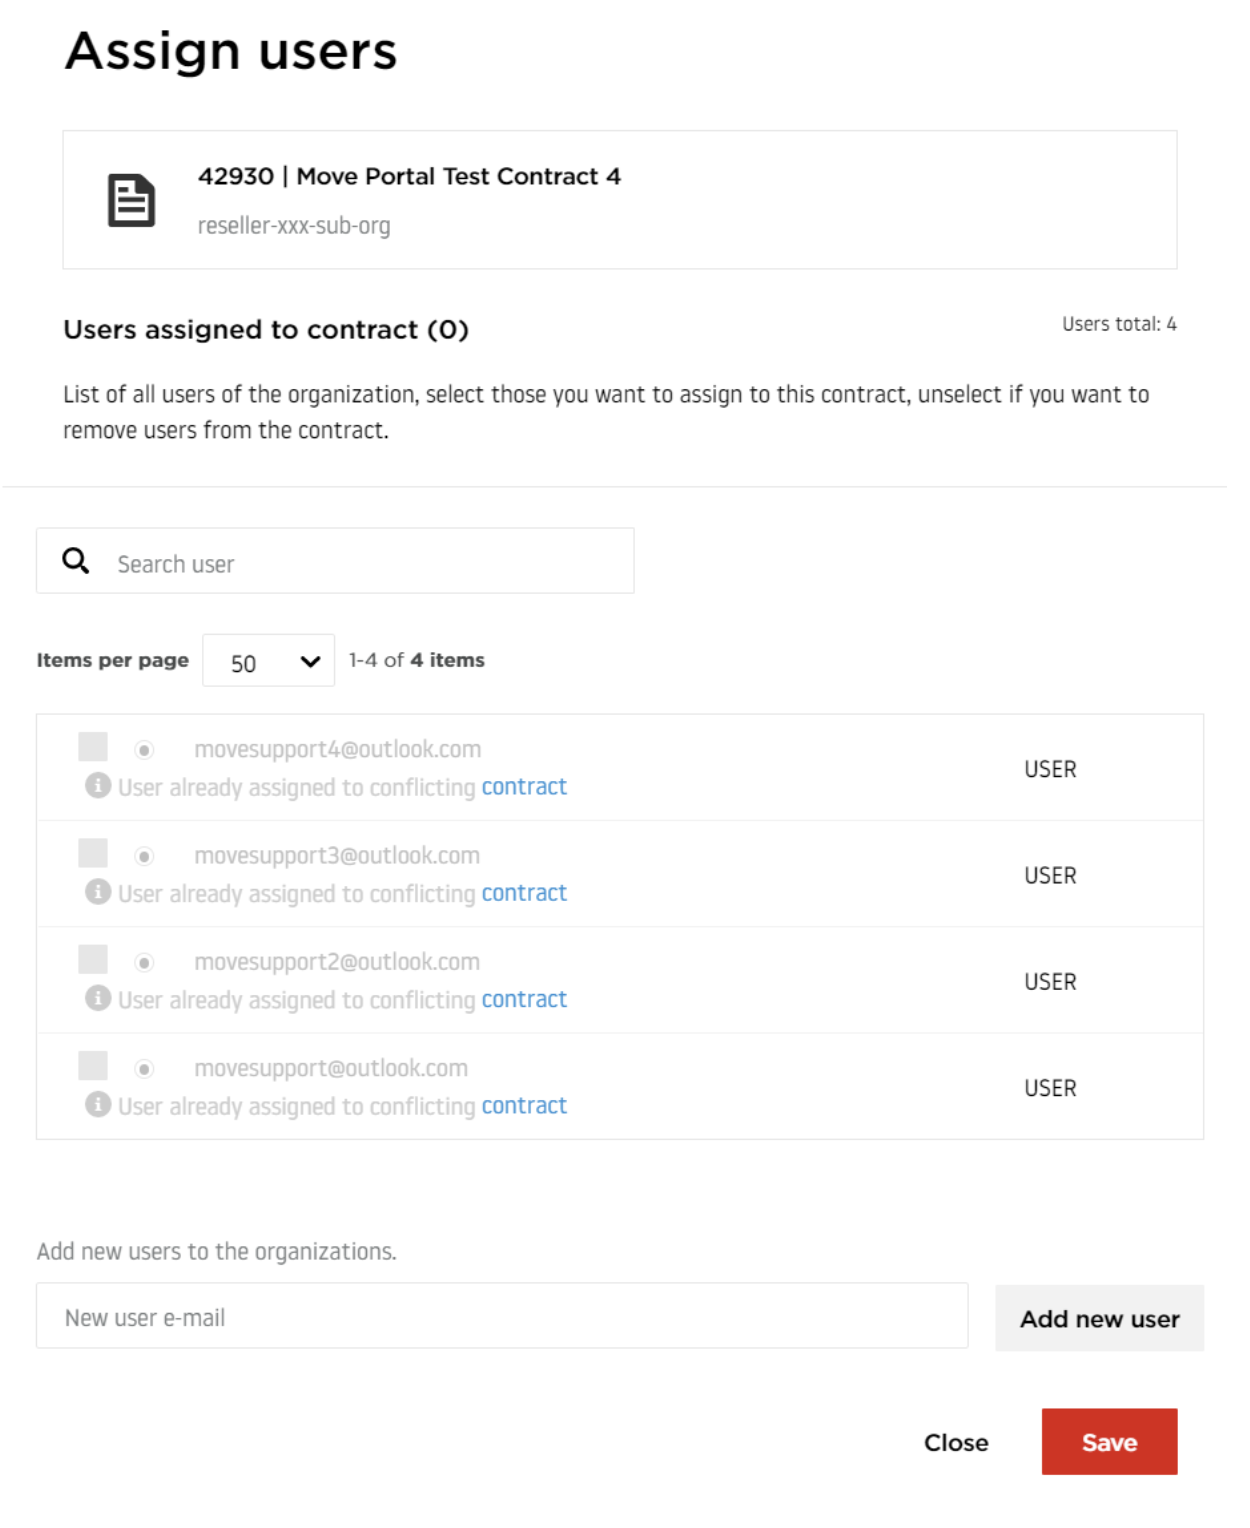
- To create a new user, enter the email address and click Add new user.
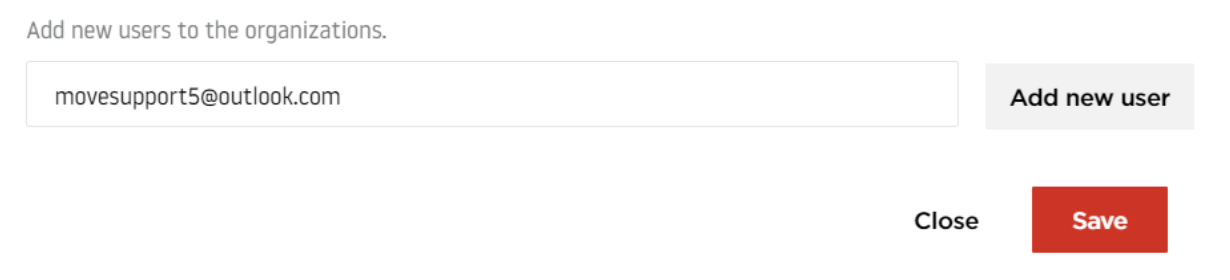
- The newly added user will appear above the list of existing users. Select this user and click Save to complete the process.
- A notification will confirm whether the process was successful via a message in the top-right corner.
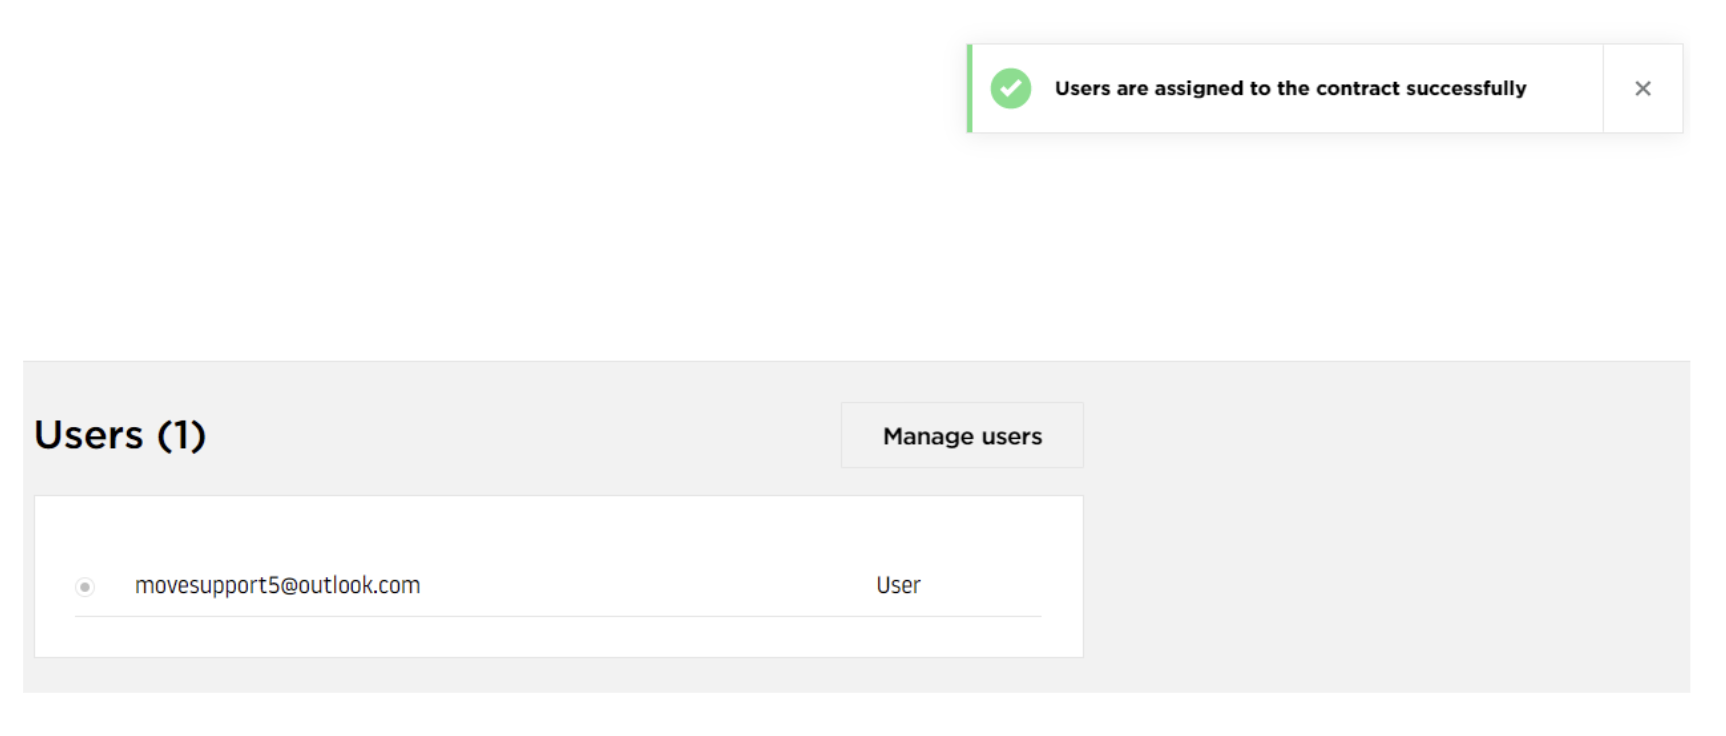
- You can now click the user's email address to see a summary of that account, including account status, access status, product access, and usage limits defined in the contract.
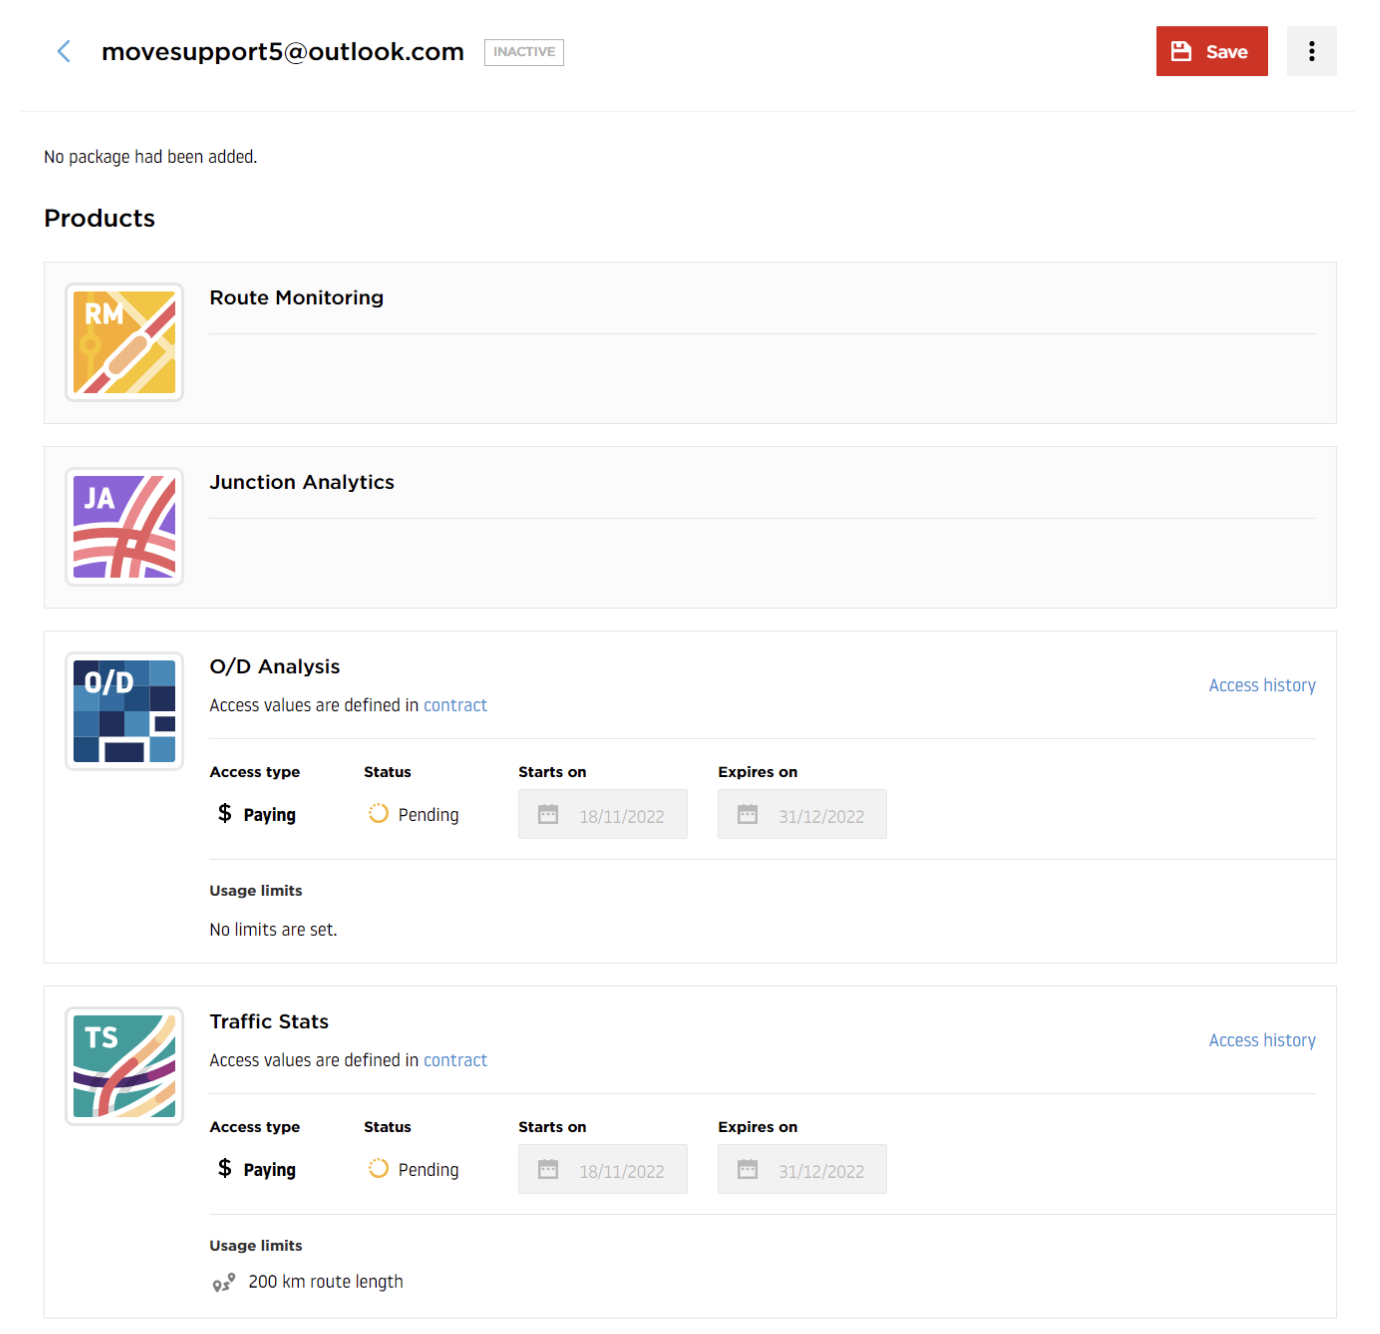
Note: If a new user is created, the status of the user's account will be "inactive" because the email address needs to be confirmed on their end.
The newly created user will receive two emails:
| Description | Image |
|---|---|
| 1. The first email contains the activation link to verify the email address and the account. The user can set up their password by clicking Activate My Account. | 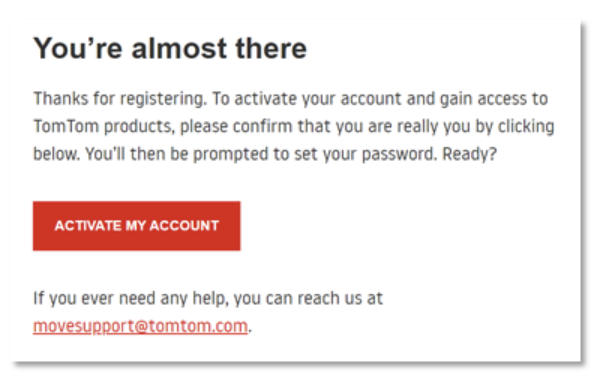 |
| 1.1. You can see screenshots of the password-setting process. The user needs to provide a unique password, repeat it, and then click Set Password. | 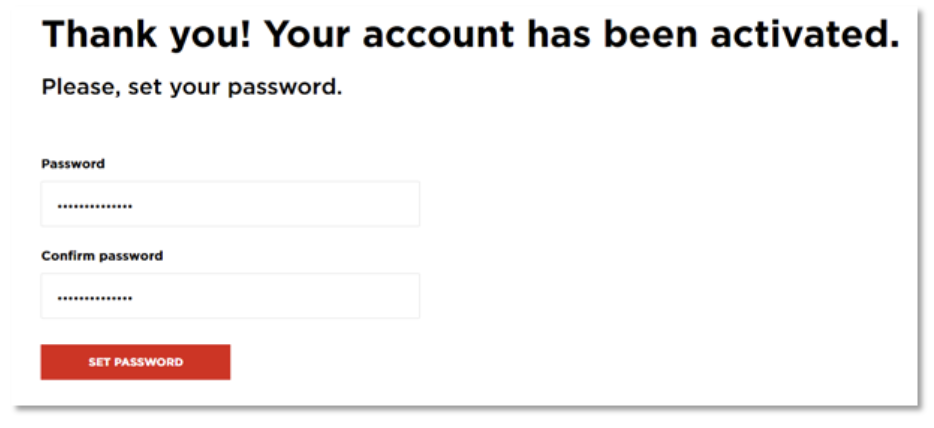 |
| 1.2. Once the password is set up correctly, the following message will appear: | 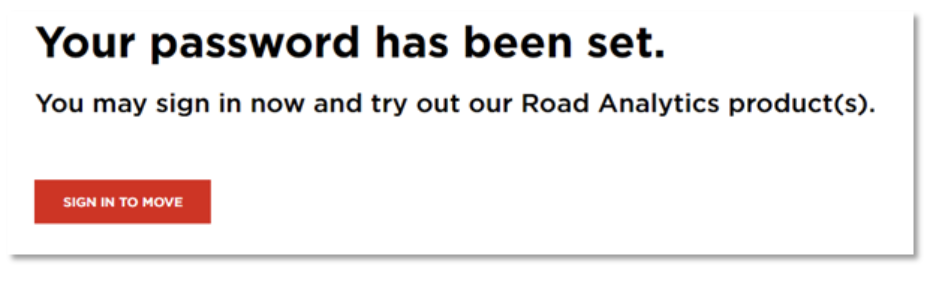 |
| 1.3. From this point, the user can sign in to Move using the credentials provided during the password-setting process and the email address. | - |
| 2. The second email contains information that access to the selected application(s) has been successfully granted. | 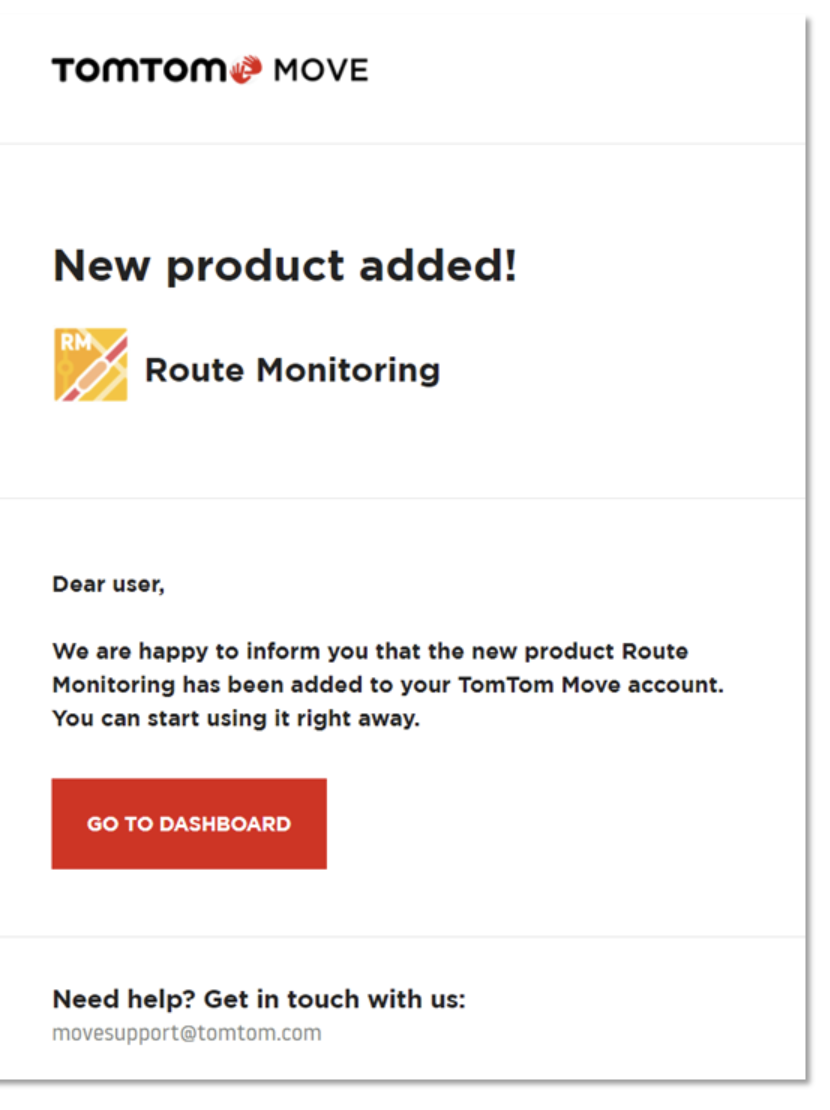 |
| 2.1. At the same time, the distributor will also be informed via email that access to the selected application has been granted to the user. | 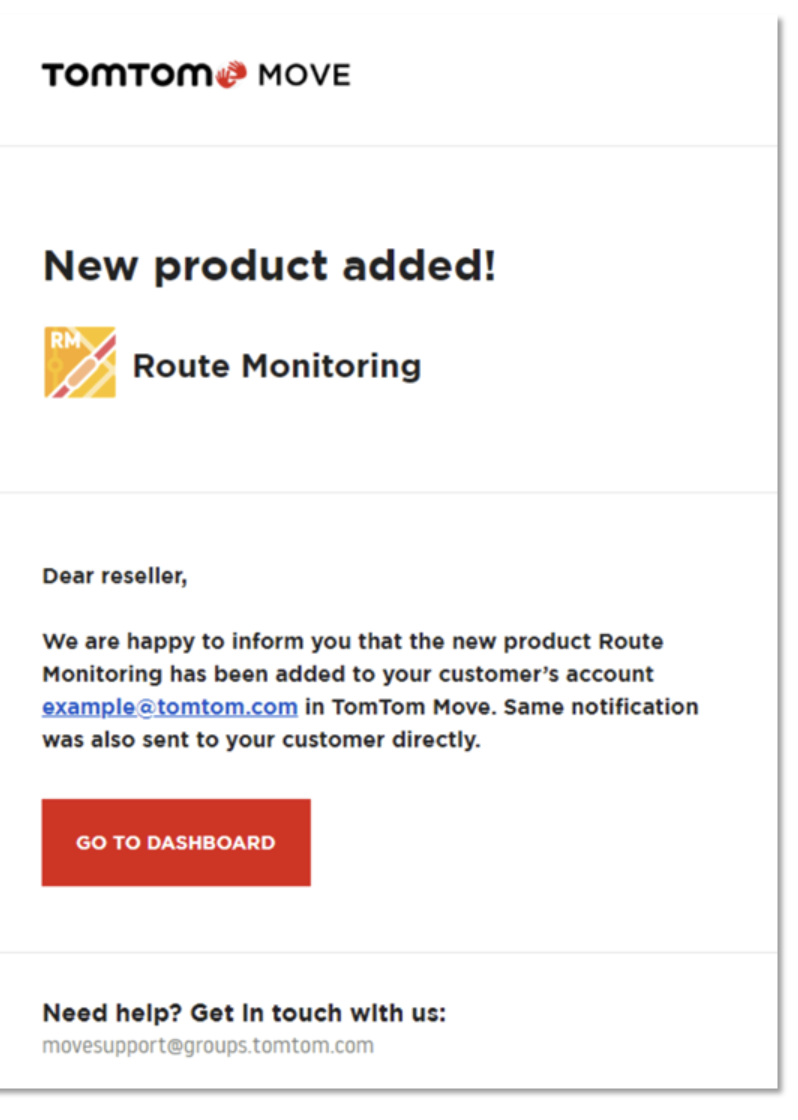 |
| 2.2. If the user confirms the account with the new password and product access is granted, they can use Move. Based on the example scenario above, the outcome for the end user will be the following: | 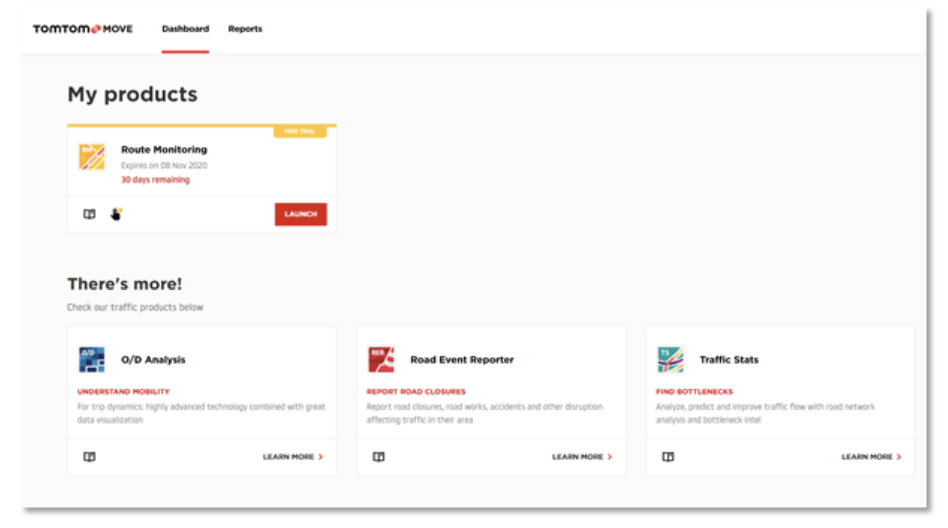 |
Contact information
If you encounter any difficulties during the contract or account creation processes, please contact us at MoveSupport@tomtom.com.