Route planning
Overview
In the Route planning step users can check the calculated route, choose an alternative route, and adjust the route.
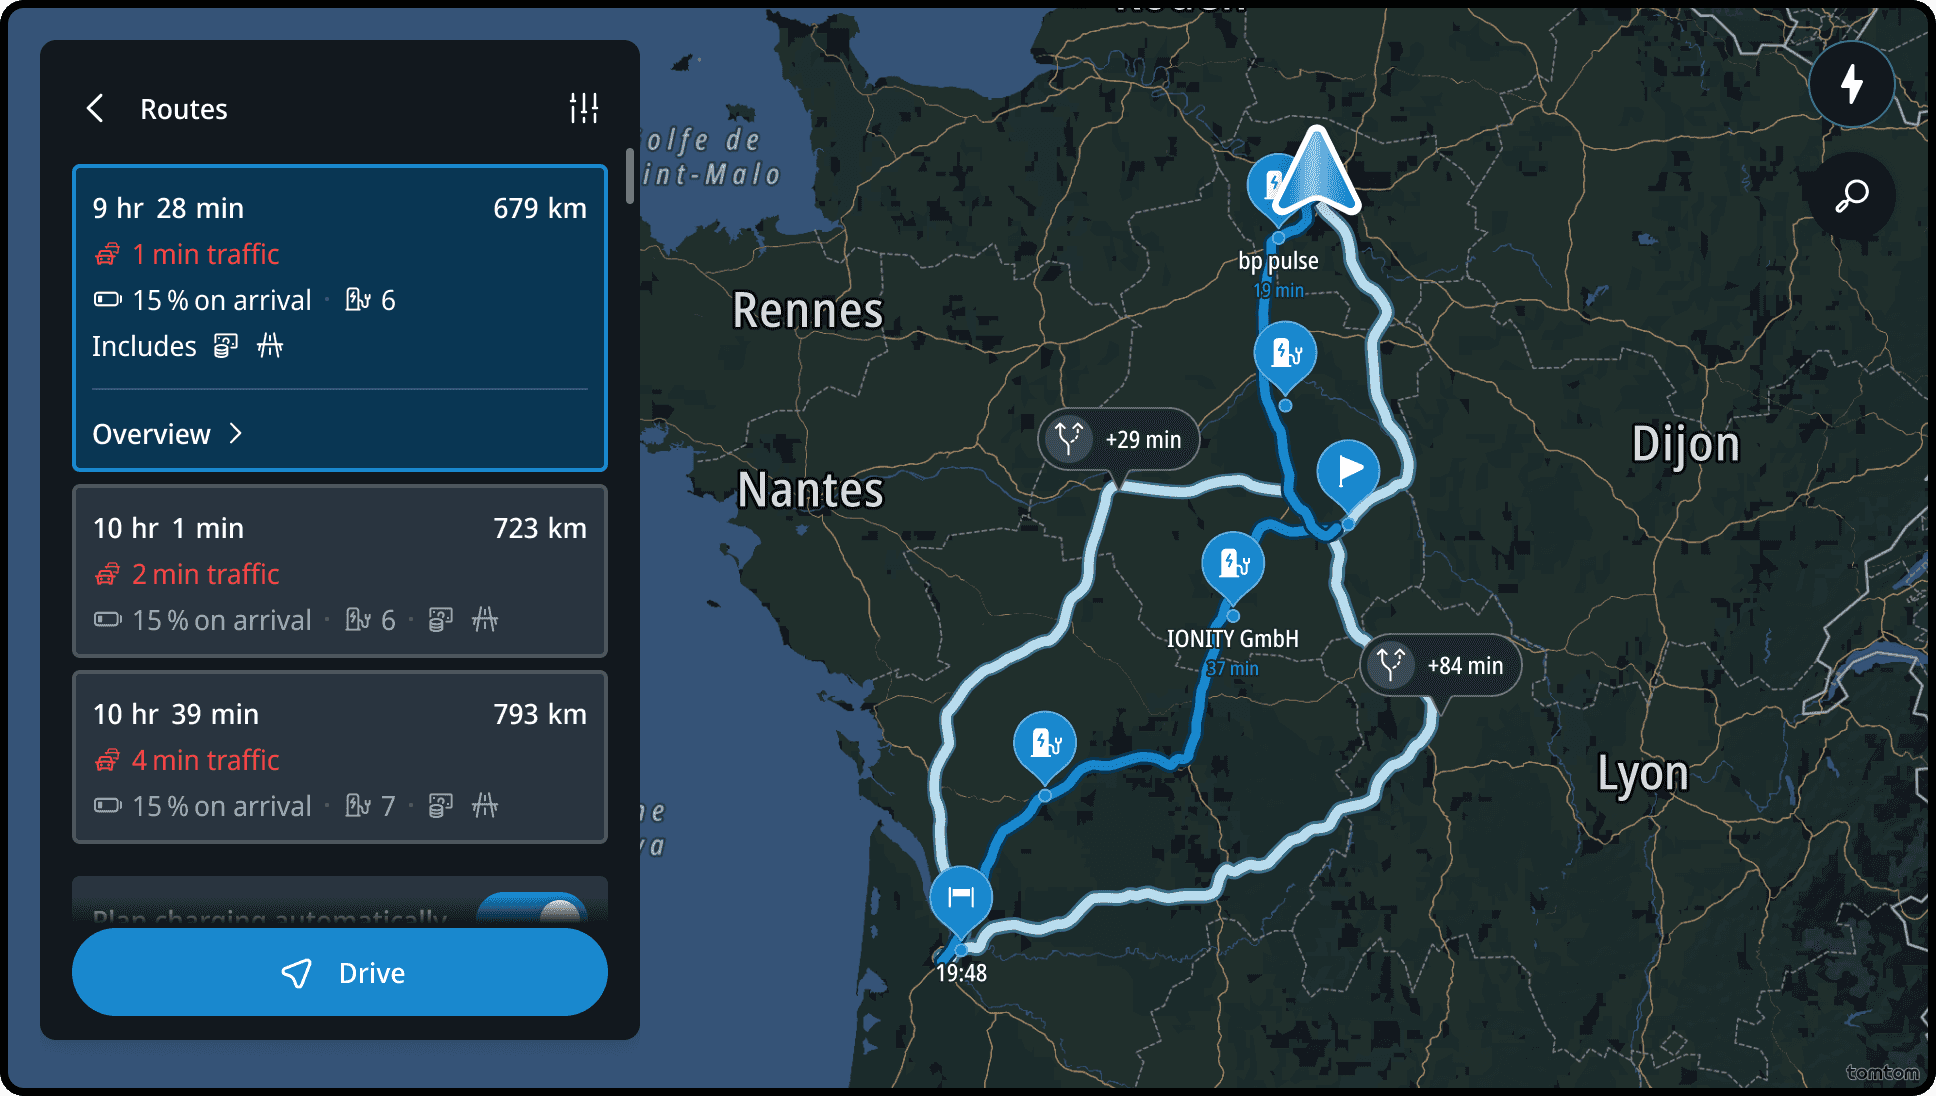
Alternative routes
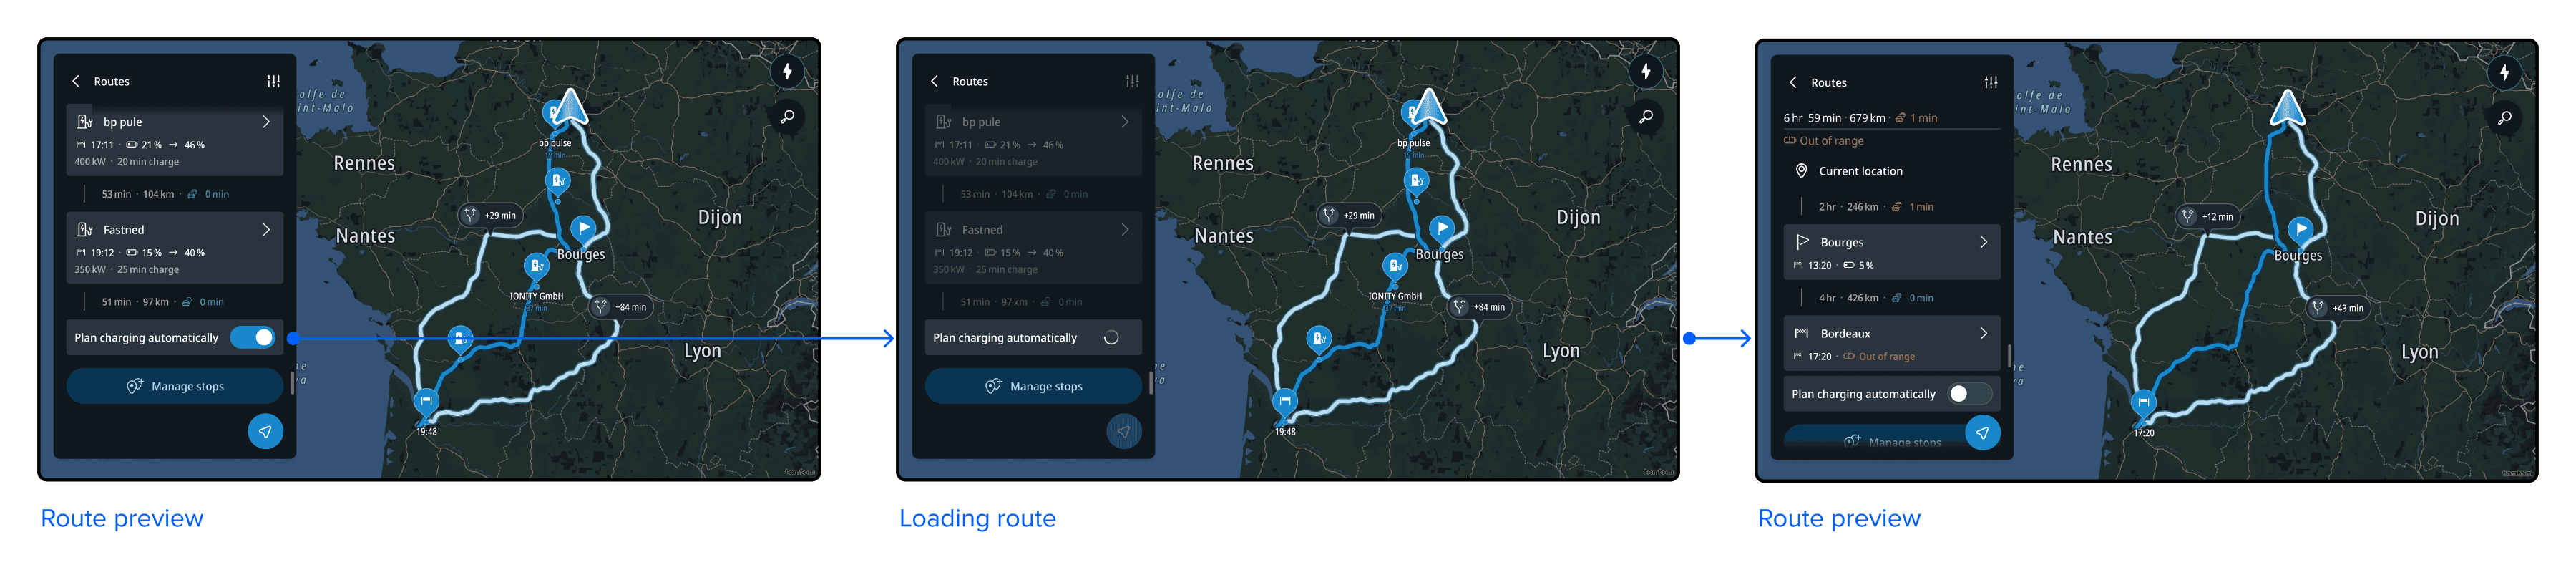
When tapping the Routes button, in the Location Preview Panel, the user lands on the Route Comparison Panel.
For each proposed route, the user is able to check more details by tapping the Overview Button in the selected card. This open a preview of the full route.
Users can modify the route by:
- Removing charging stop: remove automatically added charging stops by switching off Plan Charging Automatically toggle
- Managing the stops: adding, removing, and reordering manually added stops after tapping the Manage Stop button
- Changing the route options: changing the battery at arrival and avoid options, using the Option button on the top of the panel
- Add charging stops manually: add stops manually by using the Charging Finder button
These options are available in the Route Overview Panel and the Route Details Panel, on the bottom of the panel.
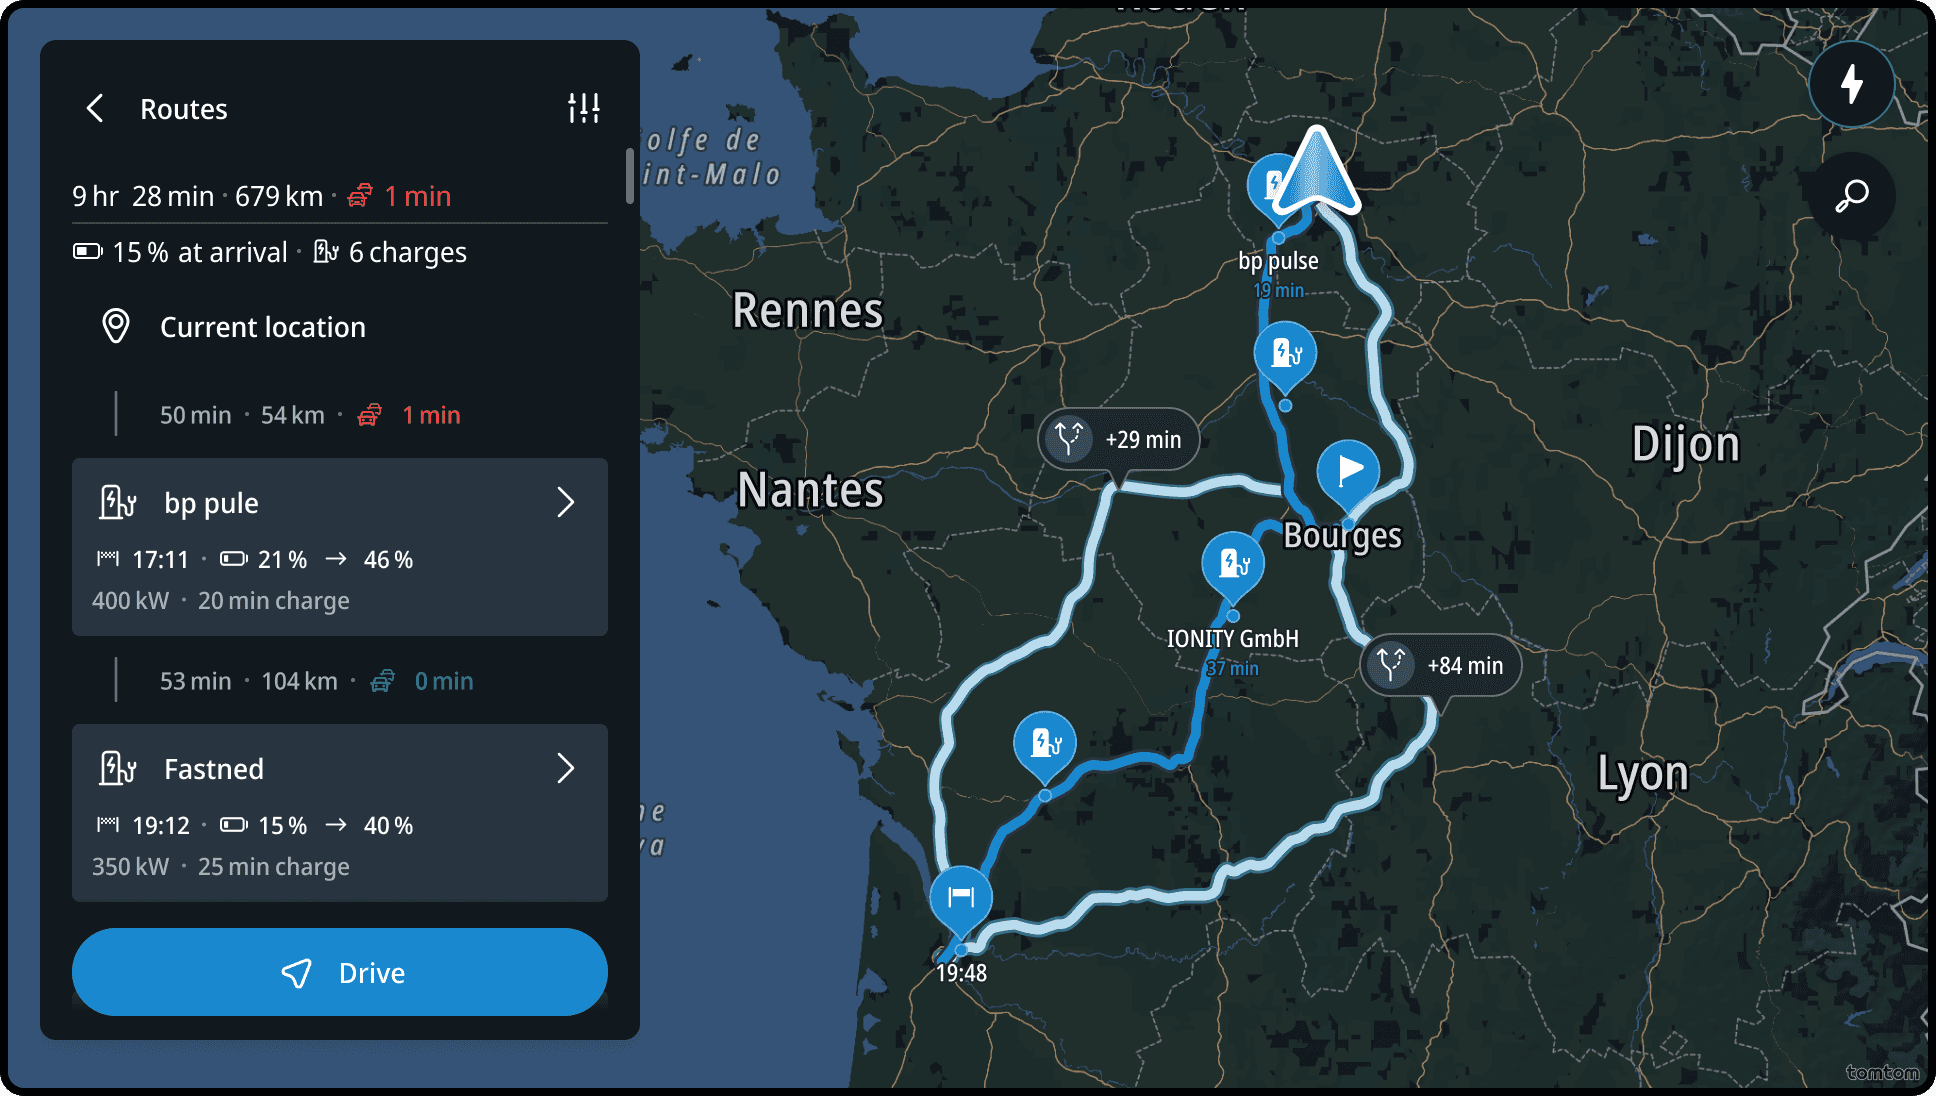
Route Itinerary
When user wants to see overview of a route with multiple stops, the route itinerary is shown. If the destination is out of reach, charging stops are added automatically.
Next to the route information, the number of electric vehicle (EV) charging stops and the duration of charging are shown in the panel.
The map shows the charging stops on the suggested route.
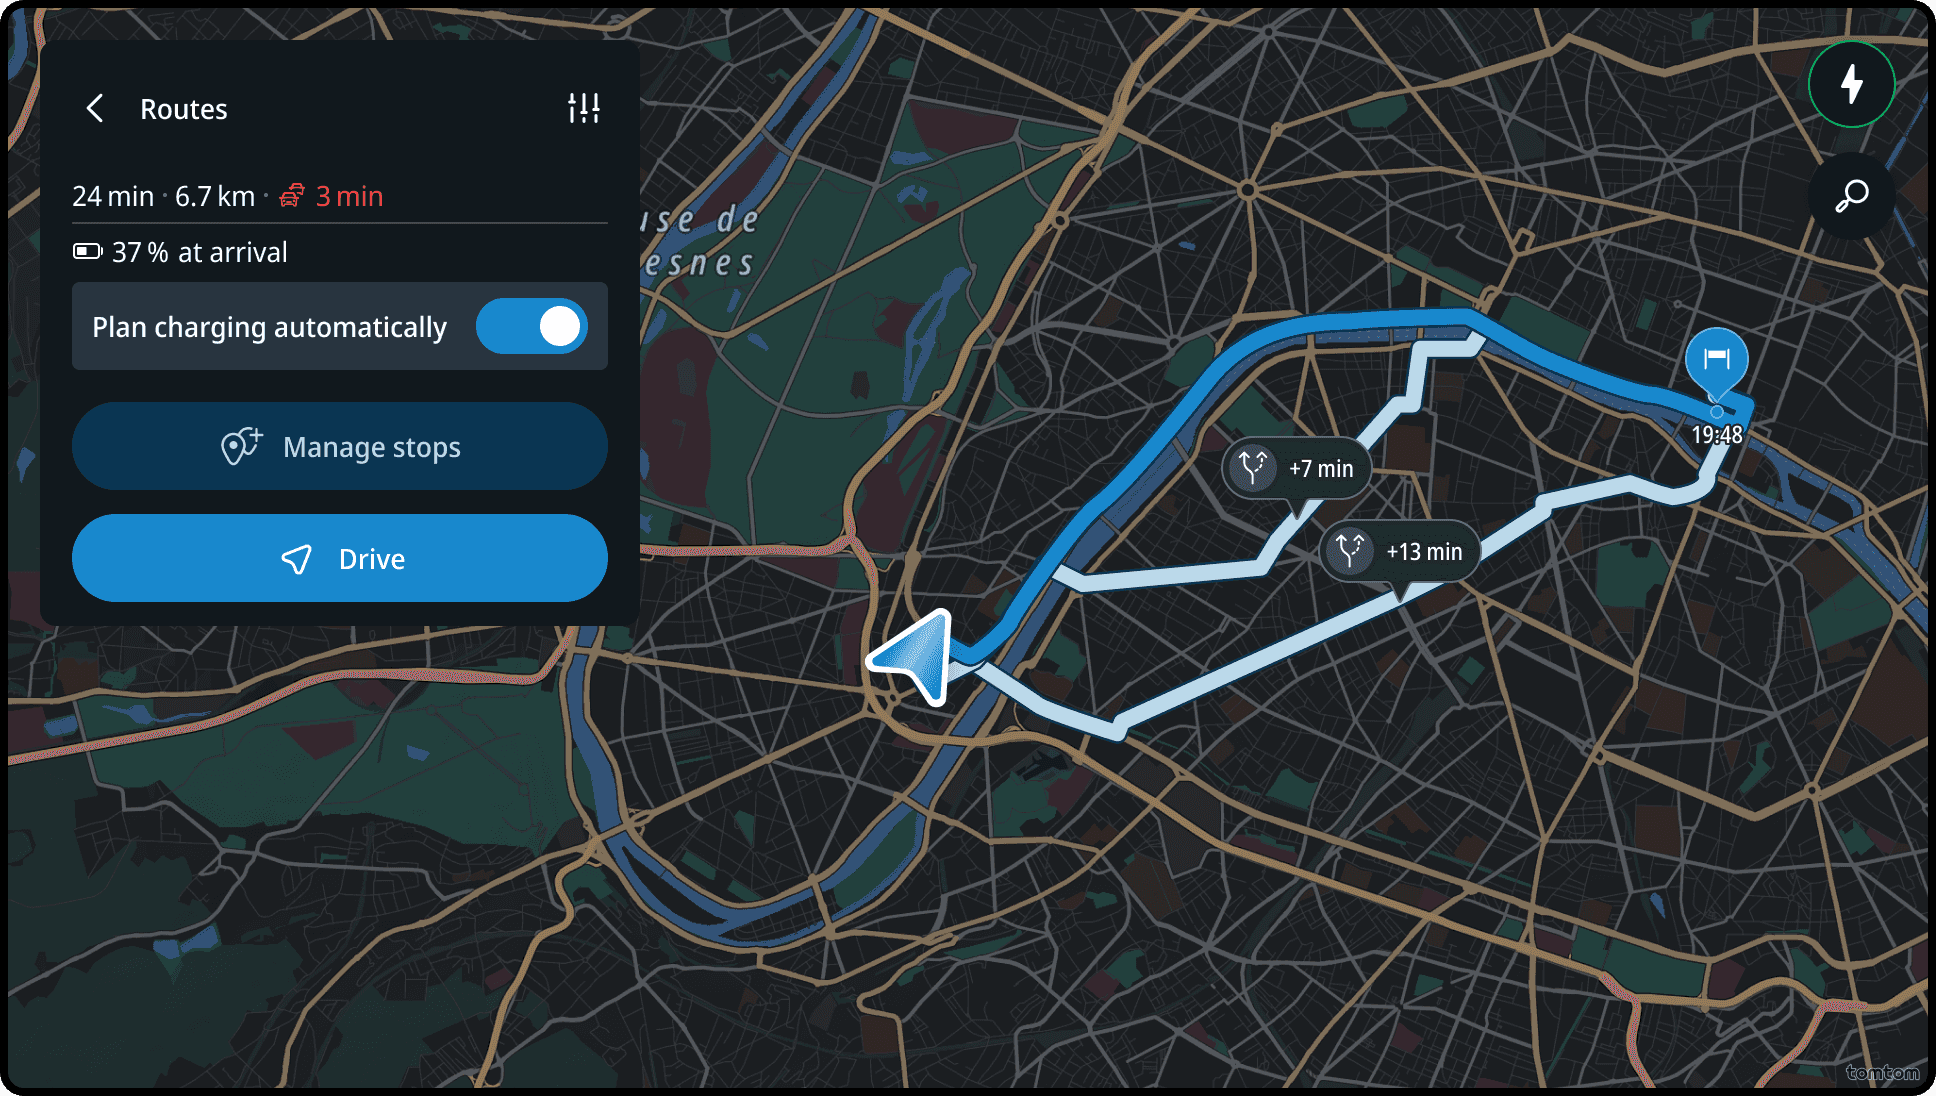
Plan charging stops automatically
For EV cars, the most optimal charging stops will be added automatically to reach the destination with enough battery at stops and at arrival. Users can use the Plan Charging Automatically toggle to control whether the stops need to be added automatically or not.
The Charger Finder button and Plan Charging Automatically toggle work together to give users complete control over charging on the route. When the toggle is active, any chargers users manually adds to the route will trigger automatic route replanning to optimize the rest of the charging stops needed to reach the destination. When the toggle is not active, only the manually added stops will be shown in the route itinerary.
Even if the destination is reachable without charging, users can enable this toggle so charging stops will be automatically added to the route, if the battery drops below the target arrival level while driving.
These preferences is explained in Fully automatic versus manual EV route planning
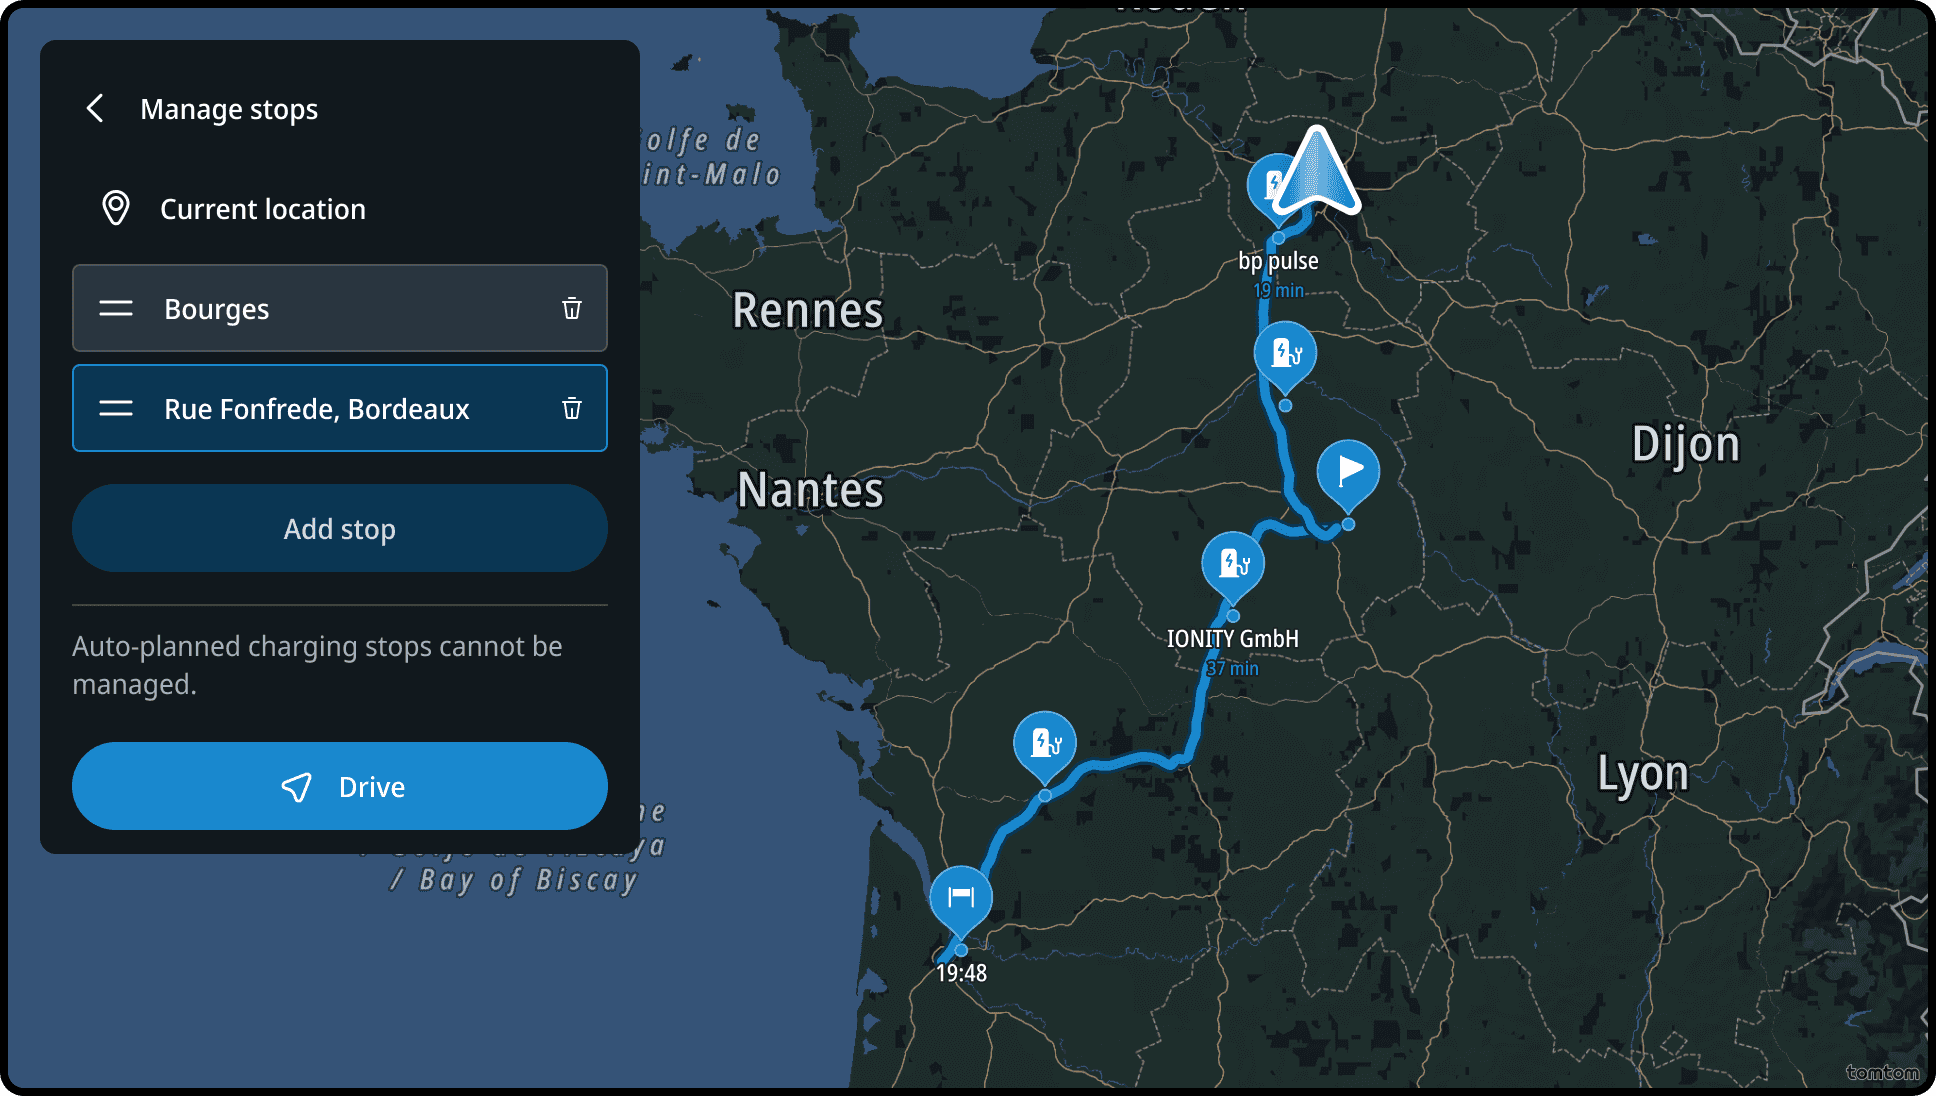
Managing stops
Users can edit their route by adding stops, removing stops, or changing the order of the manually added stops.
Automatically added charging stops cannot be reordered. With any changes in the order, the charging plan and suggested chargers will be adjusted accordingly.
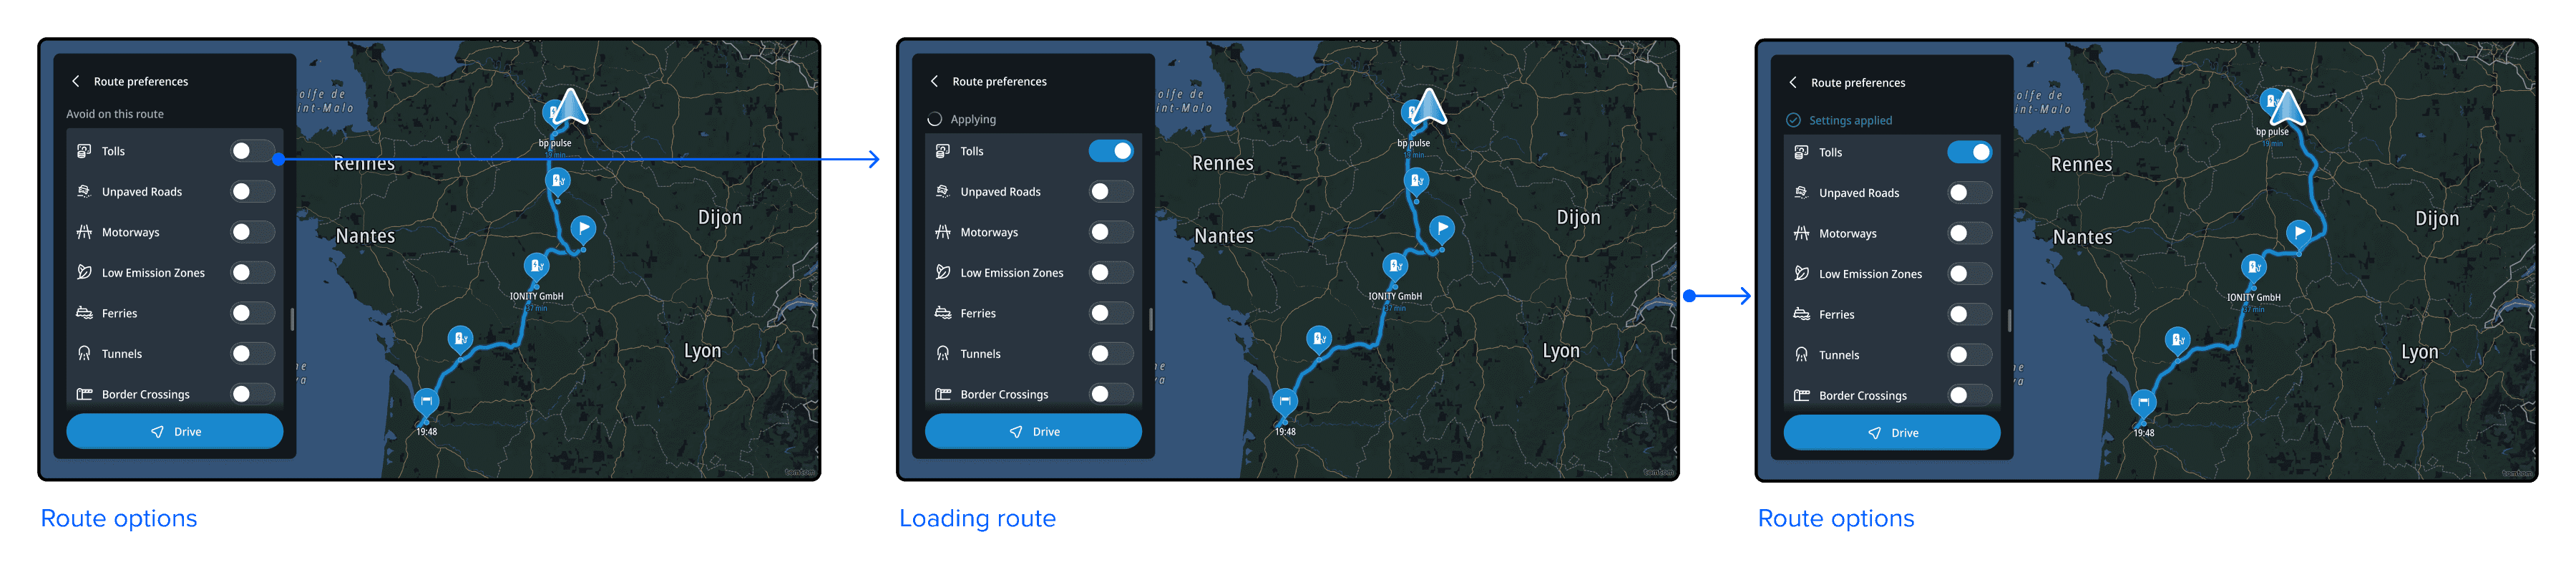
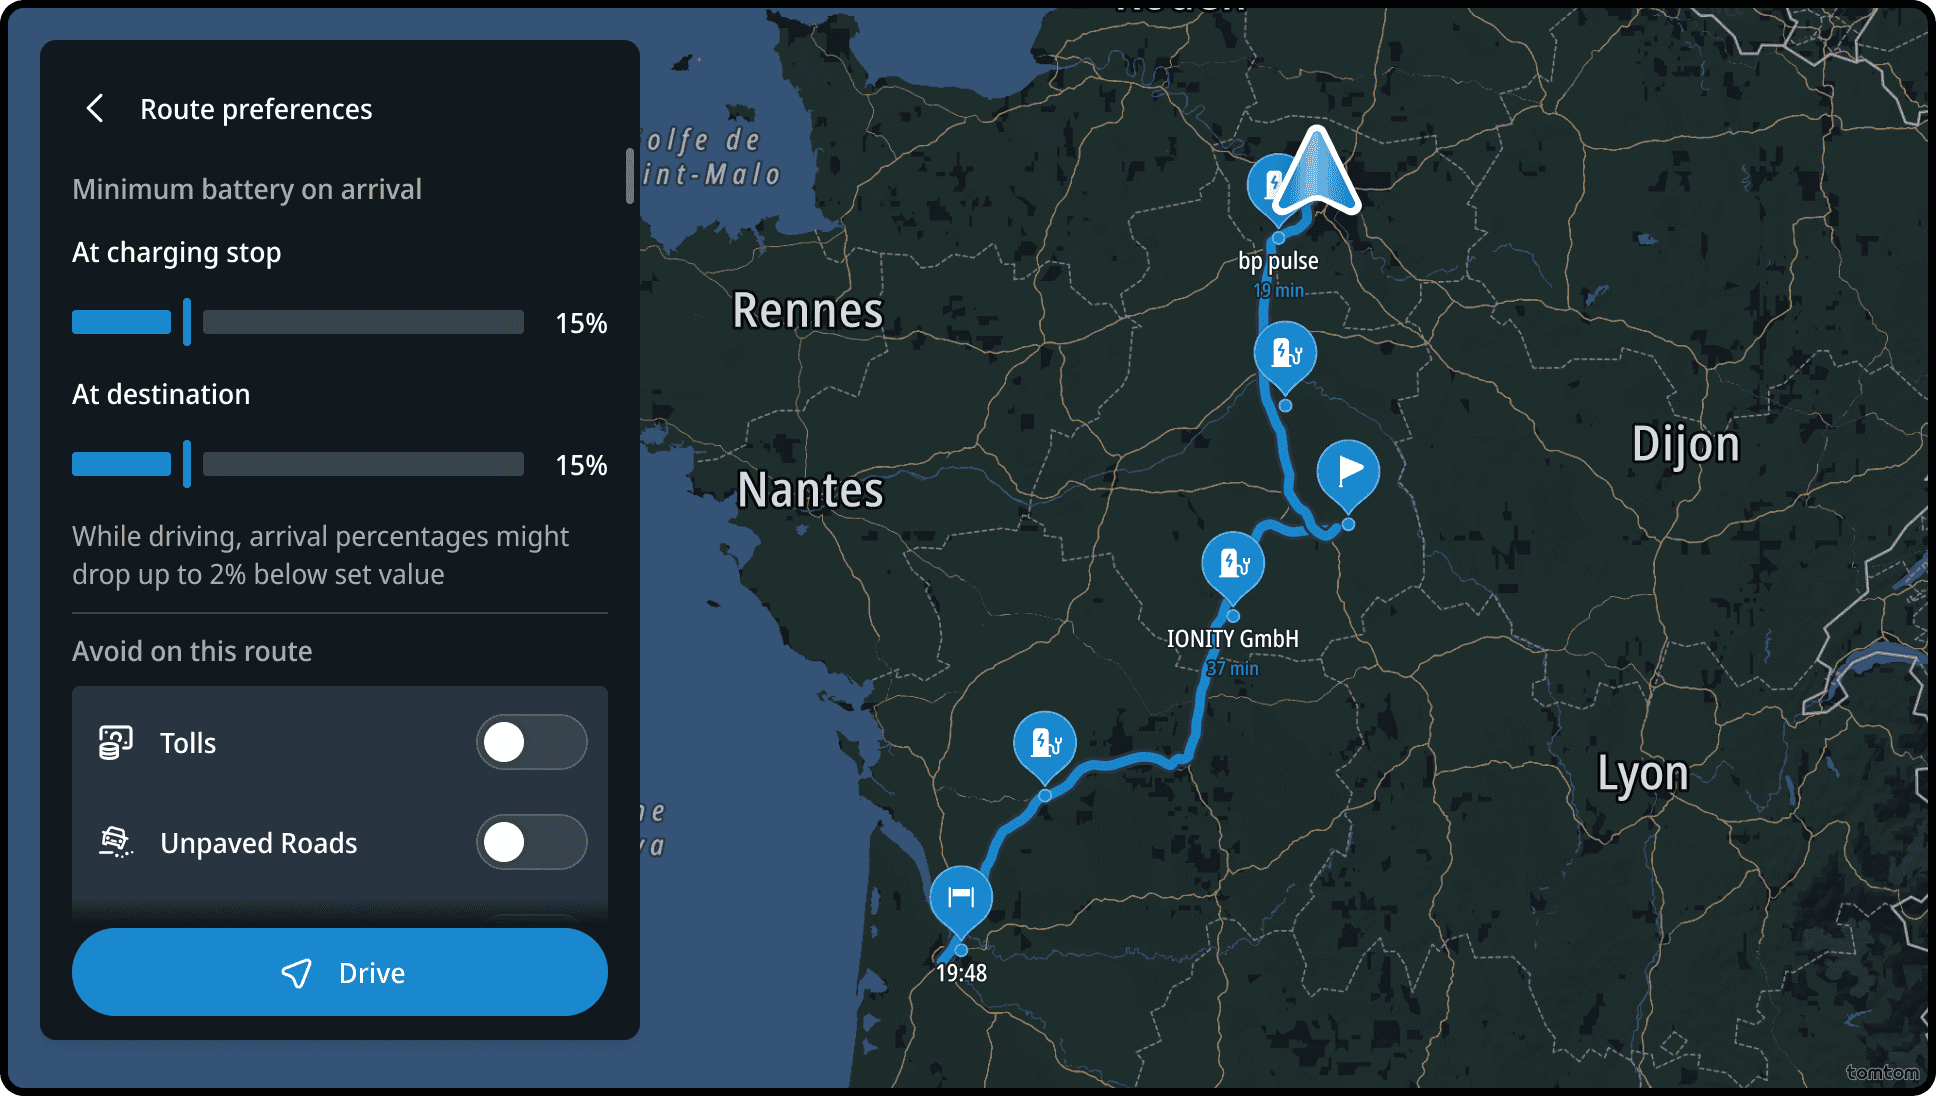
Route options
Route options can be set to match specific driver needs.
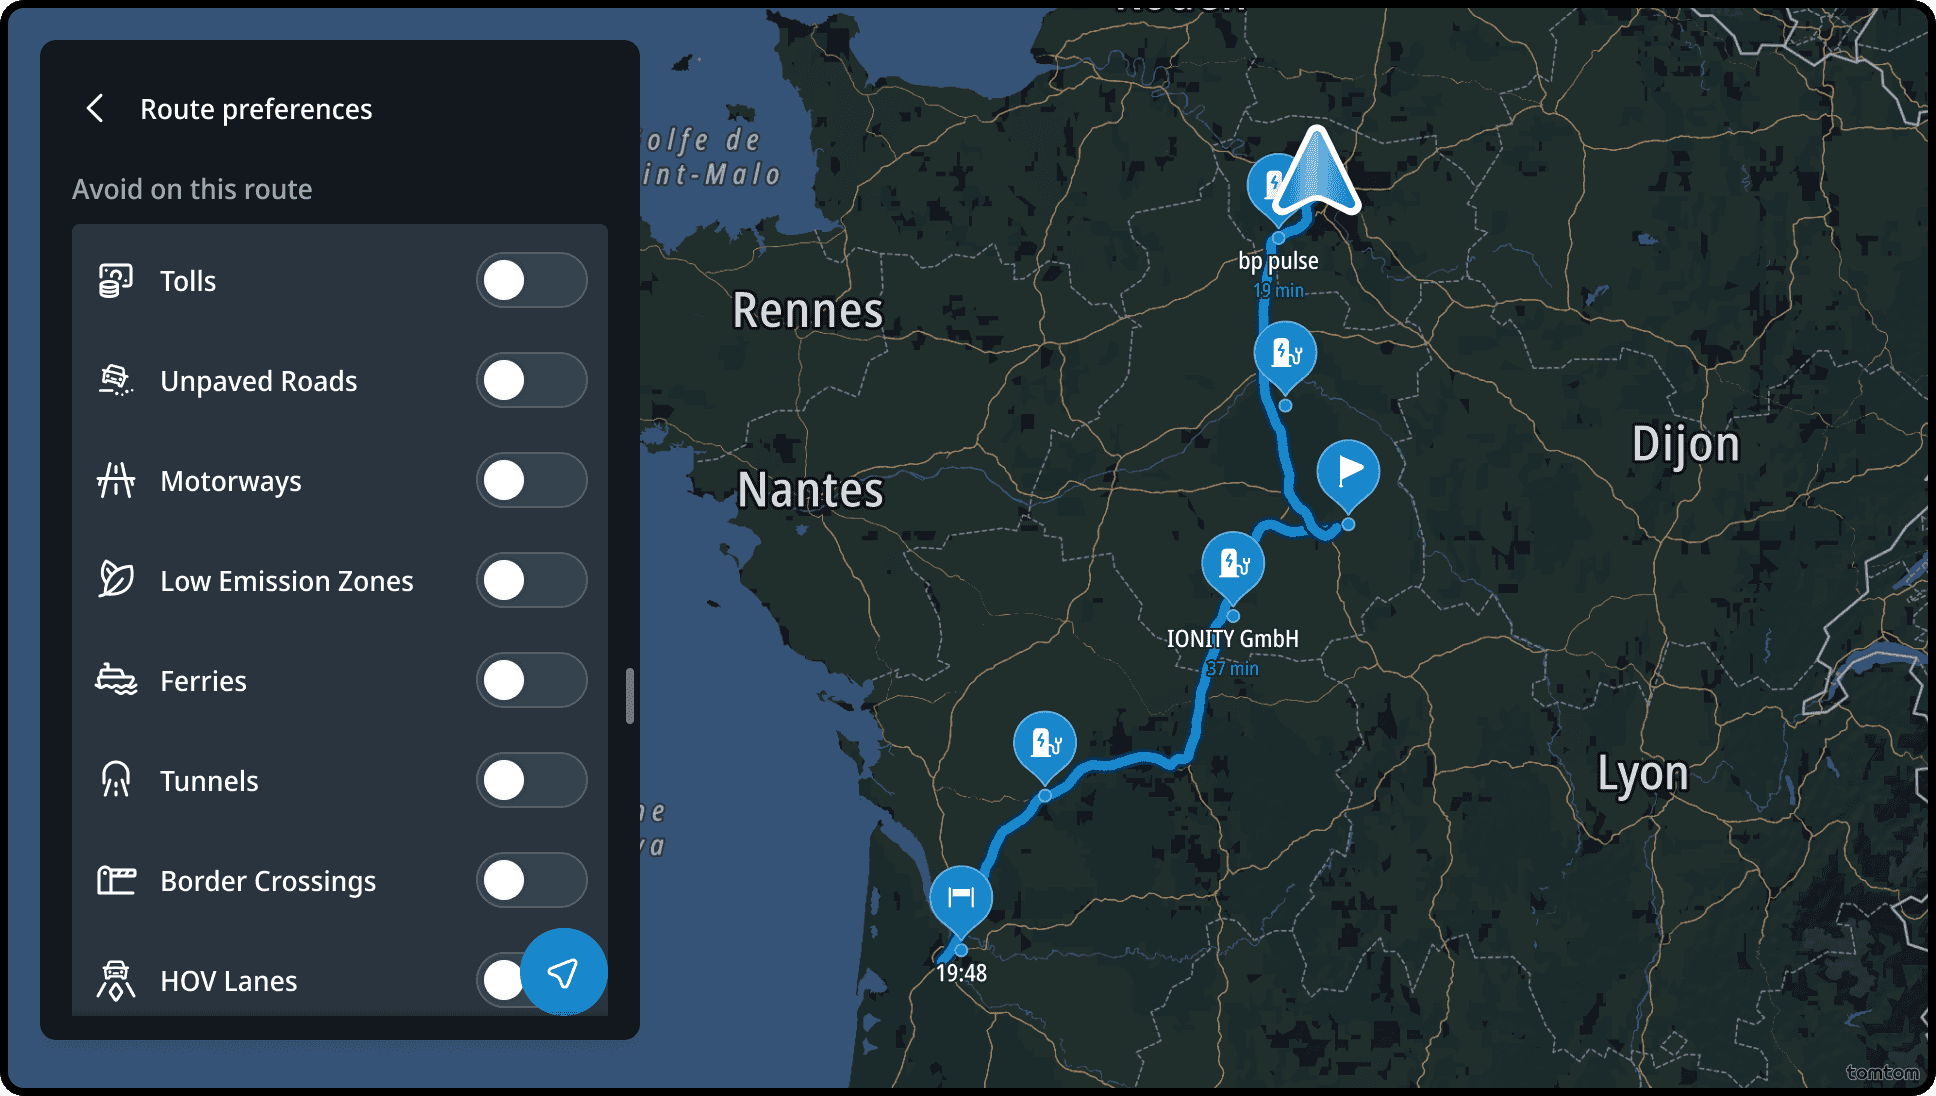
The user can choose to plan a route that attempts to avoid tolls, unpaved roads, motorways, ferries/car shuttle trains, tunnels, border crossings, and HOV lanes (US only), by changing the state of the toggle in the Avoid on this route list.
The user can also choose the battery level to arrive with, either at the charging stop or destination, by setting the desired value.
By changing these options along the route, the charging plan and suggested chargers are adjusted accordingly.
Flows
Disabling automatically adding charging stops
Charging stops will be added automatically to the route whenever the destination is located outside of the vehicle's range. Users can disable this setting by pressing the button in the Route Panel.
Changing battery level at destination
Opening the route options from the route preview panel brings up a slider to select the battery level at the destination. The route and charging stops are automatically updated after adjusting the slider.
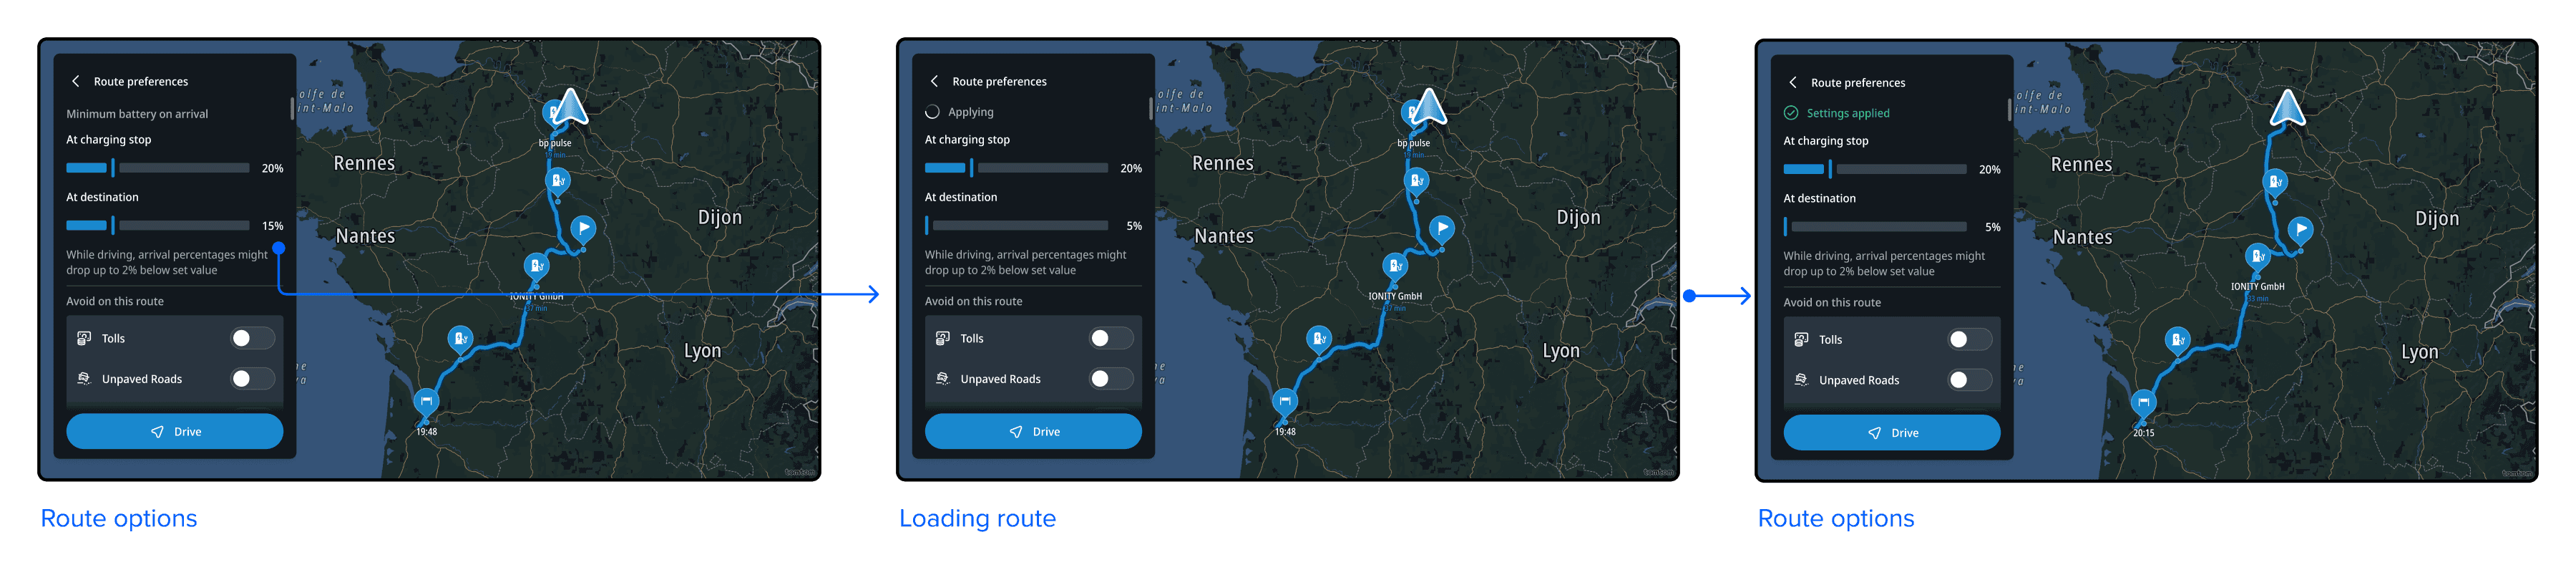
Changing avoid options
Opening the route options from the route preview panel brings up all avoid options. The route is automatically updated.