UI components
Navigation SDK for Android is only available upon request. Contact us to get started.
The Navigation SDK provides UI components for displaying navigation information in an attractive way.
The UI components are provided as a separate module. Before you use it, be sure to add its dependency to your module’s build.gradle.kts.
implementation("com.tomtom.sdk.navigation:ui:1.1.0")
The UI components module includes the Text-To-Speech (TTS) component.
The module provides two main components that can be used to build your own navigation app.
- The first component is
NavigationView, an Android ViewGroup subclass that can be used like a standard view to build a screen.NavigationViewprovides all the methods needed to configure views for navigation. - The second component is
NavigationFragment, another Android Fragment subclass that wraps both the wholeNavigationViewandTomTomNavigation.
The main difference between NavigationFragment and NavigationView is that NavigationView requires you to handle all navigation events yourself, while the NavigationFragment does it inside a class and automatically updates the view states.
Navigation view
This UI component is used to display all navigation information. It requires you to update views yourself. If you prefer not to do this, you can use the NavigationFragment.
NavigationView consists of the following views:
- Guidance view
- Street view
- Speed view
- Arrival view
The UI components support both portrait and landscape modes.
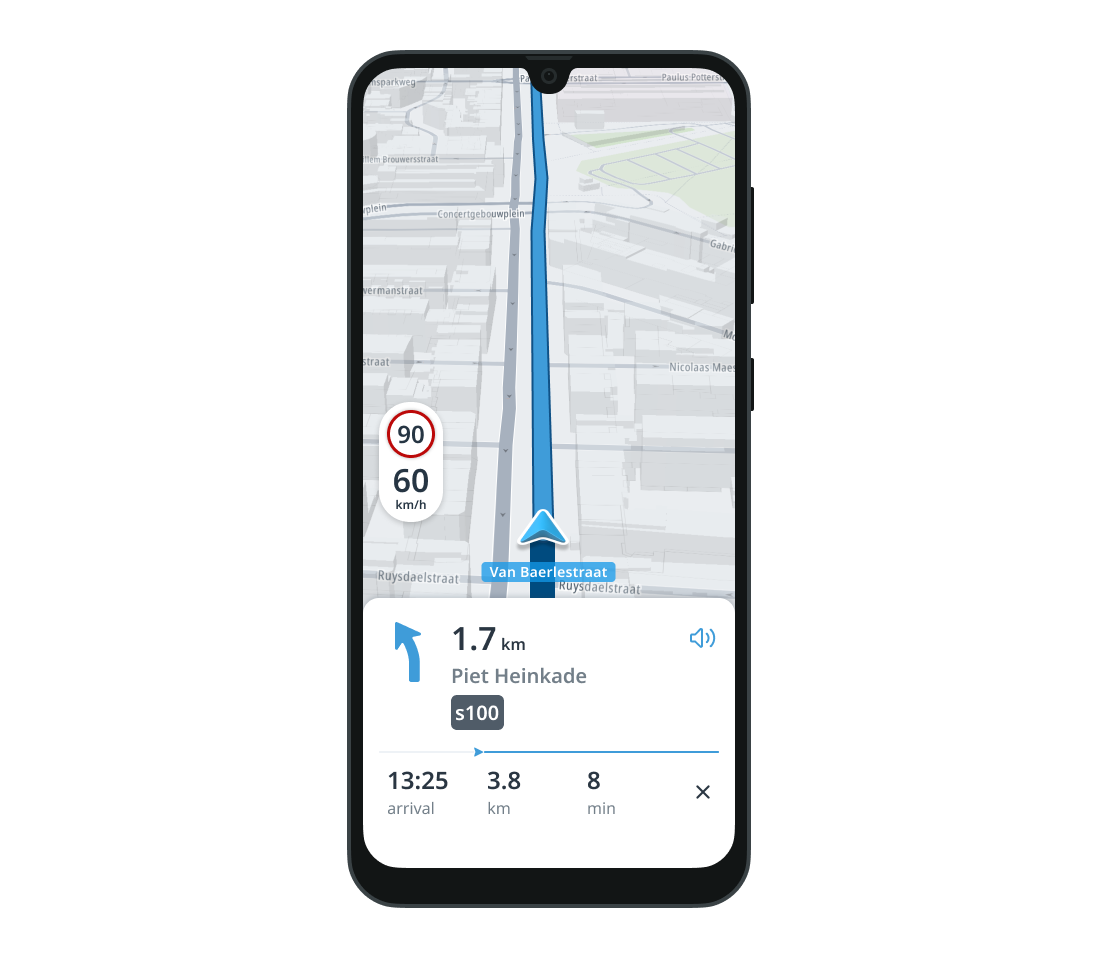
Guidance view
Guidance view is the container for:
- Next instruction view
- Route line progress view
- Estimated time of arrival (ETA) view
- Lane guidance view
- Combined instruction view
- Route updated view
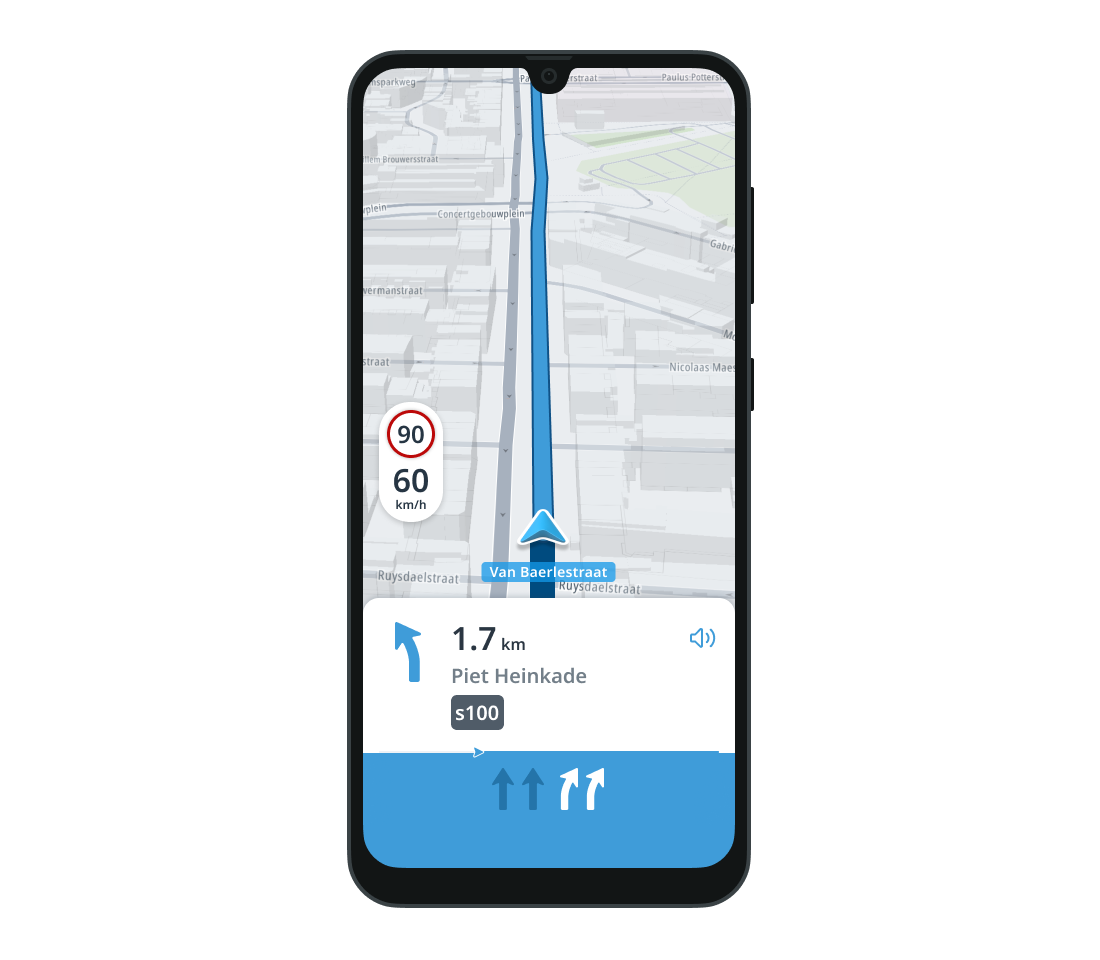
Next instruction view
The Next instruction view displays information about the next maneuver, the distance to that maneuver, and the name of the street where the maneuver ends.
The user can also mute/unmute voice guidance by tapping the sound toggle button.
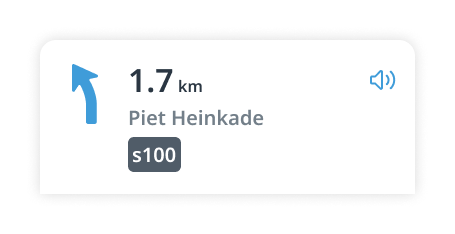
NavigationView provides a set of methods to configure this view.
1val instruction = ForkGuidanceInstruction(2 id = UniqueId(),3 routeOffset = Distance.meters(2000),4 maneuverPoint = GeoPoint(52.377956, 4.897070),5 drivingSide = DrivingSide.RIGHT,6 combineWithNext = false,7 nextSignificantRoad = Road(8 name = "Piet Heinkade",9 numbers = listOf("s100"),10 shields = listOf(RoadShield(fullRoadNumber = "s100", shieldContent = "100"))11 ),12 signpost = Signpost(exitNumber = "25"),13 forkDirection = ForkDirection.Left14)15navigationView.setNextInstruction(instruction)16navigationView.setDistanceToManeuver(Distance.meters(1700), UnitSystem.Metric)17navigationView.setGuidanceInstructionText("Piet Heinkade")18navigationView.setRoadShields(listOf("s100"))19navigationView.setMotorwayExit("25")20navigationView.setAudioState(enabled = true)21navigationView.setAudioToggleButtonClickListener { view: View ->22 /* YOUR CODE GOES HERE */23}
Route line progress view
The Route line progress view shows the progress along the route.

To set the progress, call setRouteLineProgress(routeLength, traveledDistance).
Estimated time of arrival (ETA) view
Estimated time of arrival (ETA) view displays information about the arrival time, remaining distance, and remaining time. It also contains a cancel button so the user can stop navigation.
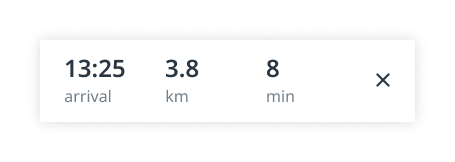
The NavigationView has methods to set up properties for this view.
1val calendar = Calendar.getInstance()2calendar.set(2022, 6, 14, 13, 25)3navigationView.setArrivalTime(calendar)4navigationView.setDistanceToDestination(Distance.meters(3800), UnitSystem.Metric)5navigationView.setTravelTime(8.minutes)
Set a listener to handle cancel button click events.
1navigationView.setCancelButtonClickListener { view: View ->2 /* YOUR CODE GOES HERE */3}
Lane guidance view
Lane guidance view indicates what lane(s) the user should drive on.

The lane guidance view fits into the place of the ETA view. The user can close it by tapping it.
To set the lanes call setLanes(List<Lane>).
If the list is empty, the lane guidance view is hidden.
Combined instruction view
Combined instruction view shows the user the maneuver coming immediately after the next one.
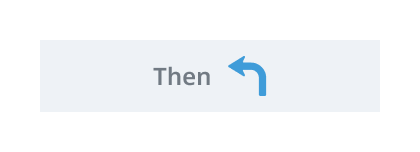
This view is shown in the place of the ETA view. If the user taps it, it closes.
The NavigationView allows you to set the combined instruction.
1val instruction = TurnGuidanceInstruction(2 id = UniqueId(),3 routeOffset = Distance.meters(2000),4 maneuverPoint = GeoPoint(52.377956, 4.897070),5 drivingSide = DrivingSide.RIGHT,6 combineWithNext = false,7 nextSignificantRoad = Road(8 name = "Piet Heinkade",9 numbers = listOf("s100"),10 shields = listOf(RoadShield(fullRoadNumber = "s100", shieldContent = "100"))11 ),12 signpost = Signpost(exitNumber = "25"),13 turnDirection = TurnDirection.TurnLeft,14 turnAngle = Angle.degrees(30)15)16navigationView.setCombinedInstruction(instruction)
You can also hide it.
navigationView.hideCombinedInstructionView()
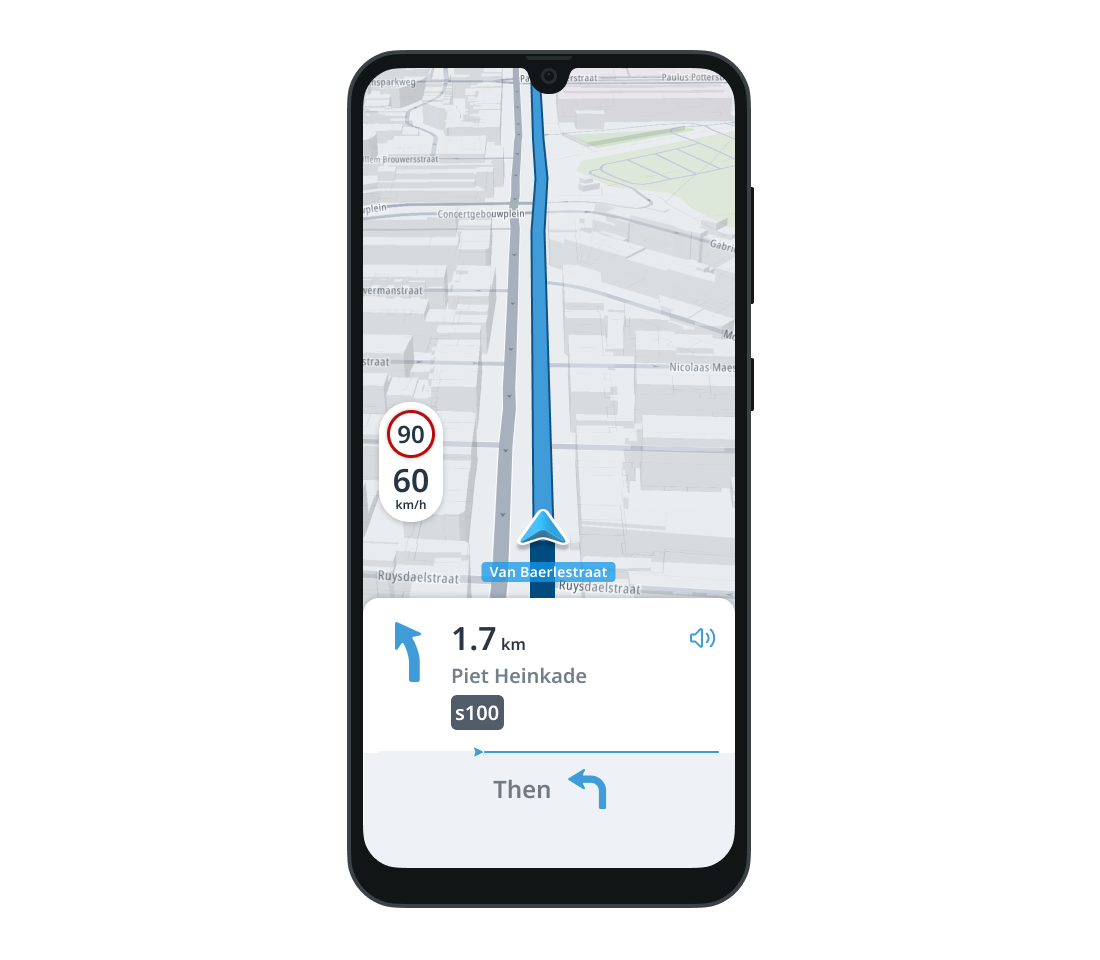
Route updated view
The Route updated view notifies the user that the route has been updated.
This view is shown in the place of the ETA view. The user can close it by tapping on it.
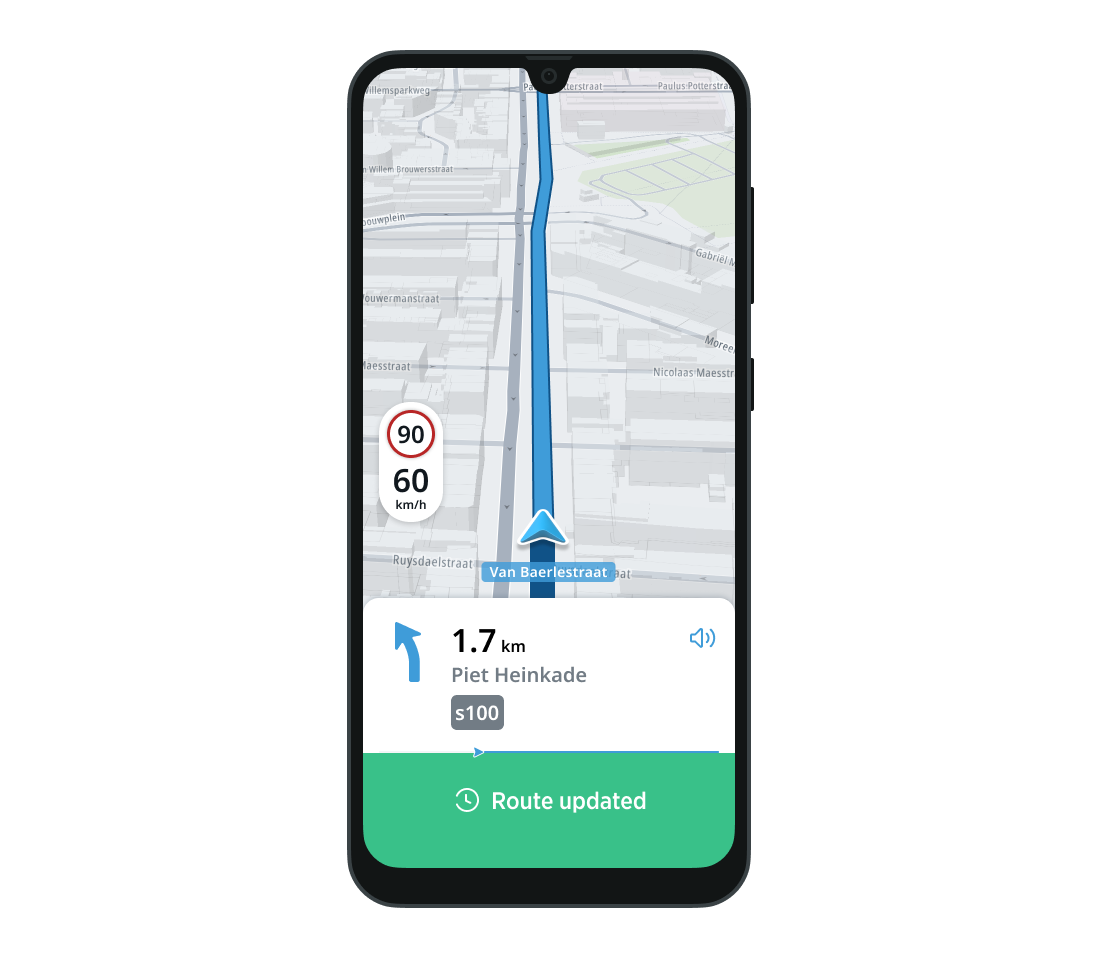
To show a route updated notification, call showRouteUpdatedView().
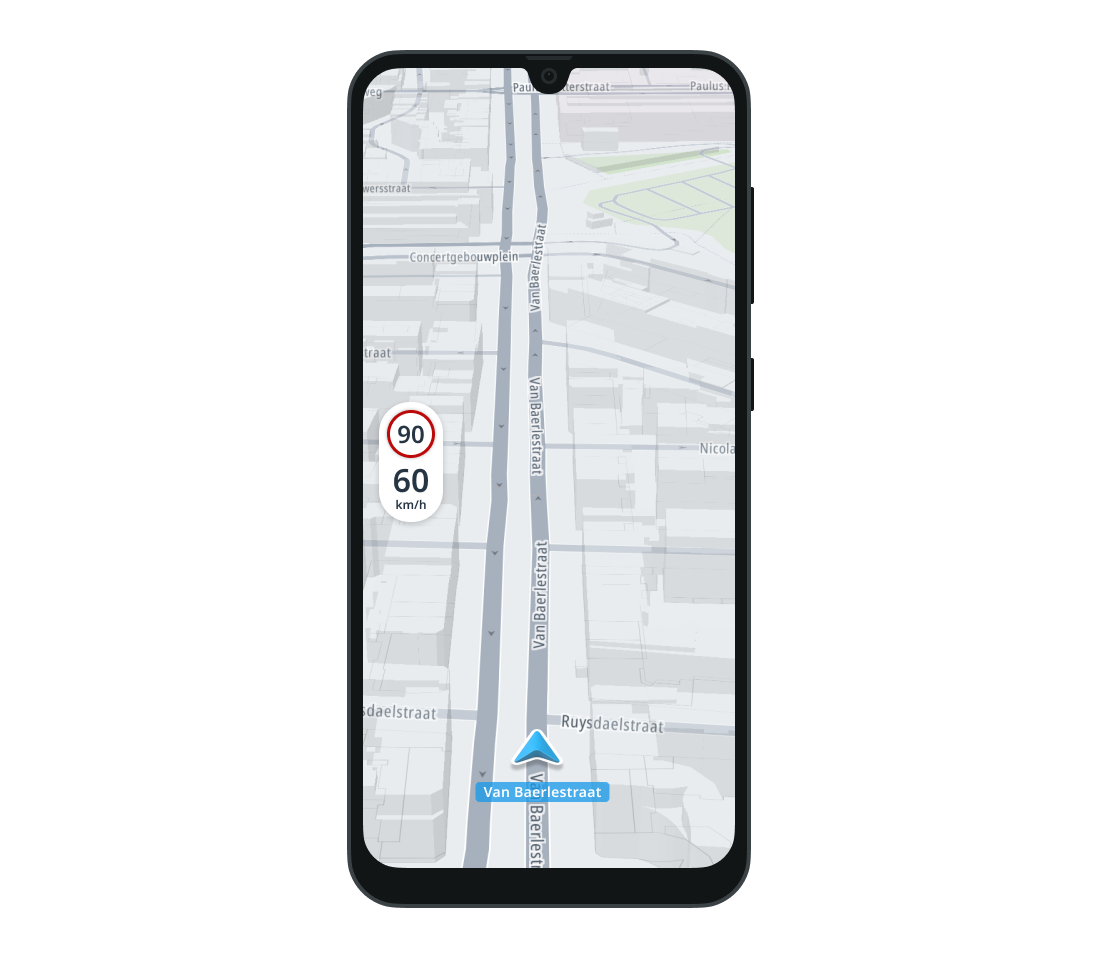
Street view
The Street view displays the current street name.

To set the content for the street view, call setStreetText(String). You can manage the visibility of this view with showStreetView() and hideStreetView().
Speed view
The Speed view displays the speed limit on the current street and the user’s current speed.
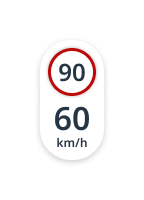
The NavigationView supports setting the click listener on the speed limit and current speed views.
1navigationView.setSpeedLimitClickListener { view: View ->2 /* YOUR CODE GOES HERE */3}
1navigationView.setCurrentSpeedClickListener { view: View ->2 /* YOUR CODE GOES HERE */3}
You can also change the visibility of the whole Speed view programmatically.
navigationView.showSpeedView()
navigationView.hideSpeedView()
Arrival view
The Arrival view is shown when the ArrivalDetectionEngine detects that the user reaches the destination. The finish button on the view stops navigation.
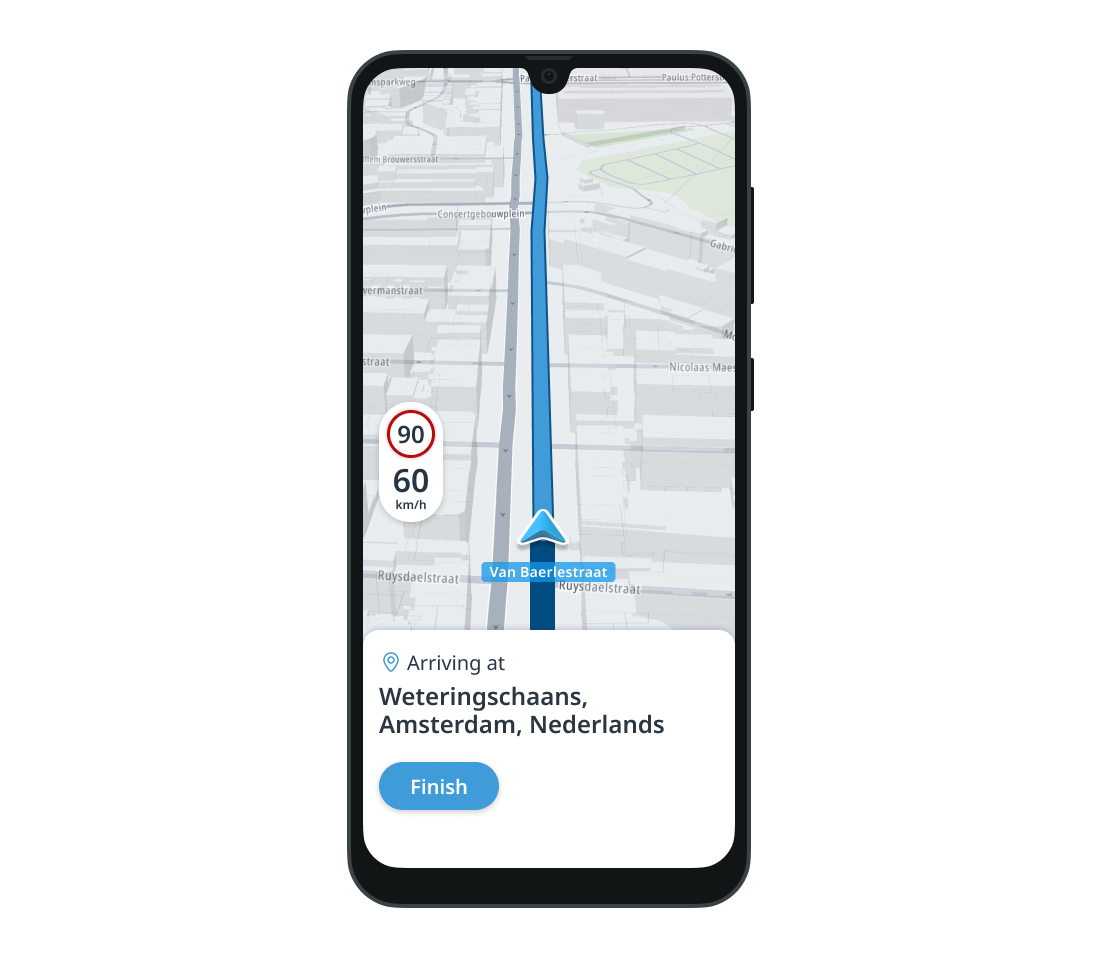
You can set the description for the arrival destination to be either an address or the name of the location.
navigationView.setArrivalDescription(destinationAddress)
To show the view call showArrivalView().
To handle clicks on the finish button, set the listener.
1navigationView.setArrivalViewButtonClickListener { view: View ->2 /* YOUR CODE GOES HERE */3}
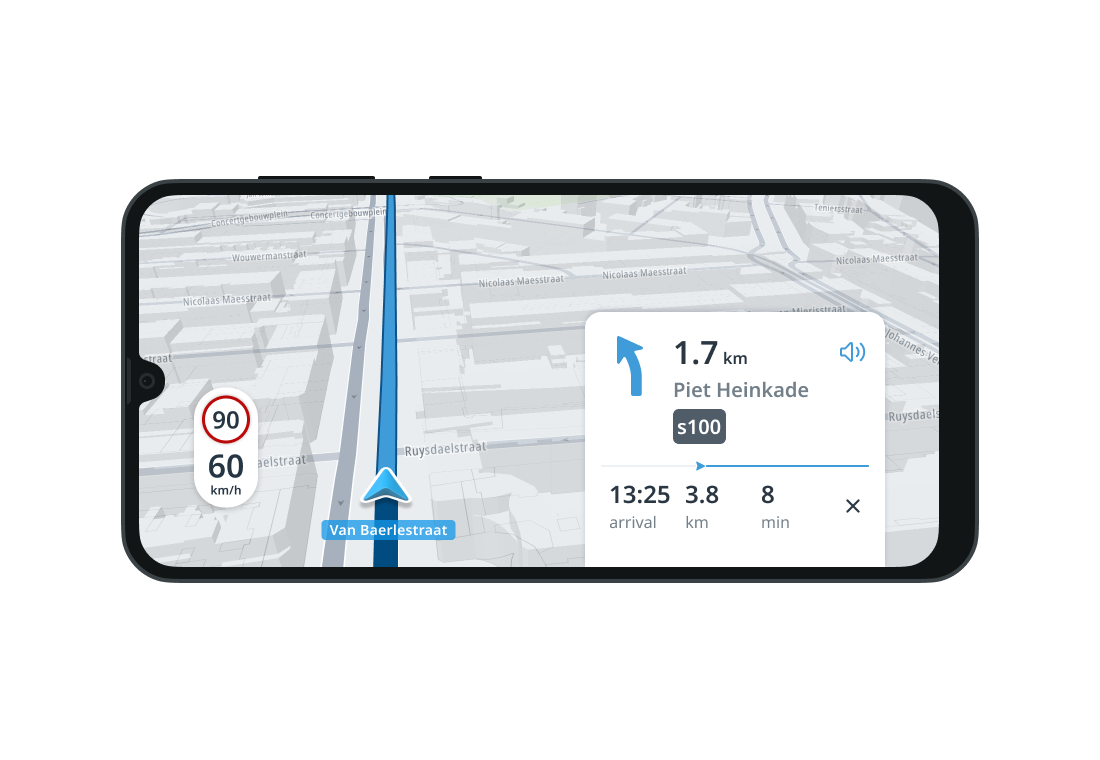
Navigation fragment
All of the previously described UI components are part of NavigationFragment. You can access NavigationView from NavigationFragment by calling NavigationFragment.navigationView.
NavigationFragmentis not only the UI component container, but also the wrapper forTomTomNavigation. If you want navigation to manage all the views, useNavigationFragment.NavigationFragmenthandles all events from navigation internally and automatically updates the views.
You can learn how to create TomTomNavigation in the Quickstart guide.
Initialization
NavigationFragment can be instantiated either programmatically or by using XML view inflation.
Programmatically
Define NavigationUiOptions to configure the UI options. You can set following properties:
unitSystemType- This sets theUnitSystemTypeof the distance displayed before upcoming maneuvers, speed and voice guidance.
It is set by default to UnitSystemType.default. * isSoundEnabled - This sets whether or not voice guidance should be used. Sound is enabled by default. * keepInBackground - This sets whether or not the navigation should be kept in the background within the Android Service.
By default it is set to false. * voiceLanguage - This sets the language for voice guidance. The default language is US English.
You can keep navigation in the background using the Android Service. A notification appears, reporting that navigation is running. The service is disconnected when the
NavigationFragmentis destroyed. Beginning with Android 13 (API level 33), you must request a user for notification permission at runtime. Detailed instructions for requesting the notification permission on Android is found at Notification runtime permission.
Use the created NavigationUiOptions object to instantiate the NavigationFragment with its NavigationFragment.newInstance(NavigationUiOptions) method.
1val navigationUiOptions = NavigationUiOptions(2 voiceLanguage = Locale.getDefault(),3 keepInBackground = true,4 isSoundEnabled = false,5 unitSystemType = UnitSystemType.default6)7val navigationFragment = NavigationFragment.newInstance(navigationUiOptions)
Once NavigationFragment is created, add it to the container created in your layout. You can do this by using FragmentManager.
1supportFragmentManager.beginTransaction()2 .add(R.id.navigation_fragment_container, navigationFragment)3 .commitNow()
1<androidx.fragment.app.FragmentContainerView2 android:id="@+id/navigation_fragment_container"3 android:layout_width="match_parent"4 android:layout_height="match_parent"/>
XML view inflation
Follow these steps for XML view inflation: * Add a fragment container for NavigationFragment.
- Declare the TomTom namespace
xmlns:tomtom="http://schemas.android.com/apk/res-auto". - Provide the
android:name="com.tomtom.sdk.navigation.ui.NavigationFragment"property to the fragment. - You can specify the same properties by using
NavigationUiOptions.
1<androidx.fragment.app.FragmentContainerView2 xmlns:tomtom="http://schemas.android.com/apk/res-auto"3 android:id="@+id/navigation_fragment"4 android:name="com.tomtom.sdk.navigation.ui.NavigationFragment"5 android:layout_width="match_parent"6 android:layout_height="match_parent"7 tomtom:tomtom_navigation_units="Metric"8 tomtom:tomtom_navigation_soundEnabled="false"9 tomtom:tomtom_navigation_keepInBackground="true"10 tomtom:tomtom_navigation_voiceLanguage="pl-PL" />
At this point, you can obtain the NavigationFragment object in the code by using FragmentManager.
val navigationFragment =supportFragmentManager.findFragmentById(R.id.navigation_fragment) as NavigationFragment
Listeners
If you’re using NavigationFragment, all of the TomTomNavigation listeners are still valid.
You can read about them in the turn-by-turn navigation guide or in the free driving guide.
You can also set the NavigationListener to listen to navigation events.
onStarted()- This is called when navigation has started.onStopped()- This is called when the cancel button on the ETA view or the finish button on the arrival view is clicked. You need to stop navigation and dispose of it yourself.
1val navigationListener = object : NavigationFragment.NavigationListener {2 override fun onStarted() {3 /* YOUR CODE GOES HERE */4 }56 override fun onStopped() {7 /* YOUR CODE GOES HERE */8 }9}10navigationFragment.addNavigationListener(navigationListener)
If the listener is no longer needed it can be removed.
navigationFragment.removeNavigationListener(navigationListener)
Navigation
NavigationFragment is a wrapper for TomTomNavigation. This means you have to set TomTomNavigation to the fragment. This must be done before any of the following methods are called:
navigationFragment.setTomTomNavigation(tomTomNavigation)
Once TomTomNavigation is set, you can start navigation.
Free driving
Navigation can be done in free driving mode, which means you are driving without a planned route. You can learn more about free driving mode in the Free driving guide.
To start navigation without a route, call the startNavigation() method.
navigationFragment.startNavigation()
In free driving mode, only the Speed view and Street view are visible.
Turn-by-turn navigation
In turn-by-turn navigation mode, the Navigation SDK provides UI components that help the user follow the route. It shows progress along the route, the next maneuver, the estimated arrival time and the remaining distance and time to the destination.
As with free driving mode, the Speed view and Street view are also visible.
If you have a Route you can start navigation. You can read how to request the Route in the Planning a route guide). Detailed information about turn-by-turn navigation is found in the Turn by turn Navigation Guide. Use the Route object and the RoutePlanningOptions that were used during route planning to create a RoutePlan object.
The RoutePlan object is used to start navigation with the provided route.
1val amsterdam = GeoPoint(52.377956, 4.897070)2val rotterdam = GeoPoint(51.926517, 4.462456)3val routePlanningOptions = RoutePlanningOptions(4 itinerary = Itinerary(origin = amsterdam, destination = rotterdam),5 guidanceOptions = GuidanceOptions()6)78// NOTE: Route request...9val routePlan = RoutePlan(route = route, routePlanningOptions = routePlanningOptions)10navigationFragment.startNavigation(routePlan)
The displayed UI component makes the chevron hover over the map. That operation requires map padding to be set. The padding values are specified in pixels.
1val bottomPaddingInDp = 2622val bottomPaddingInPixels = (bottomPaddingInDp * resources.displayMetrics.density).toInt()3tomTomMap.setPadding(Padding(left = 0, right = 0, top = 0, bottom = bottomPaddingInPixels))
You can check the size of the navigation panel and observe its changes using the Guidance view.
In addition, if the Route contains a LaneSection list, the NavigationFragment shows the Lane guidance view when required. To make lane guidance more precise, the Route should also contain a SpeedLimitSection list.
Voice guidance
NavigationFragment provides voice guidance as well as visual guidance. The voice guidance requires that RouteLegs of the Route contain Instructions with verbal Announcements. The announcements on the motorway should be triggered further from the instruction point than default. To do this the Route has to contain a list of MotorwaySections.
You can change the TextToSpeechEngine used to synthesize audio instructions.
To do this, use the changeTextToSpeechEngine(TextToSpeechEngine) method. You can learn more about the TextToSpeechEngine here.
NavigationFragment also allows you to change the TTS language.
navigationFragment.changeAudioLanguage(Locale.GERMANY)
You can also use LanguageChangedListener to update TTS language when TomTomNavigation language has been changed.
1val onLanguageChangeListener = LanguageChangedListener { language: Locale ->2 /* YOUR CODE GOES HERE */3}4tomTomNavigation.addLanguageChangedListener(onLanguageChangeListener)
If the listener is no longer needed it can be removed.
navigationFragment.removeNavigationListener(navigationListener)
Distance, speed, and voice guidance units
NavigationFragment allows you to set the units for displaying distance and speed and for voice guidance.
navigationFragment.setUnits(UnitSystemType.Fixed(UnitSystem.Metric))
Update
The Route that navigation is following can be updated at any time. To update the route, create a new RoutePlan and call the setActiveRoutePlan(RoutePlan) method.
1val newRoutePlan =2 RoutePlan(route = newRoute, routePlanningOptions = newRoutePlanningOptions)3navigationFragment.setActiveRoutePlan(newRoutePlan)
You can learn more about updating the Route in the Route Replanning Guide.
Stop
The navigation has to be stopped manually even if the user reaches the destination. To stop navigation, call the stopNavigation() method.
navigationFragment.stopNavigation()
It stops the underlying TomTomNavigation and quits showing the UI components.
The
setTomTomNavigation(TomTomNavigation)method must be called first.
If you want to dispose the navigation you have to do it directly on the TomTomNavigation object.
tomTomNavigation.close()
Next steps
Since you have learned about the navigation UI components, here are recommendations for the next steps: