Building a navigation app
Navigation SDK for Android is only available upon request. Contact us to get started.
This tutorial guides you through building a navigation application using the TomTom Navigation SDK for Android. You’ll learn to display a map, show the user’s location, calculate and display routes, and enable turn-by-turn navigation using built-in UI components.
Note that this tutorial uses simplified code snippets and doesn’t address configuration changes, error handling, or other best practices, which you’ll want to include in your application for production readiness.
Project setup
This tutorial is validated with the targetSDK set to Android API level 33. If you want to use a different API level, you may need to adjust the code accordingly.
-
Configure the project as described in the Project setup guide.
-
Add the following dependencies to your app’s
build.gradle.ktsfile and synchronize the project.1val version = "2.0.0-rc18"2implementation("com.tomtom.sdk.location:provider-default:$version")3implementation("com.tomtom.sdk.location:provider-map-matched:$version")4implementation("com.tomtom.sdk.location:provider-simulation:$version")5implementation("com.tomtom.sdk.maps:map-display-standard:$version")6implementation("com.tomtom.sdk.datamanagement:data-store:$version")7implementation("com.tomtom.sdk.navigation:navigation:$version")8implementation("com.tomtom.sdk.navigation:ui:$version")9implementation("com.tomtom.sdk.routing:route-planner:$version") -
This tutorial requires
supportFragmentManager, so ensure that your activity extendsAppCompatActivity.class MainActivity : AppCompatActivity() { -
Retrieve the TomTom API key from the
BuildConfigfield and store in a variable:1// Note: BuildConfig.TOMTOM_API_KEY could potentially be null, ensure it's not null before use.2// TomTom APIs will not work without a valid API key. Navigation SDK is only avaialble upon request.3// Use the API key provided by TomTom to start using the SDK.4private val apiKey = BuildConfig.TOMTOM_API_KEY -
Make sure to import the following classes, which will be used throughout this tutorial:
Imports
1import android.os.Bundle2import androidx.appcompat.app.AppCompatActivity3import com.tomtom.sdk.datamanagement.navigationtile.NavigationTileStore4import com.tomtom.sdk.location.LocationProvider5import com.tomtom.sdk.location.OnLocationUpdateListener6import com.tomtom.sdk.map.display.TomTomMap7import com.tomtom.sdk.map.display.ui.MapFragment8import com.tomtom.sdk.navigation.TomTomNavigation9import com.tomtom.sdk.routing.RoutePlanner10import com.tomtom.sdk.routing.options.RoutePlanningOptions11import com.tomtom.sdk.routing.route.Route -
Declare the members of the
MainActivityclass for later use in the guide:1private lateinit var mapFragment: MapFragment2private lateinit var tomTomMap: TomTomMap3private lateinit var navigationTileStore: NavigationTileStore4private lateinit var locationProvider: LocationProvider5private lateinit var onLocationUpdateListener: OnLocationUpdateListener6private lateinit var routePlanner: RoutePlanner7private var route: Route? = null8private lateinit var routePlanningOptions: RoutePlanningOptions9private lateinit var tomTomNavigation: TomTomNavigation1011@Suppress("DEPRECATION")12private lateinit var navigationFragment: com.tomtom.sdk.navigation.ui.NavigationFragment -
In the
onCreatefunction, the following SDK components will be enabled through the following steps:1 override fun onCreate(savedInstanceState: Bundle?) {2 super.onCreate(savedInstanceState)3 setContentView(R.layout.activity_main)45// initMap()6// initNavigationTileStore()7// initLocationProvider()8// initRouting()9// initNavigation()10 }
With the dependencies and API key set up, you can proceed to the next step and start displaying the map.
Displaying a map
Step 1: Creating map UI
To host the map component, configure the FragmentContainerView in your layout XML file, which can be either the activity layout or a fragment layout. The map content will be displayed within this designated container.
1<androidx.fragment.app.FragmentContainerView2 android:id="@+id/map_container"3 android:layout_width="match_parent"4 android:layout_height="match_parent" />
Now, you can initialize the MapFragment and add it to the FragmentContainerView programmatically.
Step 2: Displaying the map
To initialize the map, you’ll need the following components:
MapOptions: allows you to customize the map’s behavior and appearance.MapFragment: displays the map within the FragmentContainerView.
Here’s the code snippet for the map initialization:
1private fun initMap() {2 val mapOptions = MapOptions(mapKey = apiKey)3 mapFragment = MapFragment.newInstance(mapOptions)4 supportFragmentManager.beginTransaction()5 .replace(R.id.map_container, mapFragment)6 .commit()7 mapFragment.getMapAsync { map ->8 tomTomMap = map9 // Place the code here to enable/show user location and setup map listeners.10 // as explained in the following sections.11 }12}
Once you have the TomTomMap object, you can perform various actions such as adding markers or drawing routes. You can learn more about map configuration in the Map configuration guide.
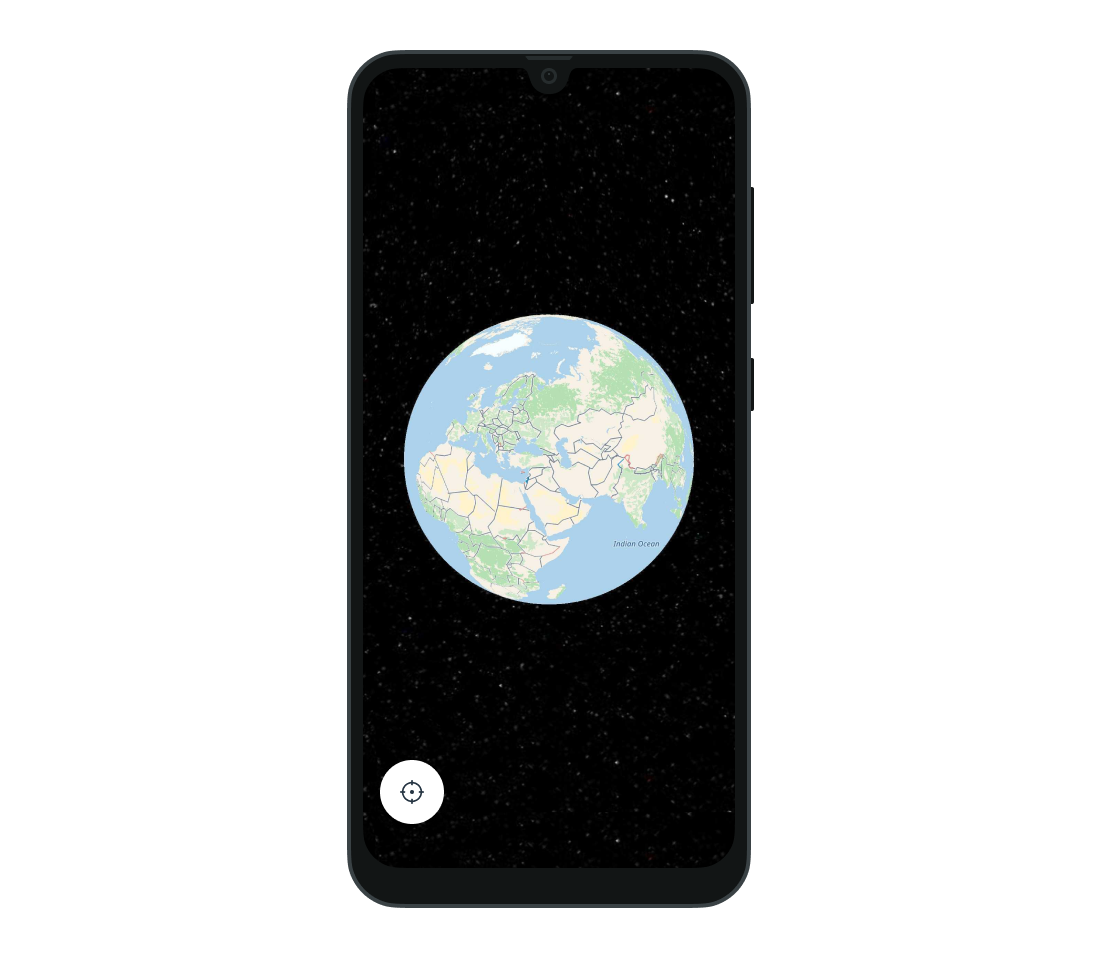
Build and run your application. Upon execution, the application will display a globe map.
Showing user location
In this section, you learn to display the user’s location on the map and adjust the camera to focus on the user’s position. To enable this functionality, use the following steps:
Step 1: Enabling location services
Before proceeding with code changes, make sure to enable location services for your application. You can declare the below permissions in the Manifest file of your application. Refer to the Android documentation for more details.
1<uses-permission android:name="android.permission.INTERNET"/>2<uses-permission android:name="android.permission.ACCESS_COARSE_LOCATION" />3<uses-permission android:name="android.permission.ACCESS_FINE_LOCATION" />
Firstly, you must verify if location permissions have been granted at runtime:
1/**2 * Method to verify permissions:3 * - [Manifest.permission.ACCESS_FINE_LOCATION]4 * - [Manifest.permission.ACCESS_COARSE_LOCATION]5 */6private fun areLocationPermissionsGranted() = ContextCompat.checkSelfPermission(7 this,8 Manifest.permission.ACCESS_FINE_LOCATION,9) == PackageManager.PERMISSION_GRANTED && ContextCompat.checkSelfPermission(10 this,11 Manifest.permission.ACCESS_COARSE_LOCATION,12) == PackageManager.PERMISSION_GRANTED
If the permissions are not granted, proceed to request them:
1private val locationPermissionRequest =2 registerForActivityResult(3 ActivityResultContracts.RequestMultiplePermissions(),4 ) { permissions ->5 if (permissions[Manifest.permission.ACCESS_FINE_LOCATION] == true &&6 permissions[Manifest.permission.ACCESS_COARSE_LOCATION] == true7 ) {8 // showUserLocation()9 } else {10 Toast.makeText(11 this,12 getString(R.string.location_permission_denied),13 Toast.LENGTH_SHORT,14 ).show()15 }16 }
1private fun requestLocationPermissions() {2 locationPermissionRequest.launch(3 arrayOf(4 Manifest.permission.ACCESS_FINE_LOCATION,5 Manifest.permission.ACCESS_COARSE_LOCATION,6 ),7 )8}
Define the location_permission_denied string resource in res/values/strings.xml.
<string name="location_permission_denied">Location permissions denied</string>
Combining all the steps may look like this:
1/**2 * In order to show the user’s location, the application must use the device’s location services,3 * which requires the appropriate permissions.4 */5private fun enableUserLocation() {6 if (areLocationPermissionsGranted()) {7 // showUserLocation()8 } else {9 requestLocationPermissions()10 }11}
You can call this method right after the map is ready to use:
1mapFragment.getMapAsync { map ->2 tomTomMap = map3 enableUserLocation()4}
Step 2: Obtaining location updates
The SDK uses the LocationProvider interface for location updates. In this use case, we use the default LocationProvider, which relies on Android’s system location services.
To retrieve location updates, you need to invoke the LocationProvider.enable() method. For more details, consult the Location quickstart guide.
1private fun initLocationProvider() {2 locationProvider = DefaultLocationProviderFactory.create(context = applicationContext)3 locationProvider.enable()4}
Step 3: Displaying the user’s location on the map
The LocationProvider only reports location changes. It does not interact internally with the map or navigation. Therefore, to show the user’s location on the map, you must set the LocationProvider to the TomTomMap. You also have to manually enable the location indicator. It can be configured using the LocationMarkerOptions class. Read more about user location on the map in the Showing User Location document.
1private fun showUserLocation() {2 locationProvider.enable()3 // zoom to current location at city level4 onLocationUpdateListener =5 OnLocationUpdateListener { location ->6 tomTomMap.moveCamera(CameraOptions(location.position, zoom = 8.0))7 locationProvider.removeOnLocationUpdateListener(onLocationUpdateListener)8 }9 locationProvider.addOnLocationUpdateListener(onLocationUpdateListener)10 tomTomMap.setLocationProvider(locationProvider)11 val locationMarker = LocationMarkerOptions(type = LocationMarkerOptions.Type.Pointer)12 tomTomMap.enableLocationMarker(locationMarker)13}
Generating a route
This section describes how to calculate a route between two locations and display it on the map. You can find more details on adjusting planning criteria and accommodating vehicle profiles in the routing documentation.
Step 1: Setting up the route planner
The route planner is your access point to the routing service through the Routing API. Initialize it with the default TomTom implementation based on the Routing API:
1private fun initRouting() {2 routePlanner = OnlineRoutePlanner.create(context = applicationContext, apiKey = apiKey)3}
Step 2: Calculating a route
You can learn to plan a route using the RoutePlanningOptions. This step specifies the origin, destination, guidance options, and vehicle profile. The calculated route is passed to a callback for further handling:
1private fun calculateRouteTo(destination: GeoPoint) {2 val userLocation =3 tomTomMap.currentLocation?.position ?: return4 val itinerary = Itinerary(origin = userLocation, destination = destination)5 routePlanningOptions =6 RoutePlanningOptions(7 itinerary = itinerary,8 guidanceOptions = GuidanceOptions(),9 vehicle = Vehicle.Car(),10 )11 routePlanner.planRoute(routePlanningOptions, routePlanningCallback)12}
Step 3: Displaying the route on the map
Now that you successfully planned a route, you can access the first route by processing the results of the RoutePlanningResponse:
1private val routePlanningCallback =2 object : RoutePlanningCallback {3 override fun onSuccess(result: RoutePlanningResponse) {4 route = result.routes.first()5 route?.let { drawRoute(it) }6 }78 override fun onFailure(failure: RoutingFailure) {9 Toast.makeText(this@MainActivity, failure.message, Toast.LENGTH_SHORT).show()10 }11 }
Displaying the route involves constructing a series of instructions from the route’s legs and then using the RouteOptions to draw the route geometry and maneuver instructions. To keep the reference of the planned route to the route drawn on the map, the RouteOptions.tag property is used. It also manages zoom levels for the route overview.
It is crucial to pass the correct route offsets for the route. The property RouteOptions.routeOffset determines where instructions and route progress are rendered. Although this field is optional, we highly recommend passing the route offset directly to the RouteOptions. Ensure that the route offsets are synchronized with the route instructions offset to avoid misplaced instructions or inaccurate progress. If you use products like TomTom Routing API, we recommend using route offsets directly from the API.
1private fun drawRoute(2 route: Route,3 color: Int = RouteOptions.DEFAULT_COLOR,4 withDepartureMarker: Boolean = true,5 withZoom: Boolean = true,6) {7 val instructions =8 route.legs9 .flatMap { routeLeg -> routeLeg.instructions }10 .map {11 Instruction(12 routeOffset = it.routeOffset,13 )14 }15 val routeOptions =16 RouteOptions(17 geometry = route.geometry,18 destinationMarkerVisible = true,19 departureMarkerVisible = withDepartureMarker,20 instructions = instructions,21 routeOffset = route.routePoints.map { it.routeOffset },22 color = color,23 tag = route.id.toString(),24 )25 tomTomMap.addRoute(routeOptions)26 if (withZoom) {27 tomTomMap.zoomToRoutes(ZOOM_TO_ROUTE_PADDING)28 }29}30companion object {31 private const val ZOOM_TO_ROUTE_PADDING = 10032}
Step 4: User interaction
Learn how to interact with the map to set the destination and initiate route calculation. This step clears any existing map elements, calculates the route to the selected location, and sets up a MapLongClickListener to handle destination selection:
1private fun clearMap() {2 tomTomMap.clear()3}45private val mapLongClickListener =6 MapLongClickListener { geoPoint ->7 clearMap()8 calculateRouteTo(geoPoint)9 true10 }1112private fun setUpMapListeners() {13 tomTomMap.addMapLongClickListener(mapLongClickListener)14}
Finally, ensure these actions are executed when the map instance is ready to be used:
1private fun initMap() {2 val mapOptions = MapOptions(mapKey = apiKey)3 mapFragment = MapFragment.newInstance(mapOptions)4 supportFragmentManager.beginTransaction()5 .replace(R.id.map_container, mapFragment)6 .commit()7 mapFragment.getMapAsync { map ->8 tomTomMap = map9 enableUserLocation()10 setUpMapListeners()11 }12}
Setting up turn-by-turn navigation
Step 1: Initializing navigation
First create the NavigationTileStore using your TomTom API key. This is required, as the navigation component relies on navigation tile data.
1private fun initNavigationTileStore() {2 navigationTileStore =3 NavigationTileStore.create(4 context = applicationContext,5 navigationTileStoreConfig = NavigationTileStoreConfiguration(apiKey),6 )7}
Use the built-in navigation UI and location simulation engine to integrate turn-by-turn navigation into your application. The built-in UI displays essential information such as upcoming maneuvers, remaining distance, ETA, current speed, and speed limits. You can use default UI components or customize your own.
To start, create a TomTomNavigation object:
1private fun initNavigation() {2 tomTomNavigation =3 OnlineTomTomNavigationFactory.create(4 Configuration(5 context = applicationContext,6 navigationTileStore = navigationTileStore,7 locationProvider = locationProvider,8 routePlanner = routePlanner,9 ),10 )11 tomTomNavigation.preferredLanguage = Locale.US12}
Step 2: Creating navigation UI
To host a navigation component, add another FragmentContainerView to your layout XML file. If you want to position the navigation fragment at the bottom of the map container (assuming you have a map container with the ID "map_container"), you can use the app:layout_constraintBottom_toBottomOf attribute and set its value to @+id/map_container. This aligns the navigation fragment’s bottom edge with map container’s bottom edge.
1<androidx.fragment.app.FragmentContainerView2 android:id="@+id/navigation_fragment_container"3 android:layout_width="match_parent"4 android:layout_height="wrap_content"5 app:layout_constraintBottom_toBottomOf="@+id/map_container" />
Now, you can initialize the NavigationFragment and add it to the FragmentContainerView programmatically. Note that you must manually handle the disposal of the TomTomNavigation instance.
1private fun initNavigationFragment() {2 if (!::navigationFragment.isInitialized) {3 @Suppress("DEPRECATION")4 val navigationUiOptions =5 com.tomtom.sdk.navigation.ui.NavigationUiOptions(6 keepInBackground = true,7 )8 @Suppress("DEPRECATION")9 navigationFragment = com.tomtom.sdk.navigation.ui.NavigationFragment.newInstance(navigationUiOptions)10 }11 supportFragmentManager.beginTransaction()12 .add(R.id.navigation_fragment_container, navigationFragment)13 .commitNow()14}
Step 3: Starting navigation
Initialize the navigation process by passing a Route object and RoutePlanningOptions. Before using it, ensure that you have associated the TomTomNavigation object with the NavigationFragment.
1private fun startNavigation(route: Route) {2 initNavigationFragment()3 @Suppress("DEPRECATION")4 navigationFragment.setTomTomNavigation(tomTomNavigation)5 val routePlan = RoutePlan(route, routePlanningOptions)6 @Suppress("DEPRECATION")7 navigationFragment.startNavigation(routePlan)8 @Suppress("DEPRECATION")9 navigationFragment.addNavigationListener(navigationListener)10 tomTomNavigation.addProgressUpdatedListener(progressUpdatedListener)11 tomTomNavigation.addRouteAddedListener(routeAddedListener)12 tomTomNavigation.addRouteRemovedListener(routeRemovedListener)13 tomTomNavigation.addActiveRouteChangedListener(activeRouteChangedListener)14}1516@Suppress("DEPRECATION")17private val navigationListener =18 object : com.tomtom.sdk.navigation.ui.NavigationFragment.NavigationListener {19 @Deprecated("This will be removed 6 months after the next release.")20 override fun onStarted() {21 tomTomMap.addCameraChangeListener(cameraChangeListener)22 tomTomMap.cameraTrackingMode = CameraTrackingMode.FollowRouteDirection23 tomTomMap.enableLocationMarker(LocationMarkerOptions(LocationMarkerOptions.Type.Chevron))24 route?.let {25 setSimulationLocationProvider(it)26 } ?: setMapMatchedLocationProvider()27 setMapNavigationPadding()28 }2930 @Deprecated("This will be removed 6 months after the next release.")31 override fun onStopped() {32 stopNavigation()33 }34 }3536private val progressUpdatedListener =37 ProgressUpdatedListener {38 tomTomMap.routes.first().progress = it.distanceAlongRoute39 }
Step 4: User interaction
Users can trigger navigation by tapping on a route, if navigation is not already running. Add a RouteClickListener to the map view:
1private fun isNavigationRunning(): Boolean = tomTomNavigation.navigationState != NavigationState.Idle23private val routeClickListener =4 RouteClickListener {5 if (!isNavigationRunning()) {6 route?.let { route ->7 mapFragment.currentLocationButton.visibilityPolicy = VisibilityPolicy.Invisible8 startNavigation(route)9 }10 }11 }1213private fun setUpMapListeners() {14 tomTomMap.addMapLongClickListener(mapLongClickListener)15 tomTomMap.addRouteClickListener(routeClickListener)16}
Step 5: Updating navigation states
Respond to navigation state updates by using the implemented listeners:
- The
RouteAddedListenerdraws the route when recalculated by the navigation. The new route is drawn in gray since at this point it is not the active route yet. - The
RouteRemovedListenerremoves the route from the map, when it is no longer used by the navigation. - The
ActiveRouteChangedListenerchanges the color of the route on the map when the navigation active route is changed. - The
CameraChangeListeneradjusts UI elements based on camera tracking mode. - The
SimulationLocationProvidersimulates location updates to test the navigation UI.
1private val routeAddedListener by lazy {2 RouteAddedListener { route, _, routeAddedReason ->3 if (routeAddedReason !is RouteAddedReason.NavigationStarted) {4 drawRoute(5 route = route,6 color = Color.GRAY,7 withDepartureMarker = false,8 withZoom = false,9 )10 }11 }12}1314private val routeRemovedListener by lazy {15 RouteRemovedListener { route, _ ->16 tomTomMap.routes.find { it.tag == route.id.toString() }?.remove()17 }18}1920private val activeRouteChangedListener by lazy {21 ActiveRouteChangedListener { route ->22 tomTomMap.routes.forEach {23 if (it.tag == route.id.toString()) {24 it.color = RouteOptions.DEFAULT_COLOR25 } else {26 it.color = Color.GRAY27 }28 }29 }30}31private val cameraChangeListener by lazy {32 CameraChangeListener {33 val cameraTrackingMode = tomTomMap.cameraTrackingMode34 if (cameraTrackingMode == CameraTrackingMode.FollowRouteDirection) {35 @Suppress("DEPRECATION")36 navigationFragment.navigationView.showSpeedView()37 } else {38 @Suppress("DEPRECATION")39 navigationFragment.navigationView.hideSpeedView()40 }41 }42}43private fun setSimulationLocationProvider(route: Route) {44 val routeGeoLocations = route.geometry.map { GeoLocation(it) }45 val simulationStrategy = InterpolationStrategy(routeGeoLocations)46 val oldLocationProvider = tomTomNavigation.locationProvider47 locationProvider = SimulationLocationProvider.create(strategy = simulationStrategy)48 tomTomNavigation.locationProvider = locationProvider49 tomTomMap.setLocationProvider(locationProvider)50 oldLocationProvider.close()51 locationProvider.enable()52}
Step 6: Improving map-matching quality
To match raw location updates to the routes, use the map-matched LocationProvider and set it to the TomTomMap.
Note that this does not apply to route simulation cases. In simulation mode, location data for both the map and navigation should be sourced exclusively from the simulation location provider.
1private fun setMapMatchedLocationProvider() {2 val mapMatchedLocationProvider = MapMatchedLocationProviderFactory.create(tomTomNavigation)3 tomTomMap.setLocationProvider(mapMatchedLocationProvider)4 mapMatchedLocationProvider.enable()5}
Step 7: Adjusting map display
You can set padding on the map to ensure proper visibility of the navigation UI elements:
1<dimen name="map_padding_bottom">263.0dp</dimen>23private fun setMapNavigationPadding() {4 val paddingBottom = resources.getDimensionPixelOffset(R.dimen.map_padding_bottom)5 val padding = Padding(0, 0, 0, paddingBottom)6 tomTomMap.setPadding(padding)7}
Step 8: Stopping navigation
Properly handle the end of the navigation process, including UI and resource clean-up:
1private fun stopNavigation() {2 @Suppress("DEPRECATION")3 navigationFragment.stopNavigation()4 mapFragment.currentLocationButton.visibilityPolicy =5 VisibilityPolicy.InvisibleWhenRecentered6 tomTomMap.removeCameraChangeListener(cameraChangeListener)7 tomTomMap.cameraTrackingMode = CameraTrackingMode.None8 tomTomMap.enableLocationMarker(LocationMarkerOptions(LocationMarkerOptions.Type.Pointer))9 tomTomMap.setPadding(Padding(0, 0, 0, 0))10 @Suppress("DEPRECATION")11 navigationFragment.removeNavigationListener(navigationListener)12 tomTomNavigation.removeProgressUpdatedListener(progressUpdatedListener)13 tomTomNavigation.removeRouteAddedListener(routeAddedListener)14 tomTomNavigation.removeRouteRemovedListener(routeRemovedListener)15 tomTomNavigation.removeActiveRouteChangedListener(activeRouteChangedListener)16 clearMap()17 initLocationProvider()18 enableUserLocation()19}
Step 9: Clean Up
Remember to release resources when navigation is no longer needed:
1override fun onDestroy() {2 tomTomMap.setLocationProvider(null)3 if (::navigationFragment.isInitialized) {4 supportFragmentManager.beginTransaction().remove(navigationFragment)5 .commitNowAllowingStateLoss()6 }7 tomTomNavigation.close()8 routePlanner.close()9 locationProvider.close()10 navigationTileStore.close()11 super.onDestroy()12}
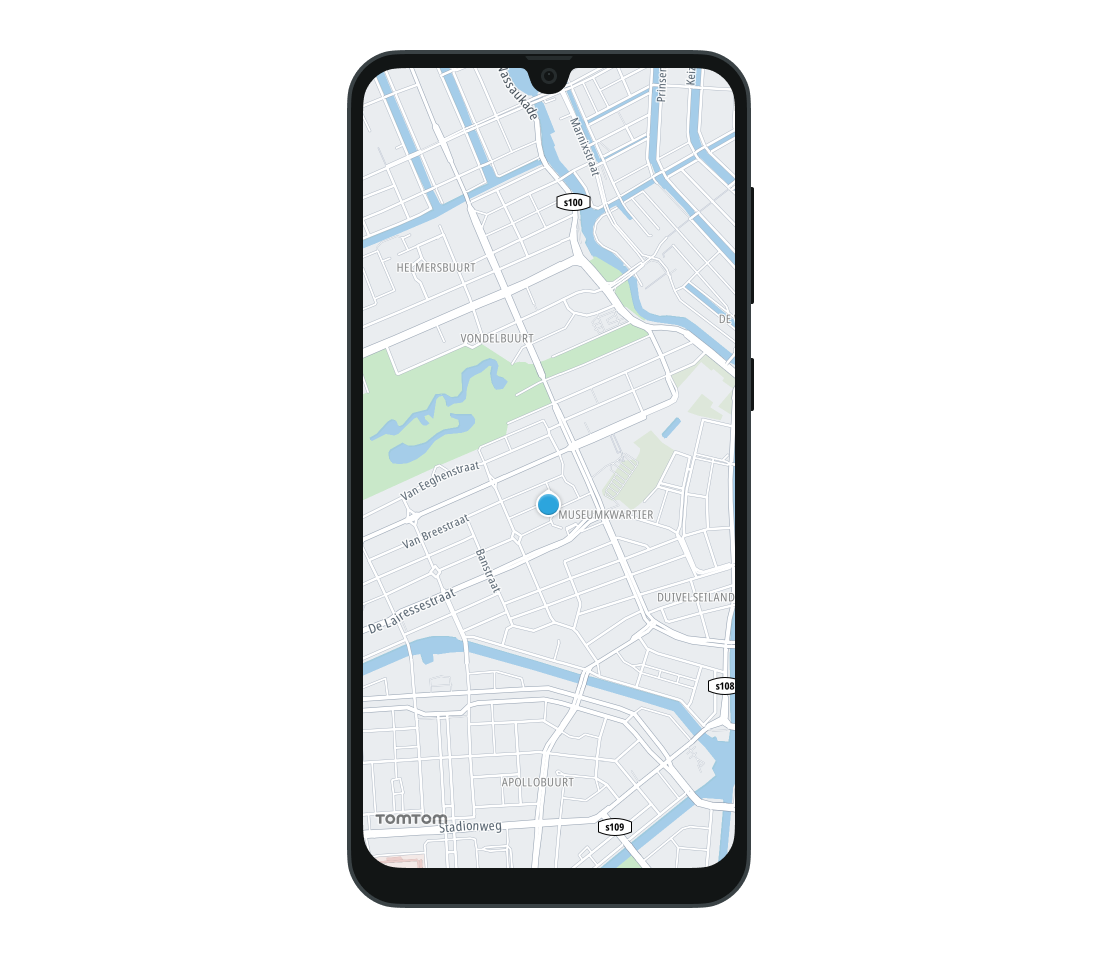
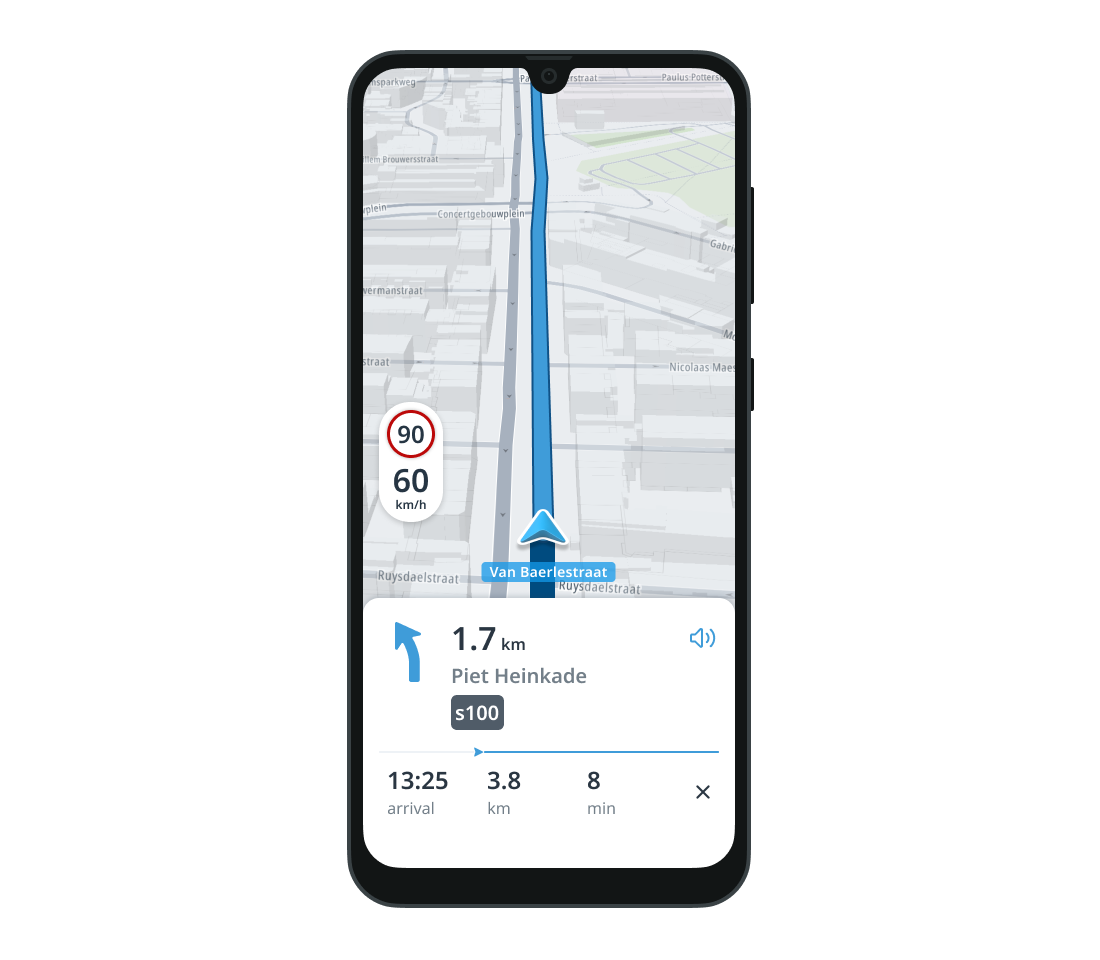
Run the application. You should see a globe showing the user’s location. Set the destination point with a long press. If you want to start navigation along the drawn route, tap it. Navigation should start with a guidance panel and voice instructions.
Next steps
The TomTom Navigation SDK allows you to customize the appearance of the map and its overlays, use your own Navigation UI components, or provide a custom implementation of certain navigation behaviors. See the following guides for more information: