Building a navigation app
The Navigation SDK for iOS is only available upon request. Contact us to get started.
This tutorial shows how to build a simple navigation application using the TomTom Navigation SDK for iOS. The app uses built-in UI components. However, you can build custom components and integrate them with the SDK.
The application displays a map that shows the user’s location and configures the components needed for online navigation. After the user selects a destination with a long click, the app plans a route and draws it on the map. Navigation is started automatically using the route simulation.
Project setup
- Create an empty SwiftUI application project with Xcode 16.0 or newer. Set the deployment target to iOS 14.
- Complete the project setup guide for the project you’ve created.
- Import the necessary frameworks using the following instructions, based on your preferred package manager:
Swift Package Manager
- Open your App’s target and navigate to General > Frameworks, Libraries, and Embedded Content.
- Add the following TomTomSDK libraries from the provided code snippet. Once the project is set up, import the mentioned frameworks into your code.
1// System modules.2import Combine3import CoreLocation4import SwiftUI56// TomTomSDK modules.7import TomTomSDKCommonUI8import TomTomSDKDefaultTextToSpeech9import TomTomSDKLocationProvider10import TomTomSDKMapDisplay11import TomTomSDKNavigation12import TomTomSDKNavigationEngines13import TomTomSDKNavigationOnline14import TomTomSDKNavigationTileStore15import TomTomSDKNavigationUI16import TomTomSDKRoute17import TomTomSDKRoutePlanner18import TomTomSDKRoutePlannerOnline19import TomTomSDKRoutingCommon
CocoaPods
- Open your project’s
Podfileand add the required modules to the project’s target:1TOMTOM_SDK_VERSION = '0.73.1'2target 'YourAppTarget' do3 use_frameworks!4 pod 'TomTomSDKCommon', TOMTOM_SDK_VERSION5 pod 'TomTomSDKCommonUI', TOMTOM_SDK_VERSION6 pod 'TomTomSDKDefaultTextToSpeech', TOMTOM_SDK_VERSION7 pod 'TomTomSDKLocationProvider', TOMTOM_SDK_VERSION8 pod 'TomTomSDKMapDisplay', TOMTOM_SDK_VERSION9 pod 'TomTomSDKNavigation', TOMTOM_SDK_VERSION10 pod 'TomTomSDKNavigationEngines', TOMTOM_SDK_VERSION11 pod 'TomTomSDKNavigationOnline', TOMTOM_SDK_VERSION12 pod 'TomTomSDKNavigationUI', TOMTOM_SDK_VERSION13 pod 'TomTomSDKRoute', TOMTOM_SDK_VERSION14 pod 'TomTomSDKRoutePlanner', TOMTOM_SDK_VERSION15 pod 'TomTomSDKRoutePlannerOnline', TOMTOM_SDK_VERSION16 pod 'TomTomSDKRouteReplannerDefault', TOMTOM_SDK_VERSION17 pod 'TomTomSDKSearch', TOMTOM_SDK_VERSION18end - Install the dependencies by executing the following commands in the project directory:
pod repo update tomtom-sdk-cocoapodspod install --repo-update
- Import the following frameworks in your project’s
<ProjectName>App.swiftfile:1// System modules.2import Combine3import CoreLocation4import SwiftUI56// TomTomSDK modules.7import TomTomSDKCommonUI8import TomTomSDKDefaultTextToSpeech9import TomTomSDKLocationProvider10import TomTomSDKMapDisplay11import TomTomSDKNavigation12import TomTomSDKNavigationEngines13import TomTomSDKNavigationOnline14import TomTomSDKNavigationTileStore15import TomTomSDKNavigationUI16import TomTomSDKRoute17import TomTomSDKRoutePlanner18import TomTomSDKRoutePlannerOnline19import TomTomSDKRoutingCommon
With the dependencies set up, you can proceed to the next step and start displaying the map.
Combine all the code snippets from this tutorial into a single Swift file, such as your project’s 'App.swift' file. The code only successfully compiles at the end of each section.
Displaying a map
After successfully creating your iOS application, you can initialize and display the map with the following steps:
Step 1: Assigning the API Key
Assign the key for TomTomSDKMapDisplay by adding the following line to your app’s initializer method:
1// Replace the content of the App struct in your Xcode project with the content of the provided snippet.2@main3struct MyNavigationApp: App {4 var body: some Scene {5 WindowGroup {6 ContentView()7 .ignoresSafeArea(edges: [.top, .bottom])8 }9 }1011 init() {12 TomTomSDKMapDisplay.MapsDisplayService.apiKey = Keys.tomtomApiKey13 }14}
Step 2: Map UI setup
Construct the MapCoordinator class that is used to handle map events:
1final class MapCoordinator {2 init(mapView: TomTomSDKMapDisplay.MapView) {3 self.mapView = mapView4 }56 private let mapView: TomTomSDKMapDisplay.MapView7 private var map: TomTomSDKMapDisplay.TomTomMap?8}
Construct the TomTomMapView structure, which contains the map view setup:
1struct TomTomMapView {2 var mapView = TomTomSDKMapDisplay.MapView()3}
Step 3: SwiftUI integration
Extend the TomTomMapView struct to conform to the UIViewRepresentable protocol. This allows you to use the TomTomMapView in SwiftUI:
1extension TomTomMapView: UIViewRepresentable {2 func makeUIView(context: Context) -> TomTomSDKMapDisplay.MapView {3 return mapView4 }56 func updateUIView(_: TomTomSDKMapDisplay.MapView, context: Context) {}78 func makeCoordinator() -> MapCoordinator {9 MapCoordinator(mapView: mapView)10 }11}
Step 4: Displaying the map
Replace the ContentView structure declaration, enabling the presentation of the TomTomMapView on the application screen:
1struct ContentView: View {2 var body: some View {3 ZStack(alignment: .bottom) {4 TomTomMapView()5 }6 }7}
Once you have the TomTomMap object, you can perform various actions such as adding markers or drawing routes.
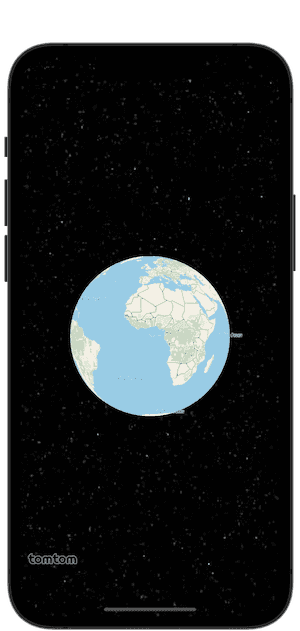
Build and run your application. The application screen should have a globe on it as follows:
Showing user location
This section guides you through displaying the user’s location on the map and adjusting the camera to focus on the user’s position. To enable this functionality, use the following steps:
Step 1: Enabling location services
Before proceeding with code changes, you must properly configure your app’s Info.plist according to the Apple documentation, for the following keys:
NSLocationAlwaysAndWhenInUseUsageDescriptionNSLocationWhenInUseUsageDescription
Step 2: Requesting authorization to use location services
To get appropriate permissions, you must send authorization request by calling requestWhenInUseAuthorization() or requestAlwaysAuthorization() on the CLLocationManager instance respectively. Complete instructions to request location permissions on iOS can be found at Requesting authorization for location services.
Step 3: Setting up map coordinator
Add the cameraUpdated parameter to MapCoordinator to handle camera updates:
1final class MapCoordinator {2 init(3 mapView: TomTomSDKMapDisplay.MapView,4 locationManager: CLLocationManager = CLLocationManager()5 ) {6 self.mapView = mapView7 self.locationManager = locationManager8 locationManager.requestWhenInUseAuthorization()9 }1011 private let locationManager: CLLocationManager12 private let mapView: TomTomSDKMapDisplay.MapView13 private var map: TomTomSDKMapDisplay.TomTomMap?14 private var cameraUpdated = false15}
Step 4: Enabling camera utility functions
Extend the MapCoordinator class with utility functions that control the camera’s behavior. These functions enable: * zooming, * panning, * rotating, and * tilting the map. More information about camera controls on CameraUpdate:
1extension MapCoordinator {2 private var defaultCameraUpdate: CameraUpdate {3 let defaultLocation = CLLocation(latitude: 0.0, longitude: 0.0)4 return CameraUpdate(5 position: defaultLocation.coordinate,6 zoom: 1.0,7 tilt: 0.0,8 rotation: 0.0,9 positionMarkerVerticalOffset: 0.010 )11 }1213 func animateCamera(14 zoom: Double,15 position: CLLocationCoordinate2D,16 animationDurationInSeconds: TimeInterval,17 onceOnly: Bool18 ) {19 if onceOnly, cameraUpdated {20 return21 }22 cameraUpdated = true23 var cameraUpdate = defaultCameraUpdate24 cameraUpdate.zoom = zoom25 cameraUpdate.position = position26 map?.applyCamera(27 cameraUpdate,28 animationDuration: animationDurationInSeconds29 )30 }31}
Step 5: Following user location
Extend the MapCoordinator class to conform to the TomTomSDKLocationProvider.LocationUpdateObserver protocol to observe GPS updates:
1extension MapCoordinator: TomTomSDKLocationProvider.LocationUpdateObserver {2 func didUpdateLocation(location: GeoLocation) {3 // Zoom and center the camera on the first location received.4 animateCamera(5 zoom: 9.0,6 position: location.location.coordinate,7 animationDurationInSeconds: 1.5,8 onceOnly: true9 )10 }11}
Step 6: Starting location updates
Add an extension to MapCoordinator that conforms to TomTomSDKMapDisplay.MapDelegate:
1extension MapCoordinator: TomTomSDKMapDisplay.MapDelegate {2 func map(_ map: TomTomMap, onInteraction interaction: MapInteraction) {3 // Handle map interactions.4 }56 func map(_ map: TomTomMap, onCameraEvent event: CameraEvent) {7 // Handle camera events.8 }9}
In your MapCoordinator conform to the TomTomSDKMapDisplay.MapViewDelegate protocol, update the MapViewDelegate.mapView(_:onMapReady:) method to start observing location updates:
1extension MapCoordinator: TomTomSDKMapDisplay.MapViewDelegate {2 func mapView(_ mapView: MapView, onMapReady map: TomTomMap) {3 // Store the map to be used later.4 self.map = map56 // Observe map events.7 map.delegate = self89 // Observe location updates.10 map.locationProvider.addObserver(self)1112 // Display a chevron.13 map.locationIndicatorType = .navigationChevron(scale: 1)1415 // Activate the GPS location engine in TomTomSDK.16 map.activateLocationProvider()1718 // Configure the camera to center on the current location.19 map.applyCamera(defaultCameraUpdate)20 }2122 func mapView(23 _ mapView: MapView,24 onStyleLoad result: Result<StyleContainer, Error>25 ) {26 print("Style loaded")27 }28}
Finally, find the TomTomMapView extension that conforms to UIViewRepresentable and set the MapView delegate:
1extension TomTomMapView: UIViewRepresentable {2 func makeUIView(context: Context) -> TomTomSDKMapDisplay.MapView {3 mapView.delegate = context.coordinator4 return mapView5 }67 func updateUIView(_: TomTomSDKMapDisplay.MapView, context: Context) {}89 func makeCoordinator() -> MapCoordinator {10 MapCoordinator(mapView: mapView)11 }12}
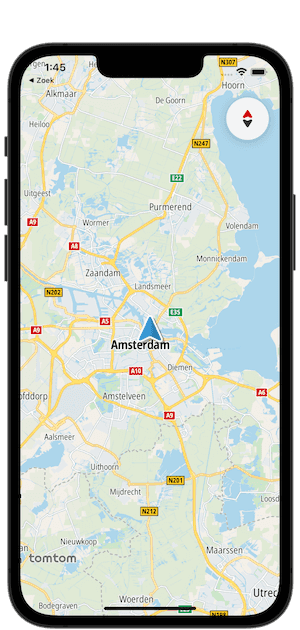
Once you’ve completed these steps, build your app. The camera will now zoom in on the user’s current location upon startup, indicated by the blue chevron. Remember to simulate the location if you’re using the iOS Simulator for testing.
Planning a route
Now you can add the ability to plan a route to a location on the map once the long press event has been triggered.
Step 1: Setting up the route planner
Create a new class, NavigationController, with OnlineRoutePlanner to handle route planning:
1final class NavigationController: ObservableObject {2 convenience init() {3 let routePlanner = TomTomSDKRoutePlannerOnline4 .OnlineRoutePlanner(apiKey: Keys.tomtomApiKey)5 let locationProvider = DefaultCLLocationProvider()67 self.init(8 locationProvider: locationProvider,9 routePlanner: routePlanner,10 locationManager: CLLocationManager()11 )12 }1314 init(15 locationProvider: LocationProvider,16 routePlanner: TomTomSDKRoutePlannerOnline.OnlineRoutePlanner,17 locationManager: CLLocationManager18 ) {19 self.locationProvider = locationProvider20 self.routePlanner = routePlanner21 self.locationManager = locationManager22 self.locationManager.requestWhenInUseAuthorization()23 self.locationProvider.enable()24 }2526 let locationProvider: LocationProvider27 let locationManager: CLLocationManager28 let routePlanner: TomTomSDKRoutePlannerOnline.OnlineRoutePlanner2930 var routePlanningOptions: TomTomSDKRoutingCommon.RoutePlanningOptions?3132 let displayedRouteSubject = PassthroughSubject<33 TomTomSDKRoute.Route?,34 Never35 >()36}
Update your TomTomMapView by adding a NavigationController:
1struct TomTomMapView {2 var mapView = TomTomSDKMapDisplay.MapView()3 var navigationController: NavigationController4}
Update the TomTomMapView UIViewRepresentable implementation:
1extension TomTomMapView: UIViewRepresentable {2 func makeUIView(context: Context) -> TomTomSDKMapDisplay.MapView {3 mapView.delegate = context.coordinator4 return mapView5 }67 func updateUIView(_: TomTomSDKMapDisplay.MapView, context: Context) {}89 func makeCoordinator() -> MapCoordinator {10 MapCoordinator(11 mapView: mapView,12 navigationController: navigationController13 )14 }15}
Update the TomTomMapView initializer in your ContentView by adding a NavigationController:
1struct ContentView: View {2 @ObservedObject3 var navigationController = NavigationController()45 var body: some View {6 ZStack(alignment: .bottom) {7 TomTomMapView(navigationController: navigationController)8 }9 }10}
Step 2: Planning a route
Include the RoutePlanner.planRoute(options:onRouteReady:completion:) method, which calculates a route between specified origin and destination coordinates:
1extension NavigationController {2 enum RoutePlanError: Error {3 case unableToPlanRoute4 }56 private func planRoute(7 from origin: CLLocationCoordinate2D,8 to destination: CLLocationCoordinate2D9 ) async throws10 -> TomTomSDKNavigationEngines.RoutePlan {11 routePlanningOptions = try createRoutePlanningOptions(12 from: origin,13 to: destination14 )15 let route = try await planRoute(16 withRoutePlanner: routePlanner,17 routePlanningOptions: routePlanningOptions!18 )19 return TomTomSDKNavigationEngines20 .RoutePlan(route: route, routePlanningOptions: routePlanningOptions!)21 }2223 private func createRoutePlanningOptions(24 from origin: CLLocationCoordinate2D,25 to destination: CLLocationCoordinate2D26 )27 throws -> TomTomSDKRoutingCommon.RoutePlanningOptions {28 let itinerary = Itinerary(29 origin: ItineraryPoint(coordinate: origin),30 destination: ItineraryPoint(coordinate: destination)31 )32 let costModel = CostModel(routeType: .fast)3334 let guidanceOptions = try TomTomSDKRoutingCommon.GuidanceOptions()3536 let options = try TomTomSDKRoutingCommon.RoutePlanningOptions(37 itinerary: itinerary,38 costModel: costModel,39 guidanceOptions: guidanceOptions40 )41 return options42 }4344 private func planRoute(45 withRoutePlanner routePlanner: OnlineRoutePlanner,46 routePlanningOptions: TomTomSDKRoutingCommon.RoutePlanningOptions47 ) async throws48 -> TomTomSDKRoute.Route {49 return try await withCheckedThrowingContinuation {50 (continuation: CheckedContinuation<TomTomSDKRoute.Route, Error>) in51 routePlanner.planRoute(52 options: routePlanningOptions,53 onRouteReady: nil54 ) { result in55 switch result {56 case let .failure(error):57 continuation.resume(throwing: error)58 case let .success(response):59 guard let route = response.routes?.first else {60 continuation61 .resume(throwing: RoutePlanError.unableToPlanRoute)62 return63 }64 continuation.resume(returning: route)65 }66 }67 }68 }69}
Step 3: Preparing the route to be displayed
Implement the planAndDisplayRoute(destination: CLLocationCoordinate2D) method, which is responsible for planning a route and sending it to the map for display:
1extension NavigationController {2 func planAndDisplayRoute(destination: CLLocationCoordinate2D) {3 Task { @MainActor in4 do {5 // Plan the route and add it to the map6 guard let start = locationProvider.lastKnownLocation?.location.coordinate7 else { return }8 let routePlan = try await planRoute(9 from: start,10 to: destination11 )1213 let route = routePlan.route14 self.displayedRouteSubject.send(route)15 } catch {16 print("Error when planning a route: \(error)")17 }18 }19 }20}
Step 4: Displaying the route on the map
Update `MapCoordinator`s extension to incorporate route planning functionality, allowing it to calculate a route from the current location to the selected destination when a long press event occurs:
1extension MapCoordinator: TomTomSDKMapDisplay.MapDelegate {2 func map(_ map: TomTomMap, onInteraction interaction: MapInteraction) {3 switch interaction {4 case let .longPressed(coordinate):5 navigationController.planAndDisplayRoute(destination: coordinate)6 default:7 // Handle other gestures.8 break9 }10 }1112 func map(_ map: TomTomMap, onCameraEvent event: CameraEvent) {13 // Handle camera events.14 }15}
Extend the MapCoordinator with the MapCoordinator.observe(navigationController:) method that will display the route on the map after it is planned:
1extension MapCoordinator {2 func observe(navigationController: NavigationController) {3 navigationController.displayedRouteSubject.sink { [weak self] route in4 guard let self = self else { return }5 if let route = route {6 self.addRouteToMap(route: route)7 } else {8 self.routeOnMap = nil9 self.map?.removeRoutes()10 }11 }.store(in: &cancellableBag)12 }13}
Execute the MapCoordinator.observe(navigationController:) method in the MapCoordinator initializer:
1final class MapCoordinator {2 init(3 mapView: TomTomSDKMapDisplay.MapView,4 navigationController: NavigationController5 ) {6 self.mapView = mapView7 self.navigationController = navigationController8 observe(navigationController: navigationController)9 }1011 private let mapView: TomTomSDKMapDisplay.MapView12 private var map: TomTomSDKMapDisplay.TomTomMap?13 private var cameraUpdated = false14 private let navigationController: NavigationController15 private var routeOnMap: TomTomSDKMapDisplay.Route?16 private var cancellableBag = Set<AnyCancellable>()17}
Extend the functionality of MapCoordinator by adding methods for drawing routes on the map and configuring camera tracking modes:
1extension MapCoordinator {2 private func createMapRouteOptions(3 coordinates: [CLLocationCoordinate2D]4 )5 -> TomTomSDKMapDisplay.RouteOptions {6 var routeOptions = RouteOptions(coordinates: coordinates)7 routeOptions.outlineWidth = 18 routeOptions.routeWidth = 59 routeOptions.color = .activeRoute10 return routeOptions11 }1213 func addRouteToMap(route: TomTomSDKRoute.Route) {14 // Create the route options from the route geometry15 // and adds it to the map.16 let routeOptions = createMapRouteOptions(coordinates: route.geometry)17 if let routeOnMap = try? map?.addRoute(routeOptions) {18 self.routeOnMap = routeOnMap1920 // Zoom the map to make the route visible.21 map?.zoomToRoutes(padding: 32)22 }23 }2425 func setCamera(trackingMode: TomTomSDKMapDisplay.CameraTrackingMode) {26 map?.cameraTrackingMode = trackingMode2728 // Update the chevron position on the screen29 // so it is not hidden behind the navigation panel.30 if trackingMode == .followRouteDirection() || trackingMode == .followNorthUp() {31 let cameraUpdate = CameraUpdate(positionMarkerVerticalOffset: 0.4)32 map?.moveCamera(cameraUpdate)33 }34 }35}
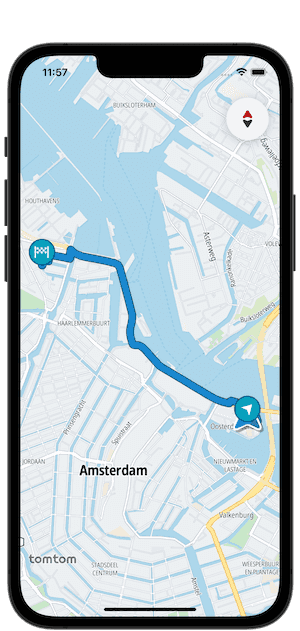
After completing these steps, you can build the application. Just perform a long press on the map, and the application plans a route from your current location to the selected point on the map, displaying it on the screen:
Setting up turn-by-turn navigation
In this section, we show you how to navigate on a planned route.
Step 1: Enable Background App Refresh
Create an Info.plist file with the UIBackgroundModes key, this will allow for map updates in the background:
1<plist version="1.0">2<dict>3 <key>UIBackgroundModes</key>4 <array>5 <string>fetch</string>6 </array>7</dict>8</plist>
Step 2: Setting up navigation
Add a TomTomNavigation object to the NavigationController to process location updates and convert them into navigation events:
1final class NavigationController: ObservableObject {2 convenience init() {3 let textToSpeech = try! SystemTextToSpeechEngine()4 let routePlanner = TomTomSDKRoutePlannerOnline5 .OnlineRoutePlanner(apiKey: Keys.tomtomApiKey)6 let locationProvider = DefaultCLLocationProvider()7 let delay = Measurement.tt.seconds(1)8 let simulatedLocationProvider = SimulatedLocationProvider(delay: delay)9 let navigationConfiguration = OnlineTomTomNavigationFactory10 .Configuration(11 navigationTileStore: try! NavigationTileStore(config: NavigationTileStoreConfiguration(12 apiKey: Keys13 .tomtomApiKey14 )),15 locationProvider: simulatedLocationProvider,16 routePlanner: routePlanner,17 betterProposalAcceptanceMode: .automatic18 )19 let navigation = try! OnlineTomTomNavigationFactory20 .create(configuration: navigationConfiguration)21 let navigationModel = TomTomSDKNavigationUI.NavigationView22 .ViewModel(navigation, tts: textToSpeech)2324 self.init(25 locationProvider: locationProvider,26 locationManager: CLLocationManager(),27 simulatedLocationProvider: simulatedLocationProvider,28 routePlanner: routePlanner,29 navigation: navigation,30 navigationModel: navigationModel31 )32 }3334 init(35 locationProvider: LocationProvider,36 locationManager: CLLocationManager,37 simulatedLocationProvider: SimulatedLocationProvider,38 routePlanner: TomTomSDKRoutePlannerOnline.OnlineRoutePlanner,39 navigation: TomTomSDKNavigation.TomTomNavigation,40 navigationModel: TomTomSDKNavigationUI.NavigationView.ViewModel41 ) {42 self.locationProvider = locationProvider43 self.locationManager = locationManager44 self.simulatedLocationProvider = simulatedLocationProvider45 self.routePlanner = routePlanner46 self.navigation = navigation47 self.navigationViewModel = navigationModel4849 self.navigation.addProgressObserver(self)50 self.navigation.addRouteAddObserver(self)51 self.navigation.addRouteRemoveObserver(self)52 self.navigation.addRouteUpdateObserver(self)53 self.navigation.addActiveRouteChangeObserver(self)54 locationManager.requestWhenInUseAuthorization()55 locationProvider.enable()56 }5758 let locationProvider: LocationProvider59 let locationManager: CLLocationManager60 let simulatedLocationProvider: SimulatedLocationProvider61 let routePlanner: TomTomSDKRoutePlannerOnline.OnlineRoutePlanner62 let navigation: TomTomSDKNavigation.TomTomNavigation63 let navigationViewModel: TomTomSDKNavigationUI.NavigationView.ViewModel6465 var routePlanningOptions: TomTomSDKRoutingCommon.RoutePlanningOptions?66 var displayedRoutes: [UUID: TomTomSDKRoute.Route] = [:]6768 let displayedRouteSubject = PassthroughSubject<69 TomTomSDKRoute.Route?,70 Never71 >()72 let navigateRouteSubject = PassthroughSubject<73 TomTomSDKRoute.Route?,74 Never75 >()76 let progressOnRouteSubject = PassthroughSubject<77 Measurement<UnitLength>,78 Never79 >()80 let mapMatchedLocationProvider = PassthroughSubject<81 LocationProvider,82 Never83 >()8485 @Published86 var showNavigationView: Bool = false87}
Extend the NavigationController with a navigateOn(route: TomTomSDKRoute.Route) method. It will start navigation on the selected route:
1extension NavigationController {2 func navigateOn(route: TomTomSDKRoute.Route) {3 Task { @MainActor in4 guard let routePlanningOptions else { return }56 self.displayedRouteSubject.send(nil) // clear previous route after replanning78 self.displayedRouteSubject.send(route)910 let routePlan = RoutePlan(route: route, routePlanningOptions: routePlanningOptions)1112 let navigationOptions = NavigationOptions(13 activeRoutePlan: routePlan14 )15 self.navigationViewModel.start(navigationOptions)16 // Use simulated location updates.17 self.simulatedLocationProvider18 .updateCoordinates(route.geometry, interpolate: true)19 self.simulatedLocationProvider.enable()20 self.mapMatchedLocationProvider21 .send(navigation.mapMatchedLocationProvider)2223 self.navigateRouteSubject.send(route)24 self.showNavigationView = true25 }26 }2728 func stopNavigating() {29 displayedRouteSubject.send(nil)30 navigationViewModel.stop()31 simulatedLocationProvider.disable()32 showNavigationView = false33 }34}
Step 3: Starting navigation on the selected route
Extend the NavigationController with RouteDelegate. This lets you know when a user presses on the route:
1extension NavigationController: RouteDelegate {2 func mapRoute(3 _ route: TomTomSDKMapDisplay.Route,4 didTapOnCoordinate coordinate: CLLocationCoordinate2D,5 waypointIndex: Int6 ) {7 guard let route = displayedRoutes[route.routeID]8 else { return }910 navigateOn(route: route)11 }12}
Update the MapCoordinator.addRouteToMap(route:) method to add the RouteDelegate.
1func addRouteToMap(route: TomTomSDKRoute.Route, zoom: Bool = false) {2 // Create the route options from the route geometry3 // and add it to the map.4 let routeOptions = createMapRouteOptions(coordinates: route.geometry)5 if let routeOnMap = try? map?.addRoute(routeOptions) {6 self.routeOnMap = routeOnMap7 navigationController.displayedRoutes[routeOnMap.routeID] = route8 routeOnMap.delegate = navigationController910 // Zoom the map to make the route visible.11 if !navigationController.showNavigationView {12 map?.zoomToRoutes(padding: 32) // zoom to the route if no navigation in progress13 }14 }15}
Step 4: Observing navigation events
Extend NavigationController to conform to NavigationProgressObserver to enable progress updates during navigation:
1extension NavigationController: TomTomSDKNavigation.NavigationProgressObserver {2 func didUpdateProgress(progress: RouteProgress) {3 progressOnRouteSubject.send(progress.distanceAlongRoute)4 }5}
Extend the NavigationController class to handle navigation events and ensure the use of TomTomSDKNavigationUI.NavigationView.ViewModel for displaying both visual and voice instructions:
1extension NavigationController {2 func onNavigationViewAction(3 _ action: TomTomSDKNavigationUI.NavigationView.Action4 ) {5 switch action {6 case let .arrival(action):7 onArrivalAction(action)8 case let .instruction(action):9 onInstructionAction(action)10 case let .confirmation(action):11 onConfirmationAction(action)12 case let .error(action):13 onErrorAction(action)14 @unknown default:15 /* YOUR CODE GOES HERE */16 break17 }18 }1920 fileprivate func onArrivalAction(21 _ action: TomTomSDKNavigationUI.NavigationView.ArrivalAction22 ) {23 switch action {24 case .close:25 stopNavigating()26 @unknown default:27 /* YOUR CODE GOES HERE */28 break29 }30 }3132 fileprivate func onInstructionAction(33 _ action: TomTomSDKNavigationUI.NavigationView.InstructionAction34 ) {35 switch action {36 case let .tapSound(muted):37 navigationViewModel.muteTextToSpeech(mute: !muted)38 case .tapLanes:39 navigationViewModel.hideLanes()40 case .tapThen:41 navigationViewModel.hideCombinedInstruction()42 @unknown default:43 /* YOUR CODE GOES HERE */44 break45 }46 }4748 fileprivate func onConfirmationAction(49 _ action: TomTomSDKNavigationUI.NavigationView.ConfirmationAction50 ) {51 switch action {52 case .yes:53 stopNavigating()54 case .no:55 /* YOUR CODE GOES HERE */56 break57 @unknown default:58 /* YOUR CODE GOES HERE */59 break60 }61 }6263 fileprivate func onErrorAction(64 _ action: TomTomSDKNavigationUI.NavigationView.ErrorAction65 ) {66 /* YOUR CODE GOES HERE */67 }68}
Extend the NavigationController class to handle the following route related changes:
- adding of a new route, e.g. if navigation proposes a better route
- removal of an existing route, e.g. if a better route proposal is rejected
- updating of an existing route, e.g. to obtain the latest traffic information
- changing of the active route, e.g. if a better route proposal is accepted
1extension NavigationController: TomTomSDKNavigation.NavigationRouteAddObserver,2 TomTomSDKNavigation.NavigationRouteRemoveObserver,3 TomTomSDKNavigation.NavigationActiveRouteChangeObserver,4 TomTomSDKNavigation.NavigationRouteUpdateObserver {5 func didAddRoute(6 route: TomTomSDKRoute.Route,7 options: TomTomSDKRoutingCommon.RoutePlanningOptions,8 reason: TomTomSDKNavigation.RouteAddedReason9 ) {10 let triggeringReasons: [RouteAddedReason] = [.avoidBlockage, .deviated, .manuallyUpdated, .withinRange]11 if triggeringReasons.contains(reason) {12 displayedRouteSubject.send(nil) // clear previous route after replanning13 displayedRouteSubject.send(route)14 }15 }1617 func didRemoveRoute(route: TomTomSDKRoute.Route, reason: TomTomSDKNavigation.RouteRemovedReason) {}1819 func didChangeActiveRoute(route: TomTomSDKRoute.Route) {}2021 func didUpdateRoute(route: TomTomSDKRoute.Route, reason: TomTomSDKNavigation.RouteUpdatedReason) {}22}
Update the MapCoordinator.observe(navigationController:) method to process progress and LocationProvider updates:
1extension MapCoordinator {2 func observe(navigationController: NavigationController) {3 navigationController.displayedRouteSubject.sink { [weak self] route in4 guard let self = self else { return }5 if let route = route {6 self.addRouteToMap(route: route)7 } else {8 self.navigationController.displayedRoutes = [:]9 self.routeOnMap = nil10 self.map?.removeRoutes()11 self.setCamera(trackingMode: .none)12 }13 }.store(in: &cancellableBag)1415 navigationController.navigateRouteSubject16 .sink { [weak self] route in17 guard let self = self else { return }18 if route != nil {19 self.setCamera(trackingMode: .followRouteDirection())20 } else {21 self.setCamera(trackingMode: .followNorthUp())22 }23 }.store(in: &cancellableBag)2425 navigationController.progressOnRouteSubject26 .sink { [weak self] progress in27 self?.routeOnMap?.progressOnRoute = progress28 }.store(in: &cancellableBag)2930 navigationController.mapMatchedLocationProvider31 .sink { [weak self] locationProvider in32 self?.map?.locationProvider = locationProvider33 }.store(in: &cancellableBag)34 }35}
Step 5: Displaying navigation UI
Include a NavigationView in your ContentView to enable the display of navigation-related information:
1struct ContentView: View {2 @ObservedObject3 var navigationController = NavigationController()45 var body: some View {6 ZStack(alignment: .bottom) {7 TomTomMapView(navigationController: navigationController)8 if navigationController.showNavigationView {9 NavigationView(10 navigationController.navigationViewModel,11 action: navigationController.onNavigationViewAction12 )13 }14 }15 }16}
To enable voice guidance on the iOS 16+ simulator, access the "Settings" app on the simulator’s home screen. Within the Settings, navigate to "Accessibility" > "Spoken Content" and enable the "Speak Selection" toggle. Proceed to the "Voices" submenu, select and download a voice. Finally, press the play button on the downloaded voice to test it.
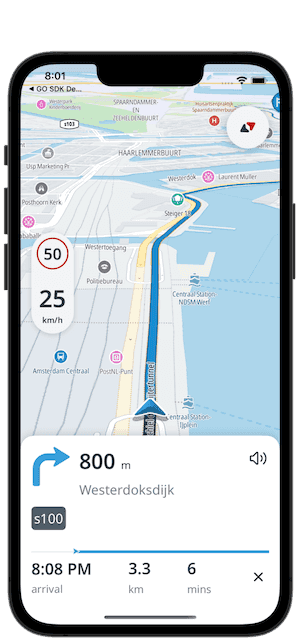
After completing these steps, you can build the app. Simply, perform a long press on the map and the app will plan a route from your current location to the selected point on the map and start the navigation simulation, including voice guidance:
Next steps
The TomTom Navigation SDK lets you customize the appearance of the map and its overlays, use your own Navigation UI components, or provide a custom implementation of certain navigation behaviors. See the following guides for more information: