Quick start
In this guide you will learn how to:
- Create your style out of the provided templates.
- Add modules, like traffic incidents, to the map.
- Customize the style.
- Publish the style and use it in your application.
Setup
Before we start, you will need a MyTomTom account. If you already have it, move to the next section.
- Go to MyTomTom.
- Click Register.
- Fill out the form and follow the provided steps.
Create a style
Map Maker provides a set of style templates that you can use as a base for your own style. You can also enable Map Modules like Traffic and Terrain.
- Open Map Maker.
- Click Add style.
- Choose template. You will immediately see the preview.
- (Optional) Choose Map Modules. You can always add them later.
- Set the style name and click Open style.
- All set up! You can now start customizing your style.
Customize colors
The simplest way to customize the map style is to use the Foundations tab.
- Take a look at the Foundations tab.
- Choose one of the Map Colors (for example Vegetation or Major Road). Each of those colors impacts multiple features on the map.
- Observe all woods and greenland areas change color. If you zoom in, you will see that label colors were updated. This is because the Vegetation color is connected to multiple layers and their properties.
Read more about how this works in Foundations guide.
Publish and Share
The Draft is a style you are currently working on. Every change that you make in Map Maker is immediately saved in the Draft style. You can use the Draft style in your test application. Once you are happy with all the changes, you can publish the Draft style. In your production application, you should only use the Production styles. This way, any additional changes in the Draft won't impact your production application until you publish the style again.
- Click the Publish button.
- Compare both the Draft and Production versions.
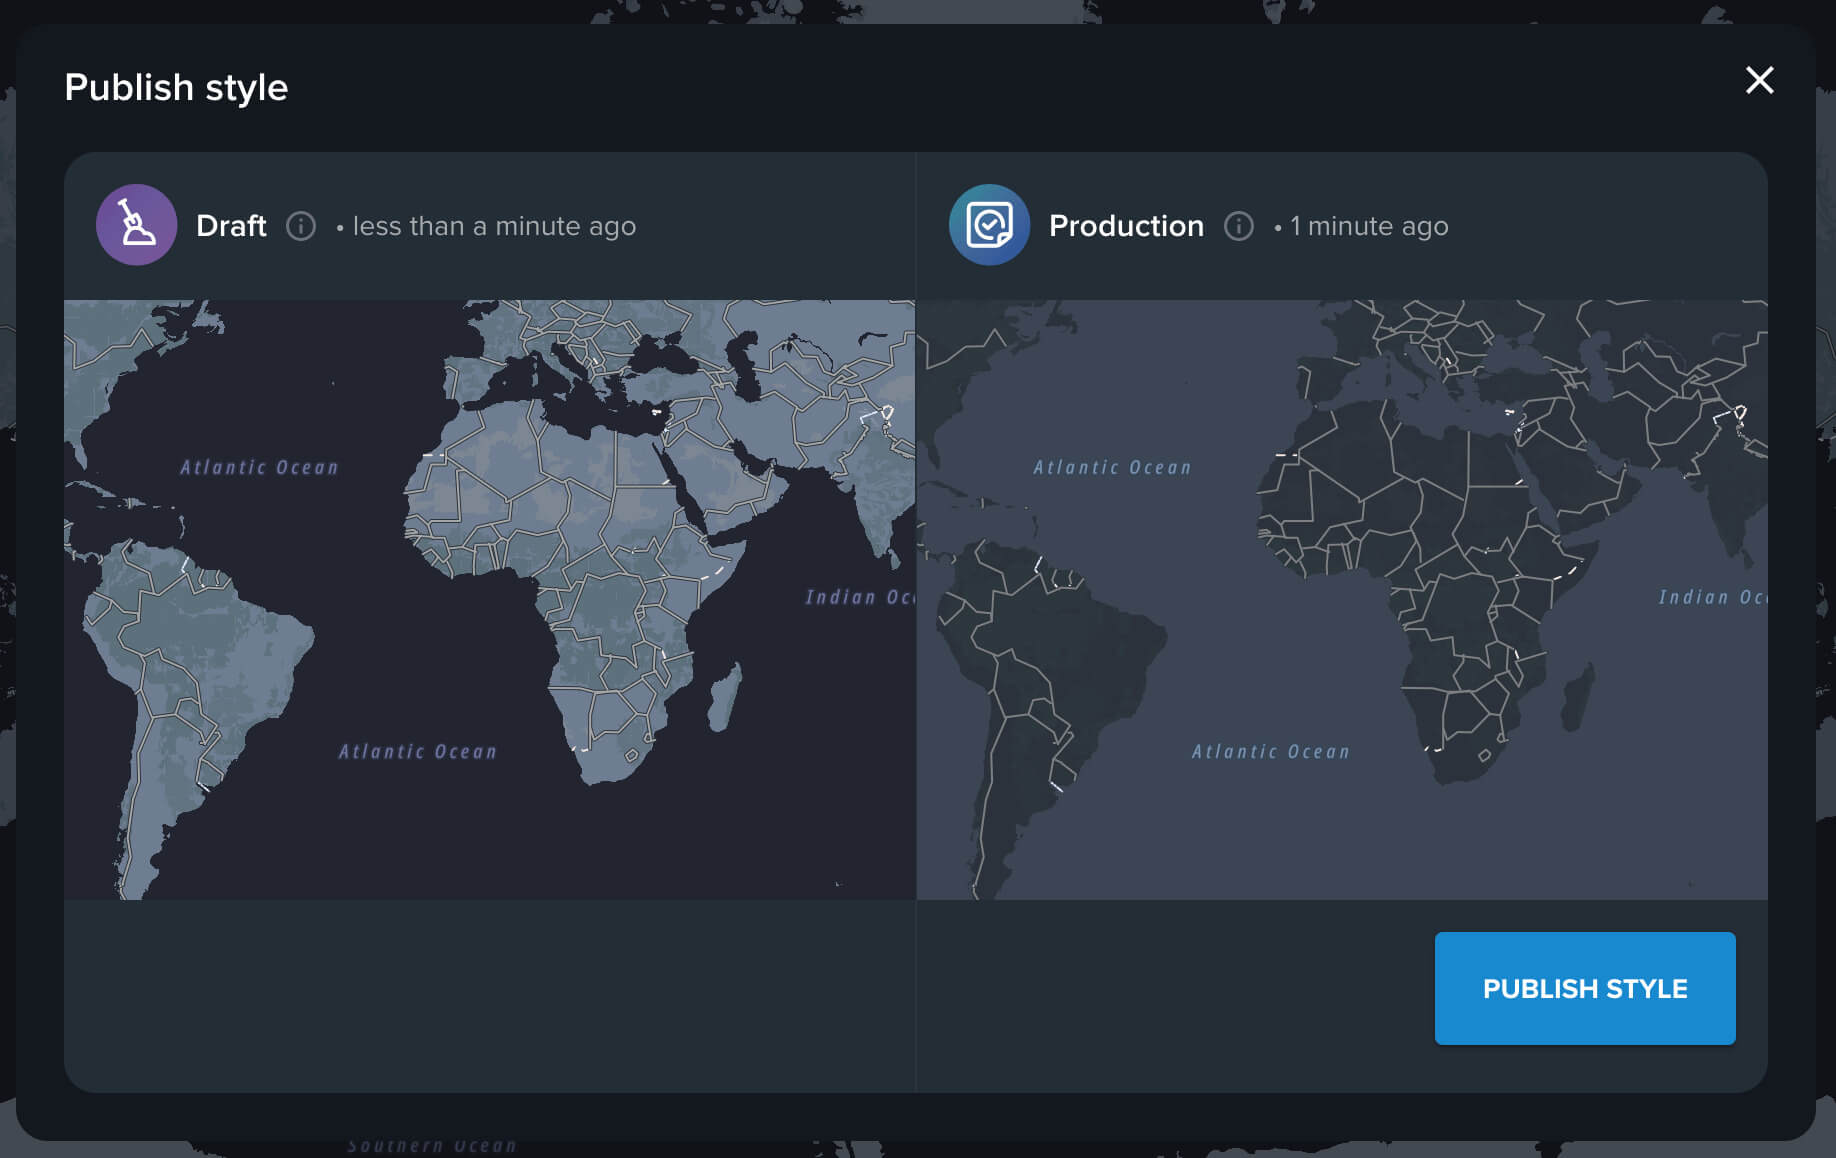
- Click Publish style. Changes from the Draft will be also visible in the Production style.
You can share both Draft and Production styles. Usually, you will only share the Production style and use it in the production applications. Sharing the Draft is useful for testing and showing the progress to other designers or stakeholders.
- Click the Share button.
- Choose which version you want to share: Draft or Production.
- If you want to share the style with others, choose Access > Open.
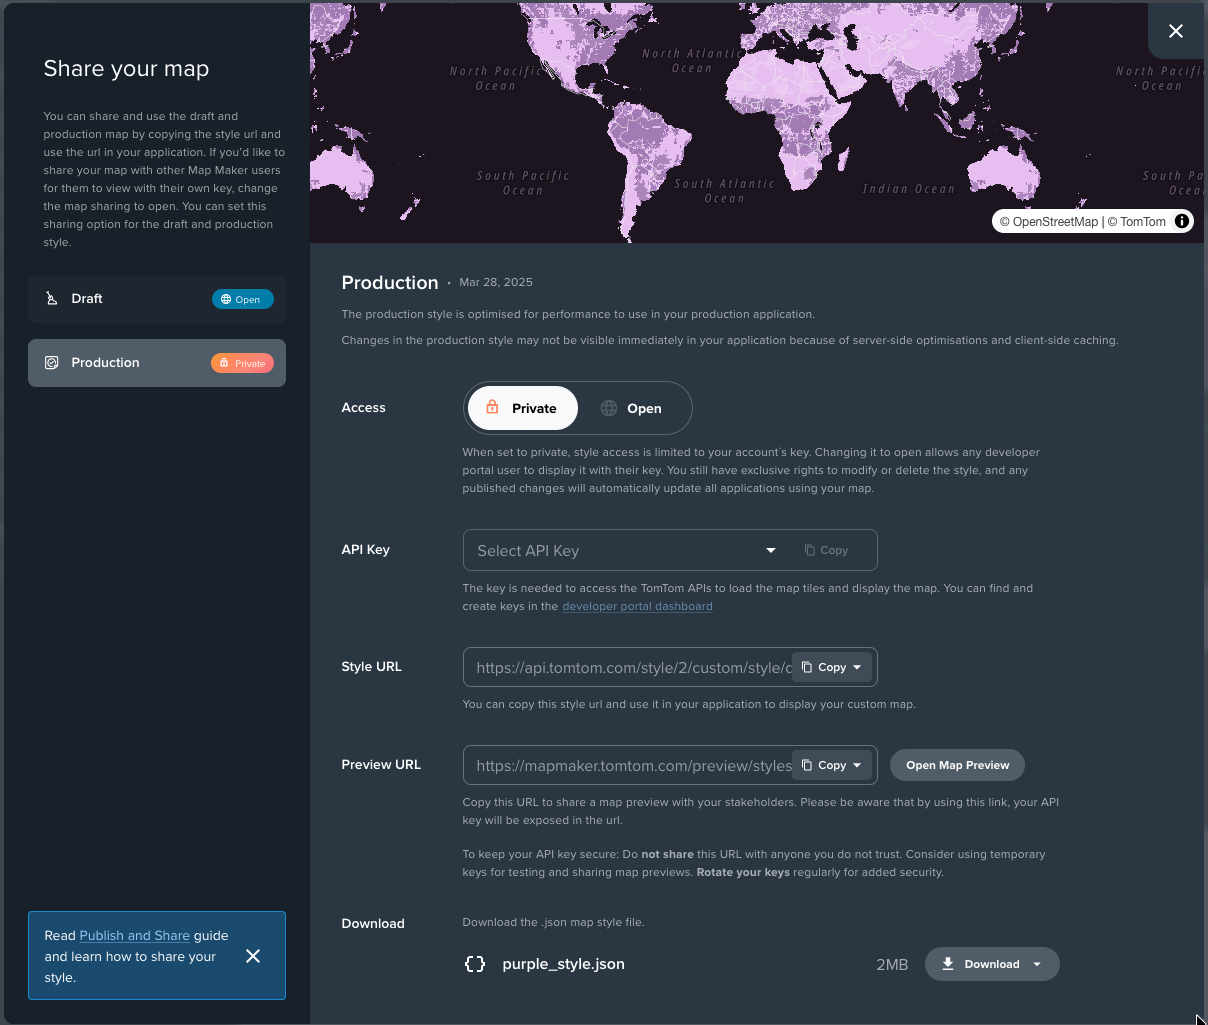
- If you use the style in TomTom SDKs, you can export it without an API Key and provide it separately later.
- Otherwise, read How do I get a TomTom API Key?.
- You can copy the URL to the style or download the style file to your computer.
Remember to always protect your API Key. Never share it with others. If you plan to use it on the Web, enable domain whitelisting in the Edit key > Security, in MyTomTom dashboard.
Learn more on how to use your style in TomTom Maps SDKs:
Next steps
Since you have learned how to create and publish your first style, here are recommendations for the next steps: