Migrate from Google
Overview
This tutorial covers some fundamental use cases to help you switch your Android app from Google’s APIs to TomTom’s as quickly and efficiently as possible. It starts with basic environment setup, then dives straight into the code.
Prerequisites
Before you start writing code, prepare your environment:
- Install Android Studio if you don’t already have it.
- Make sure to use Gradle in your project. We are no longer supporting Maven. Contact us if your project is using Maven instead of Gradle.
- Create a new project or open an existing one. Make sure that the minimum SDK API level is set to at least 26 (Android 8.0 "Oreo") and limit the ABIs to the supported set (arm64-v8a and x86_64) by making the following changes in the
androidblock of your app’sbuild.gradle.ktsfile.1android {2 defaultConfig {3 minSdk = 264 ndk {5 abiFilters += listOf("arm64-v8a", "x86_64")6 }7 // All public applications and tutorials use 'complete' flavor8 missingDimensionStrategy(ProductFlavors.DIMENSION, ProductFlavors.COMPLETE)9 }10} - To prevent potential errors during app start-up, it’s important to ensure that OpenGL ES 3.0 support is enabled in the Android Studio emulator. If your emulator supports it, navigate to Settings, choose "Renderer maximum (up to OpenGL ES 3.1)" for the "OpenGL ES API level (requires restart)" field, and then restart the emulator to apply the changes.
Configuring project dependencies
-
Add a maven block to your
settings.gradle.ktsfile to specify the URI for repositories.tomtom.com.1dependencyResolutionManagement {2 repositoriesMode.set(RepositoriesMode.FAIL_ON_PROJECT_REPOS)3 repositories {4 google()5 mavenCentral()6 maven {7 url = uri("https://repositories.tomtom.com/artifactory/maven")8 }9 }10} -
Verify that everything works as expected by adding a Maps SDK dependency to the
build.gradle.ktsfile of your application module. For example,com.tomtom.sdk.maps:map-display. Synchronize the project.val version = "1.26.4"implementation("com.tomtom.sdk.maps:map-display:$version") -
Get your TomTom API key from the TomTom Developer Portal. To find out how, refer to the How to get a TomTom API key guide.
-
Store the TomTom API key to a project property in your project
gradle.propertiesfile. Replaceapi_key_placeholderwith the actual TomTom API key.tomtomApiKey=api_key_placeholder -
Declare the tomtomApiKey variable within the
build.gradle.ktsfile, outside of theandroidblock.val tomtomApiKey: String by project -
Map the TomTom API key property to a custom field of the gradle
BuildConfigclass in theandroidblock of your app’sbuild.gradle.ktsfile.1android {2 buildFeatures {3 buildConfig = true4 }5 buildTypes.configureEach {6 buildConfigField("String", "TOMTOM_API_KEY", "\"$tomtomApiKey\"")7 }8}To use the TomTom API key in your application code, it is sufficient to access the newly added
BuildConfigfield.val apiKey = BuildConfig.TOMTOM_API_KEY
Now that you’ve completed the project setup, here is what you can do next.
- If you don’t have an API key visit a How to get a TomTom API key site and create one.
- Create fields with the API keys in your module’s
build.gradle.kts, which will be used later in the application:1android {2 defaultConfig {3 manifestPlaceholders["GoogleApiKey"] = "YOUR_GOOGLE_API_KEY"4 resValue("string", "tomtom_api_key", "YOUR_TOMTOM_API_KEY")5 buildConfigField("String", "TOMTOM_API_KEY", ""YOUR_TOMTOM_API_KEY"")6 }7}
Displaying a map
To display the map using the Google Maps SDK for Android, you need to perform these steps:
- Add dependencies to your module’s
gradle.buildfile:implementation("com.google.android.gms:play-services-maps:18.0.0") - Add a map fragment to the XML layout:
1<androidx.fragment.app.FragmentContainerView2 android:id="@+id/map"3 android:name="com.google.android.gms.maps.SupportMapFragment"4 android:layout_width="match_parent"5 android:layout_height="match_parent" />
- Add a Google Android API key inside the application section of the AndroidManifest.xml file:
1<meta-data2 android:name="com.google.android.geo.API_KEY"3 android:value="${GoogleApiKey}" />
- Implement the
MapReadyCallbackinterface in theMainActivityclass and override theOnMapReadyCallback.onMapReady(GoogleMap)method to assign the ready instance of the map to the property.override fun onMapReady(googleMap: GoogleMap) {this.googleMap = googleMap - In the
onCreatemethod of theMainActivityget the map fragment instance from activity_main.xml. SetMainActivityas a callback object which will be triggered whenGoogleMapis ready.val mapFragment = supportFragmentManager.findFragmentById(R.id.map) as SupportMapFragmentmapFragment.getMapAsync(this)
TomTom SDK
To do the same thing in the TomTom SDK for Android:
- Add dependency to your module’s
gradle.buildfile:implementation("com.tomtom.sdk.maps:map-display:1.26.4") - Add a
MapFragmentto the main activity layout. Don’t forget to set the API key for the Maps Display module:1<androidx.fragment.app.FragmentContainerView2 xmlns:tomtom="http://schemas.android.com/apk/res-auto"3 android:id="@+id/map_fragment"4 android:name="com.tomtom.sdk.map.display.ui.MapFragment"5 android:layout_width="match_parent"6 android:layout_height="match_parent"7 tomtom:mapKey="@string/tomtom_api_key"8 /> - Define a
TomTomMapproperty in theMainActivityclass.private lateinit var tomTomMap: TomTomMap - As with Google, you need to implement the
MapReadyCallbackinterface in theMainActivityclass and override theOnMapReadyCallback.onMapReady(TomTomMap)method.1 override fun onMapReady(map: TomTomMap) {2 this.tomTomMap = map3} - In the
onCreatemethod of theMainActivityclass, get the map fragment from the layout usingFragmentManager. Set theMapReadyCallbackthat is triggered when the map is ready. The map has to be fully initialized before your app can interact with theTomTomMapobject.val mapFragment = supportFragmentManager.findFragmentById(R.id.map_fragment) as? MapFragmentmapFragment?.getMapAsync(this)
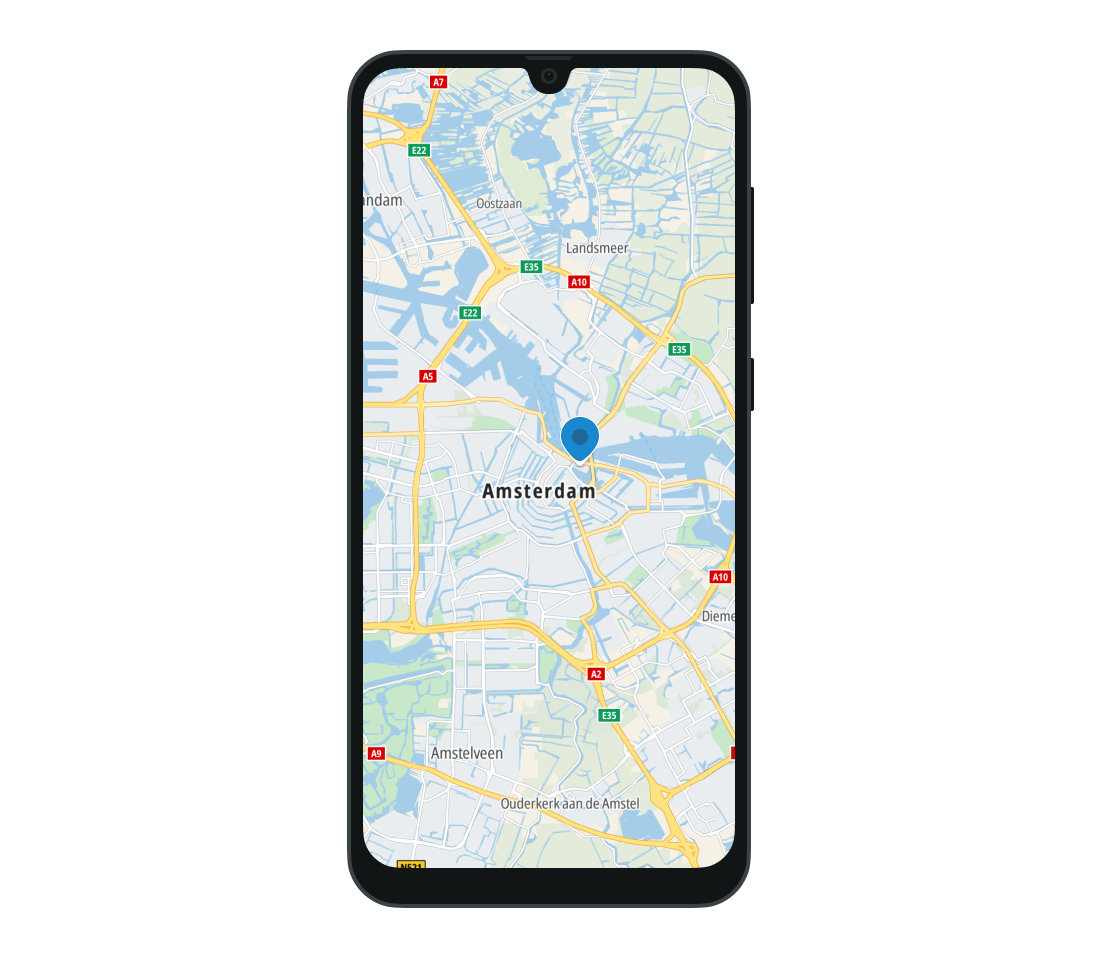
Displaying a marker
The next step is to allow your user to interact with the map. For instance, displaying a marker at the map location where the user does a long click.
Once the GoogleMap is initialized set the MapLongClickListener.
1this.googleMap.setOnMapLongClickListener { latLng: LatLng ->2 displayMarkerAt(latLng)3}
Then set the marker at the selected coordinates.
1private fun displayMarkerAt(latLng: LatLng) {2 val markerOptions =3 MarkerOptions()4 .position(latLng)5 .title("Long clicked location")6 googleMap.addMarker(markerOptions)7}
TomTom SDK
As with Google, the map must be fully initialized before you can interact with it. Add the MapLongClickListener to the TomTomMap object.
1tomTomMap.addMapLongClickListener { geoPoint: GeoPoint ->2 displayMarkerAt(geoPoint)3 true4}
Display a Marker at the map location of a long press.
1private fun displayMarkerAt(geoPoint: GeoPoint) {2 val markerOptions =3 MarkerOptions(4 geoPoint,5 // No default marker icon6 ImageFactory.fromResource(com.tomtom.sdk.map.display.common.R.drawable.ic_sdk_tt_compass),7 label = Label("Long clicked location"),8 )9 tomTomMap.addMarker(markerOptions)10}
Displaying traffic
Google has only one method for traffic visualization. That method can only display traffic flow tiles. To show the traffic layer:
googleMap.isTrafficEnabled = true
To hide the traffic layer:
googleMap.isTrafficEnabled = false
TomTom SDK
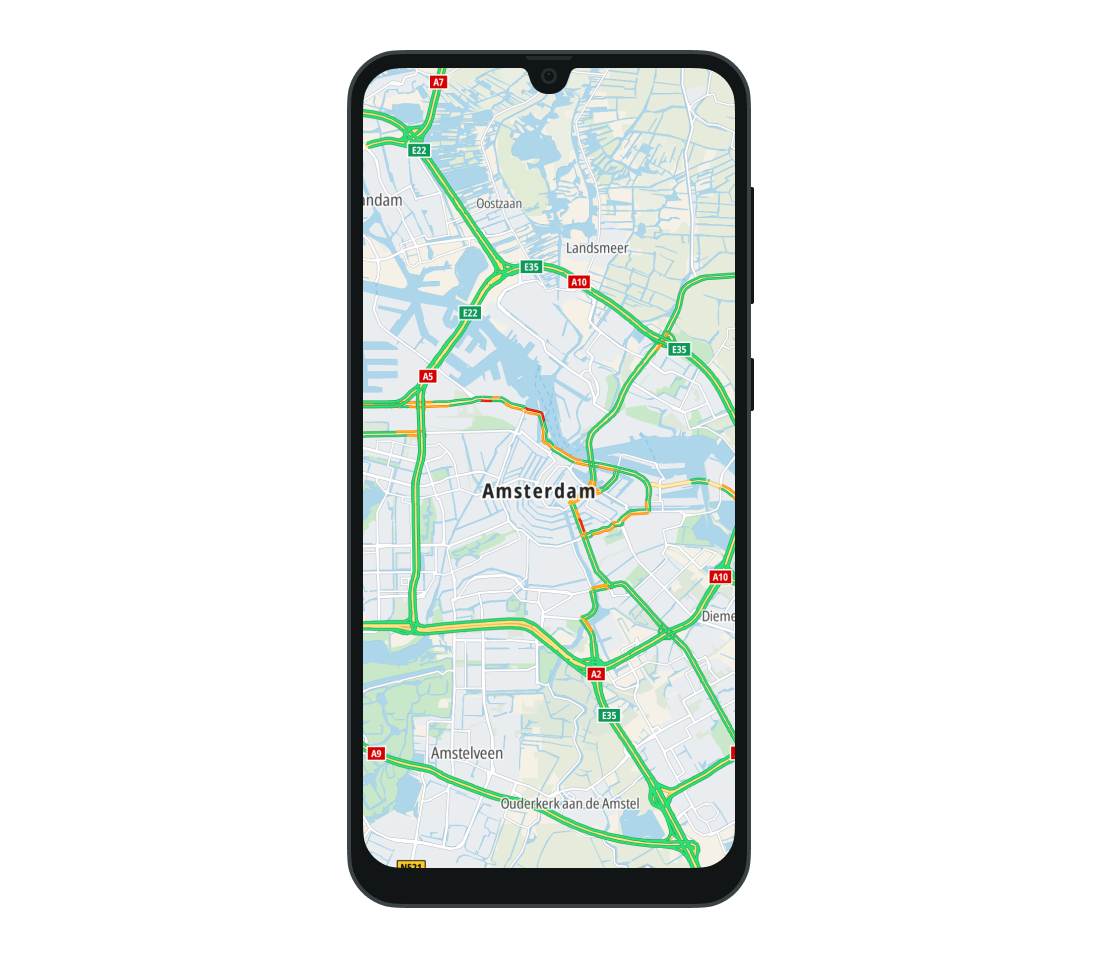
The TomTom SDK provides two kinds of traffic information: traffic flow and traffic incidents.
- Traffic flow shows the difference between current and free-flow speed. Green indicates that the speeds are the same, meaning there are no traffic jams. Red indicates that traffic is slower than free-flow, meaning that there are traffic jams.
tomTomMap.showTrafficFlow()tomTomMap.hideTrafficFlow()
- Traffic incidents shows specific traffic problems such as closed roads, rain, ice on the road, or accidents.
tomTomMap.showTrafficIncidents()tomTomMap.hideTrafficIncidents()
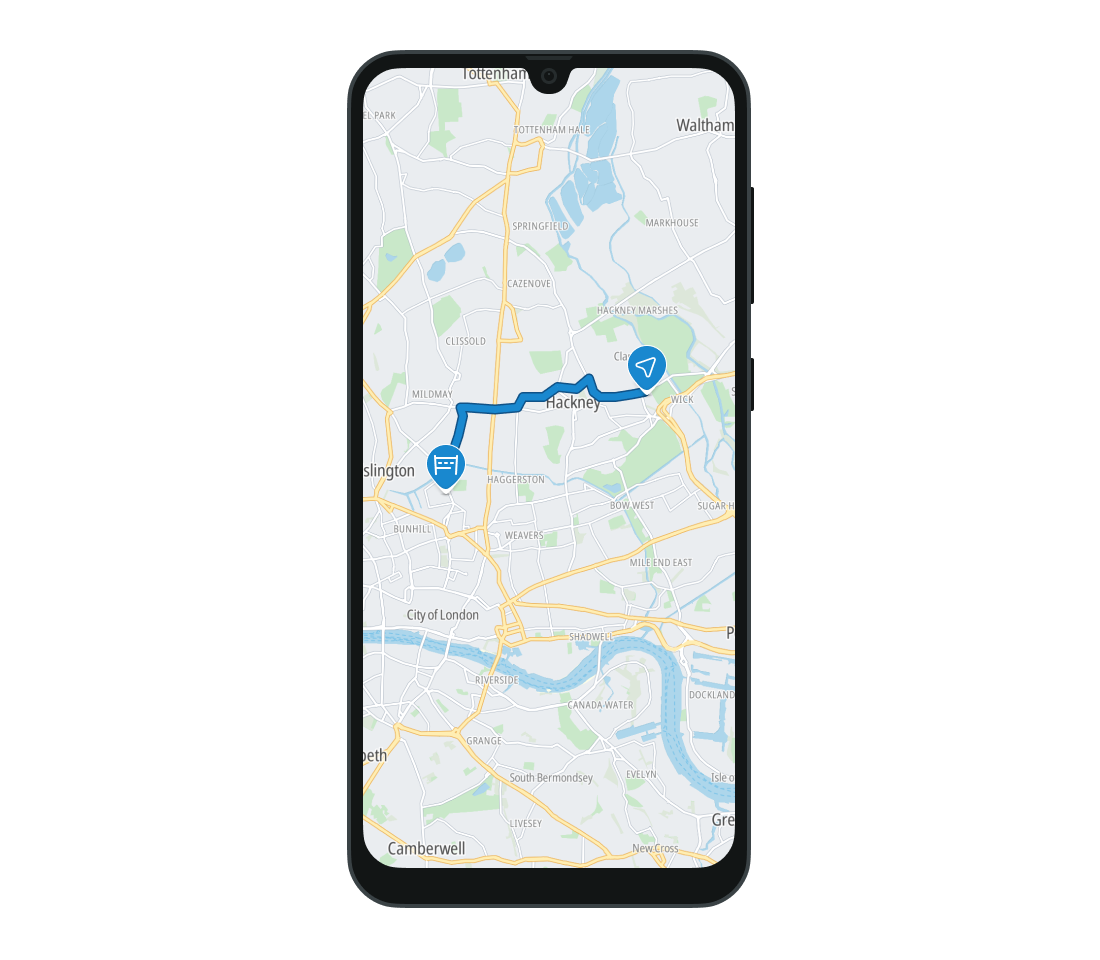
Displaying a route/directions
Displaying a route in Google Maps SDK for Android is awkward. It boils down to interacting with the Directions API, gathering a list of route positions, then drawing a polyline from that list directly onto the map. This procedure is too verbose and complex to show here.
TomTom SDK
The TomTom Routing API allows the app to easily calculate a route between two points, add waypoints, and specify other route properties. The requested Route can then be drawn on the map in a single step.
- To enable the Routing API inside your application, add a dependency to the module’s
gradle.buildfile:implementation("com.tomtom.sdk.routing:route-planner-online:1.26.4") - Create an instance of the
RoutingApiobject.1val routingApi =2 OnlineRoutePlanner.create(3 context = applicationContext,4 apiKey = BuildConfig.TOMTOM_API_KEY,5 ) - Construct the
RoutePlanningOptionsobject. This contains route request parameters that will be used for Routing API call.1val amsterdam = GeoPoint(52.37, 4.90)2val hague = GeoPoint(52.07, 4.30)3val routePlanningOptions =4 RoutePlanningOptions(5 itinerary = Itinerary(origin = amsterdam, destination = hague),6 vehicle = Vehicle.Car(),7 costModel = CostModel(routeType = RouteType.Short),8 ) - Provide the created
RoutePlanningOptionsobject as a parameter to theRoutingApi.planRoute(RoutePlanningOptions, RoutePlanningCallbackmethod. The method performs a request for the route using the provided parameters.routingApi.planRoute(routePlanningOptions, routePlanningCallback) - The result of request is returned by the
RoutePlanningCallbackthat was provided to the method above. If the call was successful it returnsRoutePlanningResponse.
Otherwise, it passes the exception that was raised.
+
1private val routePlanningCallback =2 object : RoutePlanningCallback {3 override fun onFailure(failure: RoutingFailure) {4 Toast.makeText(this@MainActivity, failure.message, Toast.LENGTH_SHORT).show()5 }67 override fun onSuccess(result: RoutePlanningResponse) {8 drawRouteOnTheMap(result)9 }10 }
- Get the
Routefrom theRoutePlanningResponseand add it to theTomTomMap.1private fun drawRouteOnTheMap(result: RoutePlanningResponse) {2 val route = result.routes.first()3 val routeOptions =4 RouteOptions(5 geometry = route.geometry,6 departureMarkerVisible = true,7 destinationMarkerVisible = true,8 )9 tomTomMap.addRoute(routeOptions)10 tomTomMap.zoomToRoutes()11}
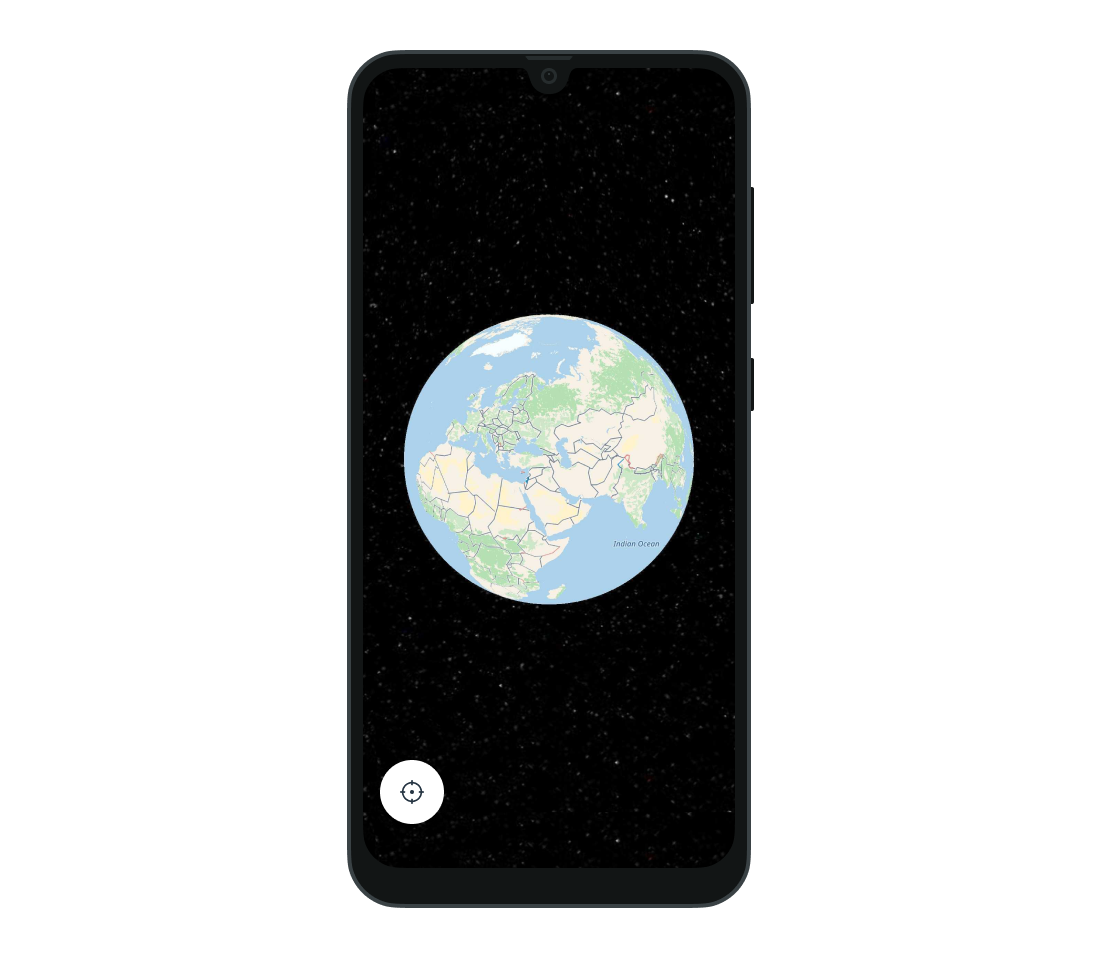
Showing user location
To use the user’s location in Android, the app must request location permissions. These steps must be performed for both the TomTom SDK and the Google Maps SDK.
- Add location permissions to the AndroidManifest.xml:
<uses-permission android:name="android.permission.ACCESS_FINE_LOCATION"/><uses-permission android:name="android.permission.ACCESS_COARSE_LOCATION"/>
- Register the location permission callback to handle the user’s response to the system permissions dialog.
1private val locationPermissionRequest =2 registerForActivityResult(3 ActivityResultContracts.RequestMultiplePermissions(),4 ) { permissions ->5 if (permissions[Manifest.permission.ACCESS_FINE_LOCATION] == true &&6 permissions[Manifest.permission.ACCESS_COARSE_LOCATION] == true7 ) {8 showUserLocation()9 } else {10 Toast.makeText(11 this,12 getString(R.string.location_permission_denied),13 Toast.LENGTH_SHORT,14 ).show()15 }16 }
- Request permission in runtime to let the user decide whether to allow location permissions.
1private fun enableUserLocation() {2 if (ContextCompat.checkSelfPermission(this, Manifest.permission.ACCESS_FINE_LOCATION)3 == PackageManager.PERMISSION_GRANTED &&4 ContextCompat.checkSelfPermission(this, Manifest.permission.ACCESS_COARSE_LOCATION)5 == PackageManager.PERMISSION_GRANTED6 ) {7 showUserLocation()8 } else {9 locationPermissionRequest.launch(10 arrayOf(11 Manifest.permission.ACCESS_FINE_LOCATION,12 Manifest.permission.ACCESS_COARSE_LOCATION,13 ),14 )15 }16}
In Google you can enable location and the location button as follows:
1@SuppressLint("MissingPermission")2private fun showUserLocation() {3 googleMap.isMyLocationEnabled = true4 googleMap.uiSettings.isMyLocationButtonEnabled = true5}
TomTom SDK
In the TomTom SDK you can either use a pre-defined location provider, or define your own LocationProvider to provide location updates to the map. This tutorial focuses on the pre-defined default LocationProvider. This engine relies on the Android system location services, meaning that it does not require Google services. For more information read Built-in Location Provider guide.
- Add the default
LocationProviderdependency:implementation("com.tomtom.sdk.location:provider-default:1.26.4") - Create a
LocationProviderproperty and initialize the defaultLocationProvider. - Set
LocationProviderto the map. - Enable
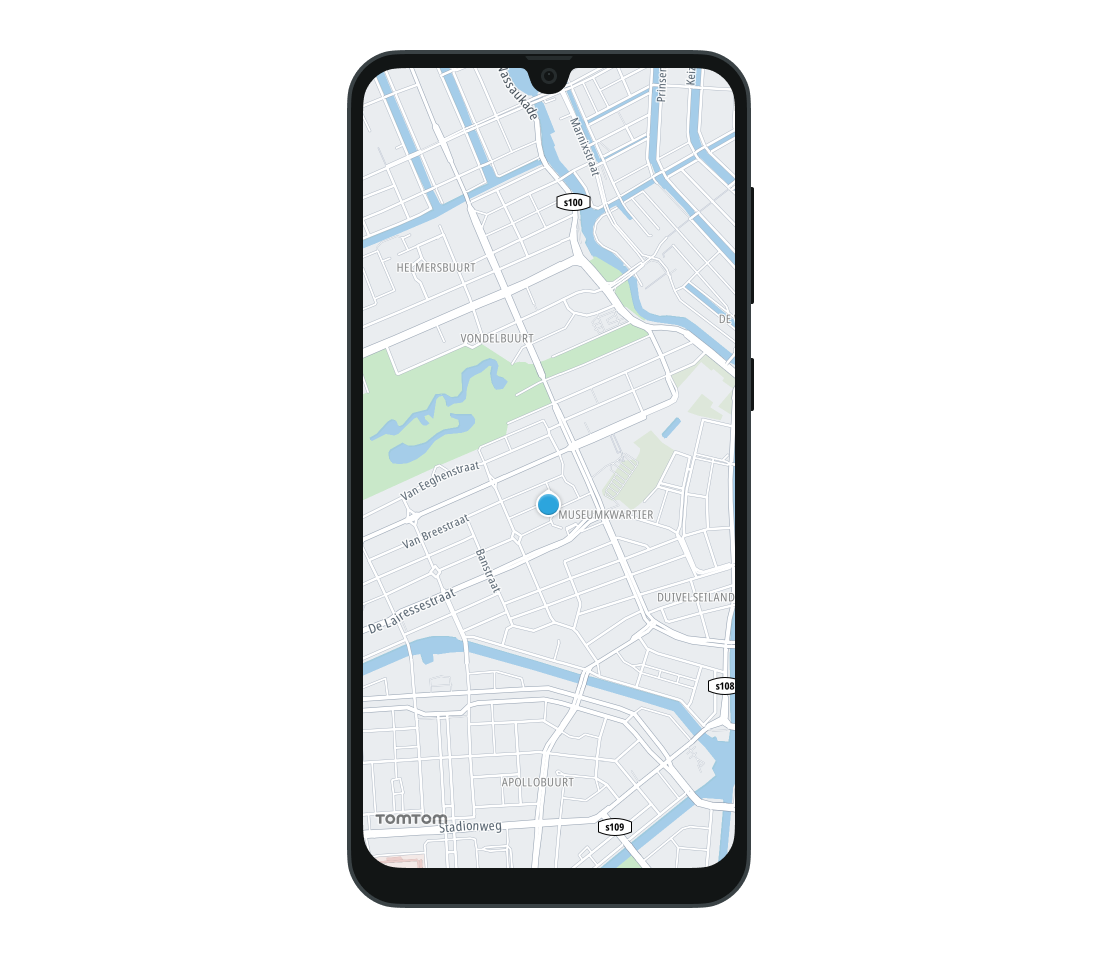
LocationProviderto start updating the user’s location. - Show the user location on the map. To do this, enable
LocationMarkeron the map and set its specifications usingLocationMarkerOptions.
1private fun showUserLocation() {2 locationProvider = DefaultLocationProviderFactory.create(context = this)3 locationProvider?.let {4 tomTomMap.setLocationProvider(it)5 it.enable()6 tomTomMap.enableLocationMarker(LocationMarkerOptions(LocationMarkerOptions.Type.Pointer))7 }8}
Summary
This tutorial instructed you on how to move a basic app from Google’s SDKs to TomTom’s SDKs. Now you can enrich your app with TomTom’s features and functions.
If you want to learn more, take a look at our other tutorials: