Getting Started with the TomTom Maps SDK for iOS: Project Setup
)

The TomTom Maps SDK for iOS makes it easy to take advantage of TomTom location APIs when you're building iOS apps for iPhones and iPads. The SDK handles the nitty gritty details of talking to the TomTom APIs so you can focus on building your app. To make sure you get started off right, this article guides you through getting your iOS project set up and running with the TomTom Maps SDK using Swift, and includes an example of adding a map view to your project.
Taking advantage of TomTom location APIs in iOS mobile applications can be easy using the TomTom Maps SDK for iOS. The SDK handles the nitty gritty details of talking to the server so you can focus on how to best use locations and maps in your app. This article will guide you through the steps to get your iOS project set up and running with TomTom Maps using Swift.
Prerequisites
First, you’ll need a couple things before creating the iOS app:
Xcode – The IDE required to build and run iOS projects. Download it for free from the Mac App Store.
CocoaPods – A dependency manager for Swift and Objective-C to assist with installing the TomTom Maps SDK.
TomTom Maps API Key – The API Key that allows you to use the TomTom location APIs. It’s free to use and available from the TomTom Dashboard.
Installing CocoaPods
If you don’t already have CocoaPods on your Mac, you can install it by opening a Terminal window and typing:
sudo gem install cocoapods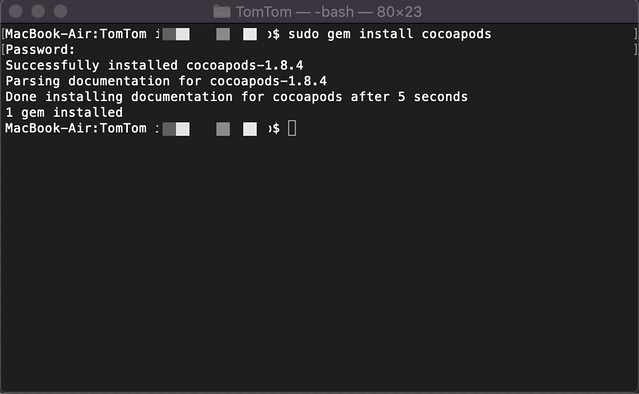
If you run into any errors, check out the excellent Troubleshooting guide on the CocoaPods project site. You'll find additional installation and usage information there as well.
Getting a TomTom API Key
If you don’t have an API key, follow these steps:
Click on Add New Key in your Dashboard.
Copy and save this API key. You’ll need it later.

Setting Up Your iOS Project
With all of the required software in place, it's time to create your project in Xcode.
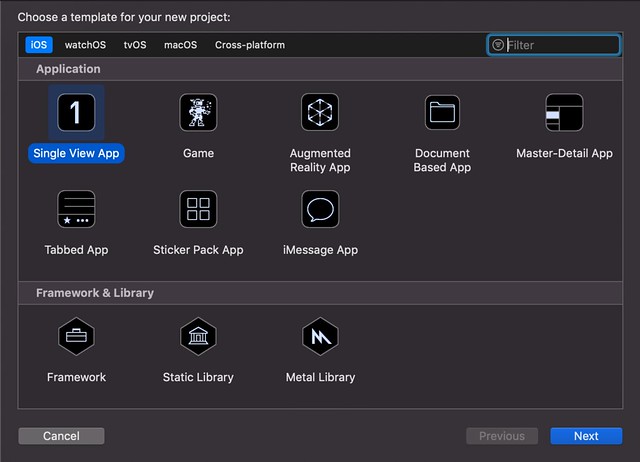
First, create a new Single View App project in Xcode and make sure to select Storyboard for the User Interface. Uncheck the Include Unit Tests and Include UI Tests options, then click Next and Create.

Next, set up CocoaPods to manage the TomTom SDK modules.
Open your project folder in a Terminal window and type "pod init". This will create a new file called Podfile in your directory.
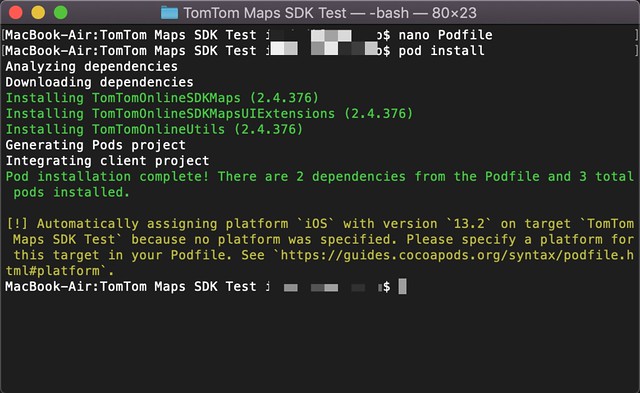
Now you can specify the TomTom SDK modules you’d like for your project, such as Maps, Search, or Routing. For this project, you only need the Maps module so open Podfile in a text editor like nano and add the following lines inside your target:
pod 'TomTomOnlineSDKMaps', '2.4.376'
pod 'TomTomOnlineSDKMapsUIExtensions', '2.4.376'
It should look like this:

Note that you don't need to include the version number for the pod unless you need a specific version. CocoaPods will install the latest release by default if you don't include a version. Check the SDK Release Notes for details on changes between releases.
The Map UI Extensions pod (TomTomOnlineSDKMapsUIExtensions) is included to provide some options UI view components such as a compass or zoom and pan controls.
Install the SDK modules you added by typing "pod install" in your Terminal window. You can ignore any warnings that appear during the installation.

After this, you’ll need to refresh the Xcode project to include the new dependencies. Close Xcode and open the .xcworkspace file (instead of the .xcodeproj file) so Xcode can find the SDK modules.

Lastly, you need to set the TomTom API Key in the project, so open the Info.plist file from your project navigator. Right-click to add a new row and name it "OnlineMap.Key". Set the Value to the TomTom API key created in your TomTom Dashboard.

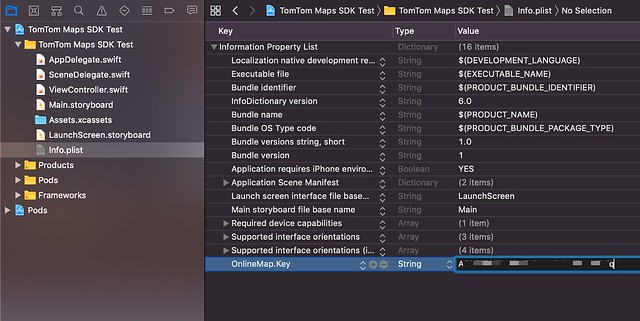
Note: To use additional APIs such as Search, Routing, or Geofencing, you may need to specify more entries in the Info.plist file, such as "OnlineSearch.Key".
Now you're ready to use the TomTom APIs in your project.
Adding TomTom Maps to Your Application
Let's add a Map View and a point of interest location marker to the app.
Open Main.storyboard and navigate through the View Controller Scene hierarchy to View.
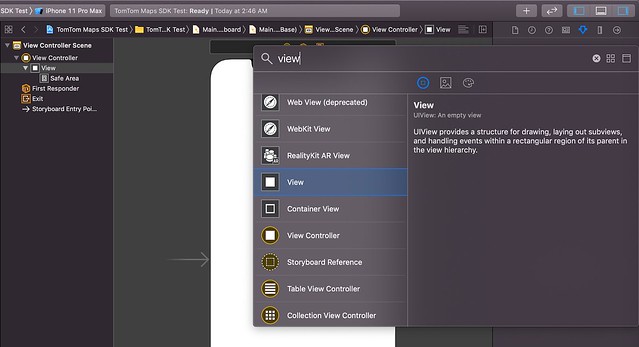
Add a new View inside by clicking the + button at the top right of your Xcode workspace, searching for the View control, and then dragging it into the scene.
You can give it any name and resize it however you wish. It should look something like this:
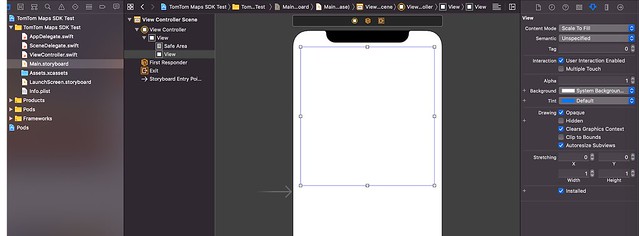
Set the Custom Class for this new View to TTMapView and check that the type of View in the hierarchy has updated to Map View.

Press Command + R to build and run the project in an iOS Simulator and you should see a map you can interact with using touch gestures.

Getting an Outlet Reference to the Map View
To create a reference to the Map View added in the previous step, change the workspace to show the editor on the right by clicking the rectangular icon on the upper right. This lets you see the view controller code in a split view. Now open the ViewController code on one side, with the Main.storyboard on the other:

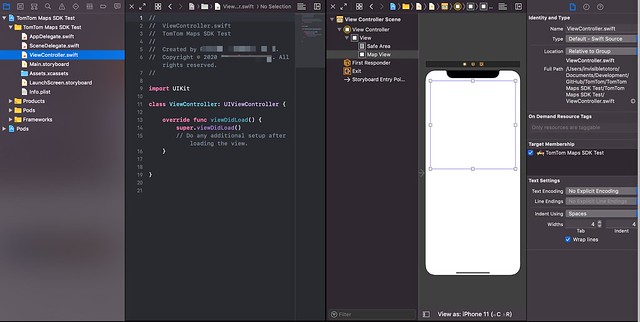
Select Map View in the editor hierarchy and click the circled right-arrow icon on the upper right to open the Connectors Inspector.

Click and drag a line from the circle to the right of New Referencing Outlet to a spot in your view controller code where you wish to add the reference variable.
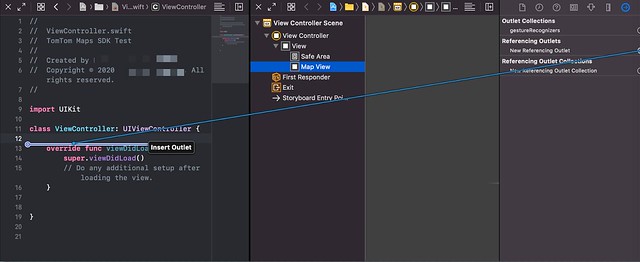
Name the reference something easy to remember, such as mapView.
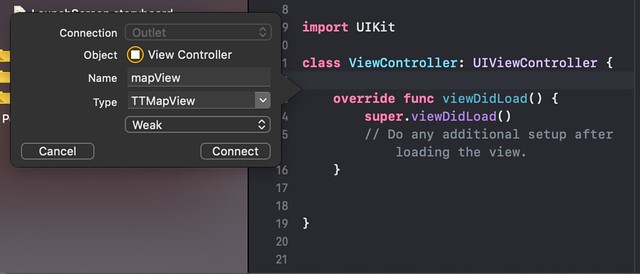
Add the line "import TomTomOnlineSDKMaps" below "import UIKit" so that your code recognizes the TTMapView type, then press Command + R to ensure your project builds and runs without any errors.

Adding a Marker to the Map View
You can show points of interest on a map with markers with just a few lines of code using TomTom Annotations. To demonstrate, let’s create a map marker at TomTom HQ in Amsterdam and center and zoom the map view to the location.
Add CoreLocation to your references:
import CoreLocationInside your viewDidLoad method, set a CLLocation reference using the latitude and longitude values of any location. In this case, we’ll use 52.377198, 4.9095261 for the coordinates of TomTom Headquarters:
let coordinates = CLLocationCoordinate2DMake(52.377198, 4.9095261) Create an annotation using the CLLocation:
let annotation = TTAnnotation(coordinate: coordinates)Add the annotation to the annotation manager in the mapView:
mapView.annotationManager.add(annotation)Center the map to the coordinates and zoom to level 17:
mapView.center(on: coordinate, withZoom: 17)With everything put together, here’s what your view controller code should look like:
import UIKit
import TomTomOnlineSDKMaps
import CoreLocation

class ViewController: UIViewController {

    @IBOutlet weak var mapView: TTMapView!
    override func viewDidLoad() {
        super.viewDidLoad()
        // Do any additional setup after loading the view.
        let coordinates = CLLocationCoordinate2DMake(52.377198, 4.9095261) // TomTom HQ, Amsterdam
        let annotation = TTAnnotation(coordinate: coordinates)
        mapView.annotationManager.add(annotation)
        mapView.center(on: coordinate, withZoom: 17)
    }
}
Finally, build and run the project in your iOS simulator. If everything is set up correctly, you’ll see the app with the location marker at the center of your map view in the app, zoomed in to the city level of Amsterdam.

Next Steps
As you saw, it takes just a couple lines of code to display an interactive map with a marker indicating a point of interest in your iOS application. Imagine what else might be possible in your mobile apps using some of the many other features supported by the TomTom Maps SDK for iOS. For example, you could show real-time traffic, find the quickest navigation routes, or even style your map to look the way you want.
Also note that, when using the iOS and Android SDKs, the map and traffic tile downloads don't count in your daily used transactions.
Explore more iOS examples and tutorials for the various TomTom APIs using these links:
Map:
Traffic:
Search:
Routing:
Geofencing:
To read about all of the APIs and learn how to use them, refer to the TomTom Documentation.
And for any questions or feedback, we encourage you to reach out and share your projects with us in the TomTom Developer Forum at .
Good luck and happy coding!