Building a Responsive Location Search Component with Angular
)
Follow this step-by-step tutorial to learn how to add responsive search functionality to your maps. Discover the value of responsive search and help your users find points of interest (POIs) quickly and easily.
As websites get bigger and bigger, it’s almost impossible to find one without search functionality. There are two forms of searches: responsive and passive.
When performing a passive search, the user inputs a keyword and then clicks a button or presses Enter to reveal the search results. In other words, passive search waits for action after the input to display the results.
Conversely, responsive search shows the results immediately as a user starts typing inside the input box. Furthermore, it improves the search results as the user types more meaningful information.
Responsive search brings a lot of value to the table, including the following benefits:
It provides a better experience for users who only remember part of what they’re looking for.
It provides a faster experience for users searching long strings of text.
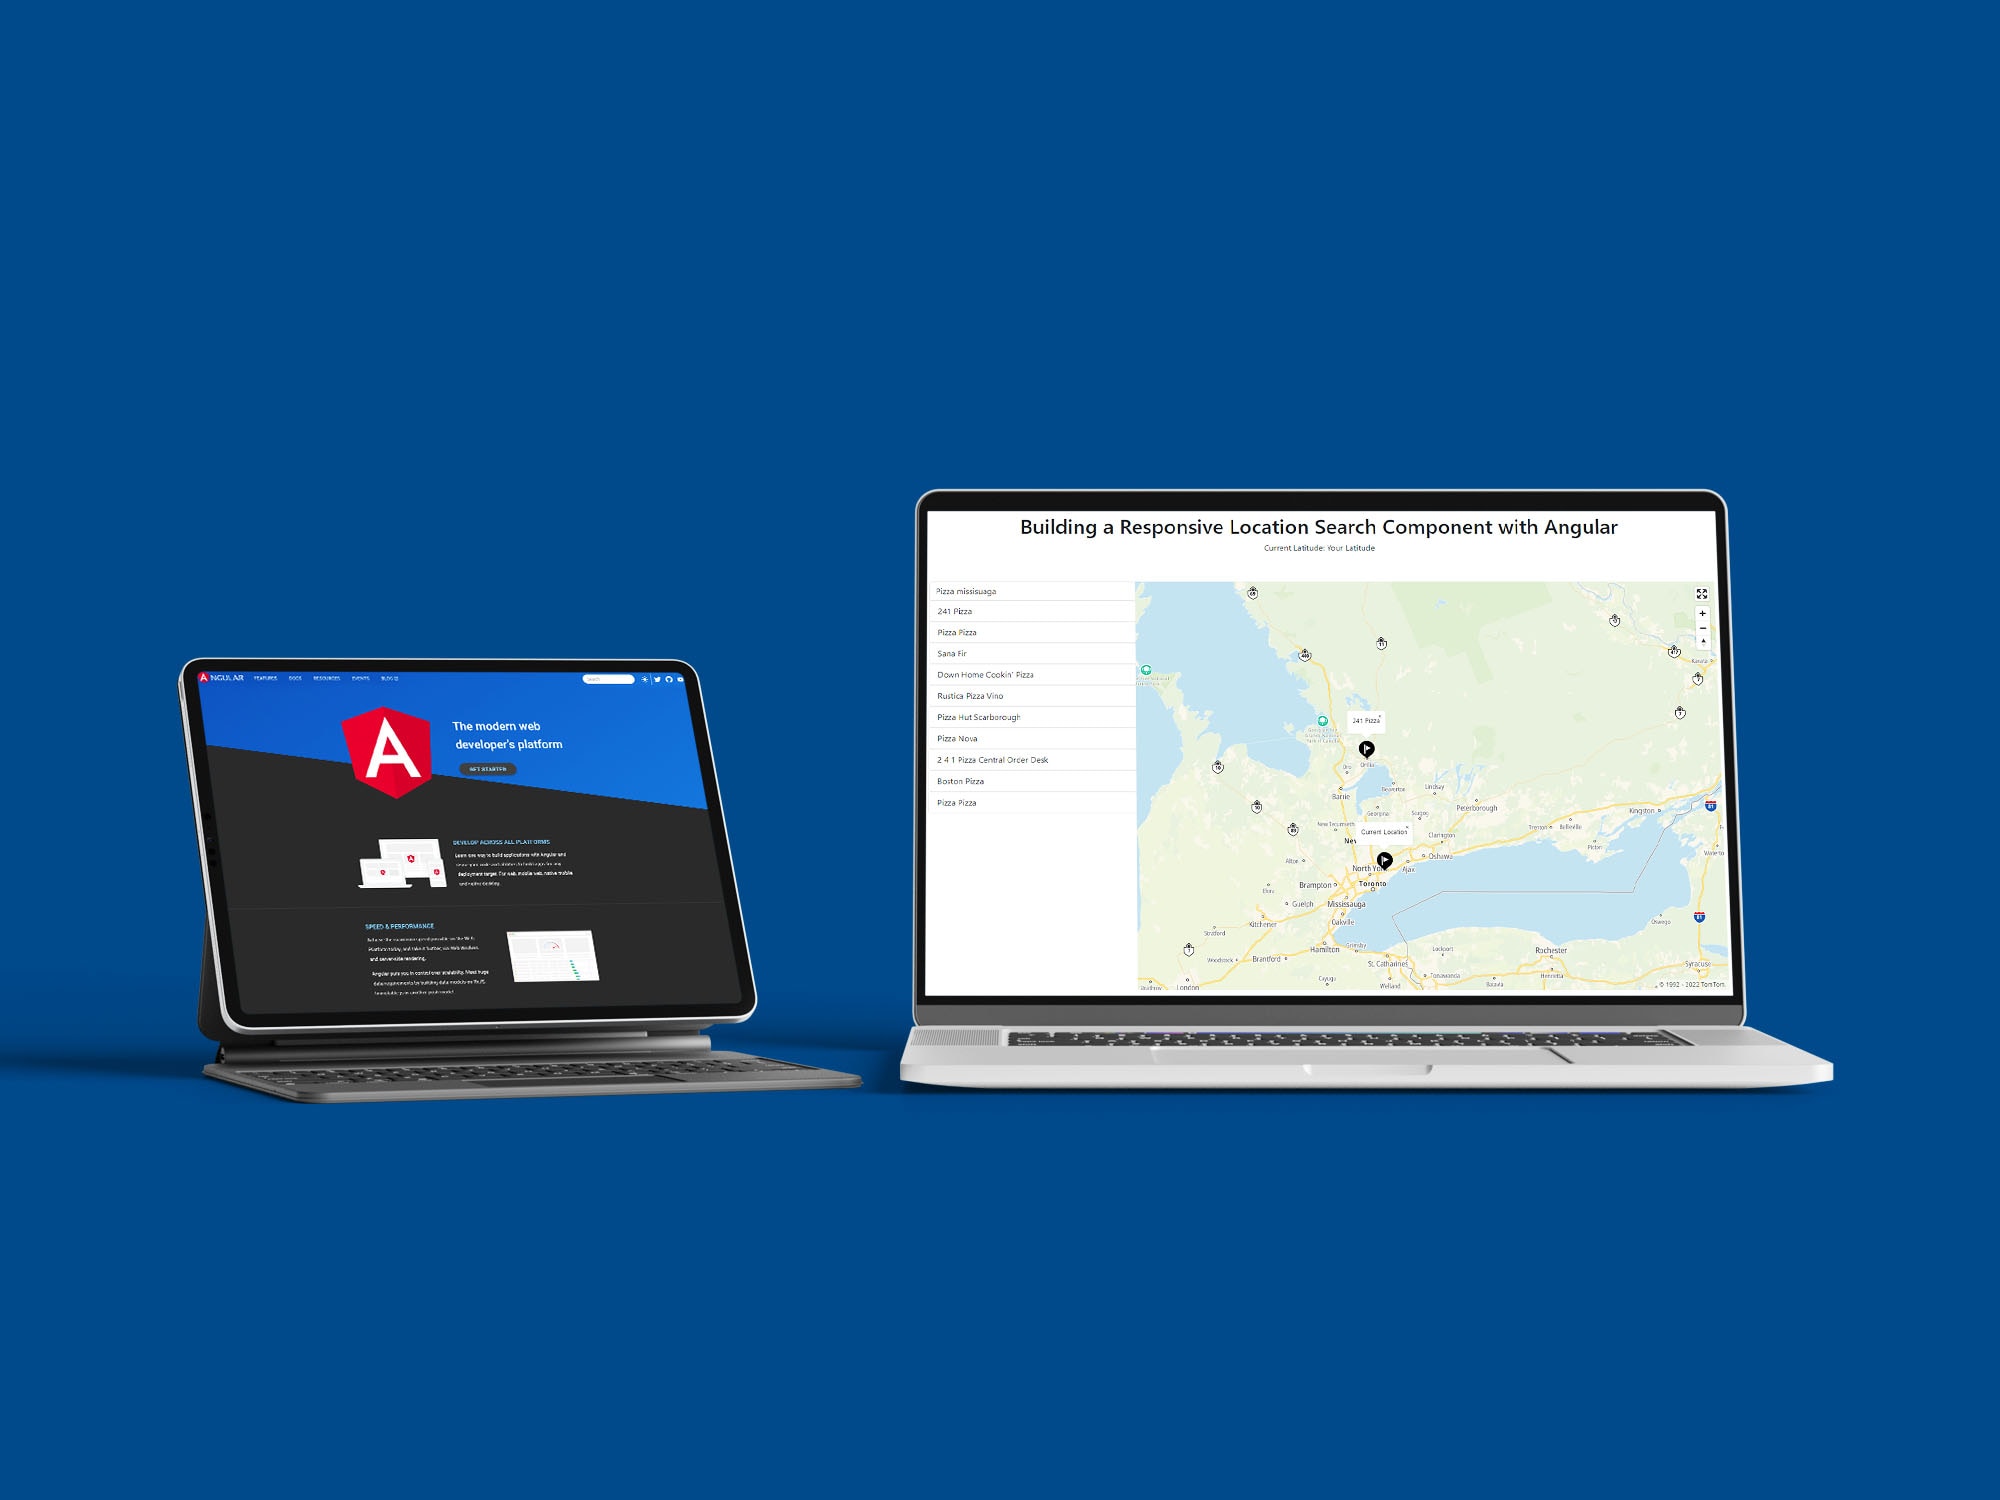
In this article, we create a responsive location search component in Angular using TomTom’s Map Display API and Search API. Here’s a link to the completed project code.
Creating a Basic Angular Application
In this section, we create a basic Angular application using this repository as a starting point. You can skip this section if you already have an Angular application running. The starting code is just a cleaned-up version of the initial Angular application with additional dependencies.
After cloning the repository, we must install all the dependencies.
npm i Once installed, we can start the application by running the following command.
npm startAfter successful compilation, the application runs on port 4200. If you open the URL in the browser, you should see the following screen:

This means the starter application is successfully set up.
TomTom API Key
We need a TomTom API key to integrate map and responsive search components in our Angular application. For that, we need a verified developer account.
You can create an account by visiting the developer portal.
Once you have created, verified, and signed in to your account, go to the dashboard and select Keys on the left navigation bar to copy the API key.

Next, create an environment.ts file in src/environments and add the API key to the file:
export const environment = {
  production: false,
  tomtom: {
    key: 'YOUR_API_KEY',
  },
};
After adding an API key, we can start creating an Angular component that can search for a location or a point of interest (POI). We’ll build a component that displays the result in a list and shows the POI on a map when we click it.
Responsive Search Component with TomTom Maps
It’s time to build our component by adding code to app/app.component.ts.
First, we declare three variables: currentLon, currentLat, and map to store the map data and the user’s current location.
export class AppComponent implements AfterViewInit {
  map: any;
  currentLat: number = 0;
  currentLon: number = 0;


  constructor(private http: HttpClient) {}
Then, in the ngAfterViewInit method, we call the function initLocationMap. The initLocationMap function creates an instance of a map using the TomTom API and adds it to the DOM element using an ID named map with full screen and navigation controls.
  public ngAfterViewInit(): void {
    this.initLocationMap();
  }
Next, we subscribe to a function called getCurrentPosition to get the user’s current location and display it in a map using the Popup and Marker.
private getCurrentPosition(): any {
return new Observable((observer: Subscriber<any>) => {
if (navigator.geolocation) {
navigator.geolocation.getCurrentPosition((position: any) => {
observer.next({
latitude: position.coords.latitude,
longitude: position.coords.longitude,
});
this.currentLon = position.coords.longitude;
this.currentLat = position.coords.latitude;
observer.complete();
});
} else {
observer.error();
}
});
}
private initLocationMap(): void {
this.map = tt.map({
key: environment.tomtom.key,
container: "map",
});
this.map.addControl(new tt.FullscreenControl());
this.map.addControl(new tt.NavigationControl());
this.getCurrentPosition().subscribe((position: any) => {
this.map.flyTo({
center: {
lat: position.latitude,
lng: position.longitude,
},
zoom: 13,
});
const popup = new tt.Popup({
anchor: "bottom",
offset: { bottom: [0, -40] },
}).setHTML("Current Location");
const marker = new tt.Marker()
.setLngLat({
lat: position.latitude,
lng: position.longitude,
})
.addTo(this.map);
marker.setPopup(popup).togglePopup();
});
}
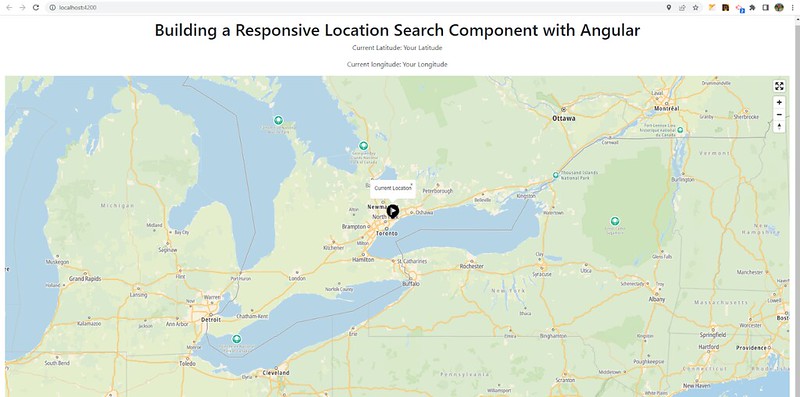
}That’s all we need to do for the logic portion, but to display a map, we also need to edit the src/app/app.component.html file. Right after the H1 tag, we must add the following code, which displays the user’s location and the map.
<p class="text-center">Current Latitude: {{currentLat}} </p>
<p class="text-center">Current longitude: {{currentLon}} </p>
<div id="map" class="map"></div>
After adding this code, your app should look like this:
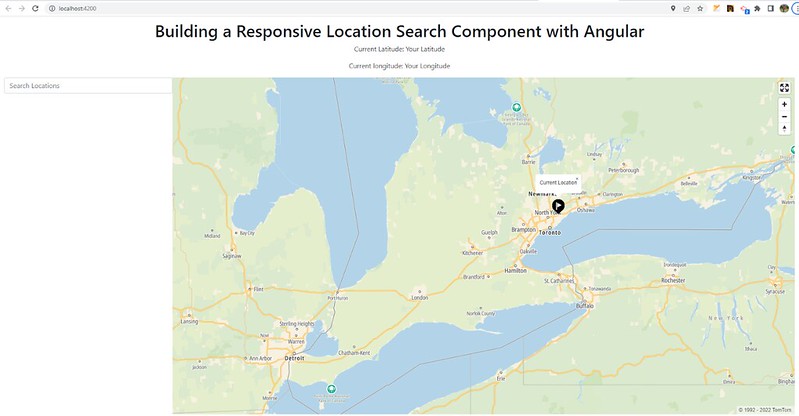
Here is what src/app/app.component.html looks like once you’ve added the code above:
<div class="container-fluid py-3">
  <h1 class="text-center">Building a Responsive Location Search Component with Angular</h1>
  <p class="text-center">Current Latitude: {{currentLat}} </p>
  <p class="text-center">Current longitude: {{currentLon}} </p>
  <div class="d-flex">
    <div class="search-wrapper">
      <input type="text" class="form-control" (keyup)="getValue(search.value)" #search name="search"
        placeholder="Search Locations" />
      <div>
        <ul class="resultList" *ngFor="let result of searchResults" class="list-group">
          <li role="button" (click)="setPlaceLocation(result.position.lat,result.position.lon,result.poi.name)"
            class="list-group-item cursor">{{result.poi.name}}</li>
        </ul>
      </div>
    </div>
    <div id="map" class="map"></div>
  </div>
</div>
Here, the function getValue(search.value) uses the current input’s value into the API as a query and sets a response in the variable. For that, let’s create two new variables inside src/app/app.component.ts.
ROOT_URL = 'https://api.tomtom.com/search/2/search/';
searchResults: any = [];
Then, the ngAfterViewInit function creates a function named getValue, which calls the TomTom API to find the locations or POIs according to the user’s search input and the current location.
getValue(value: string) {
  this.http
    .get(
      this.ROOT_URL +
      `${value}.json?
      lat=${this.currentLat}&
      lon=${this.currentLon}&
      minFuzzyLevel=1&
      maxFuzzyLevel=2&
      view=Unified&
      relatedPois=off&
      key=${environment.tomtom.key}`
      )
    .subscribe((data: any) => (this.searchResults = data['results']));
}
Last, we must create a function that adds a location or POI to the map with a click.
setPlaceLocation(lat: number, lng: number, placeName: string): void {
    this.map.flyTo({
      center: {
        lat: lat,
        lng: lng,
      },
      zoom: 13,
    });


    const popup = new tt.Popup({
      anchor: 'bottom',
      offset: { bottom: [0, -40] },
    }).setHTML(placeName);


    const marker = new tt.Marker()
      .setLngLat({
        lat: lat,
        lng: lng,
      })
      .addTo(this.map);
    marker.setPopup(popup).togglePopup();
 }
After all these changes, the app looks like this:
Now, if we search for any term — for example, pizza — we can see a list as we type.
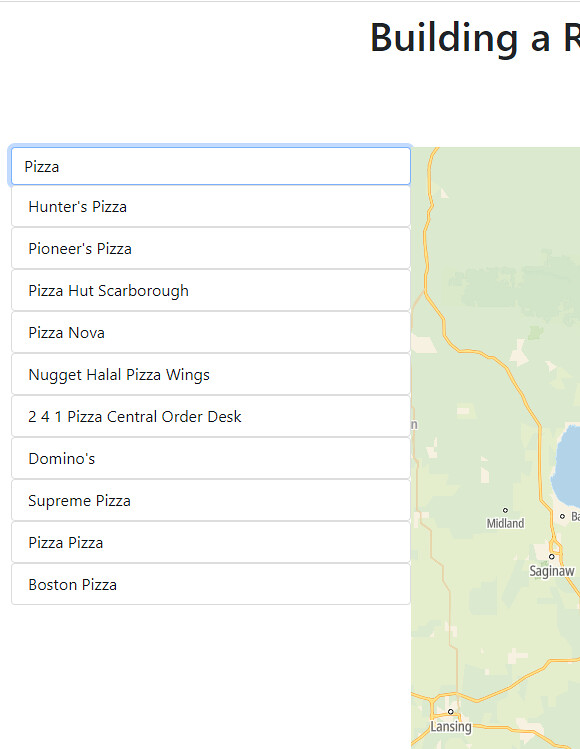
As we keep typing more specific terms, it shows more specific POIs.

When we click on an element from the list, it appears on the map.

Conclusion
A responsive search provides a better experience for users who want to search for something but only remember a part of the term they want to find. As a responsive search narrows down the search results while a user types more specific terms, it helps users find the search term easily compared to a passive search.
A responsive search has become a necessary tool in standard websites, helping you stand out from your competitors, and with TomTom APIs, it is extremely easy to implement.
Check out the Map Display API and Search API further enhance your application’s capabilities effortlessly.