Pizza Delivery
Overview
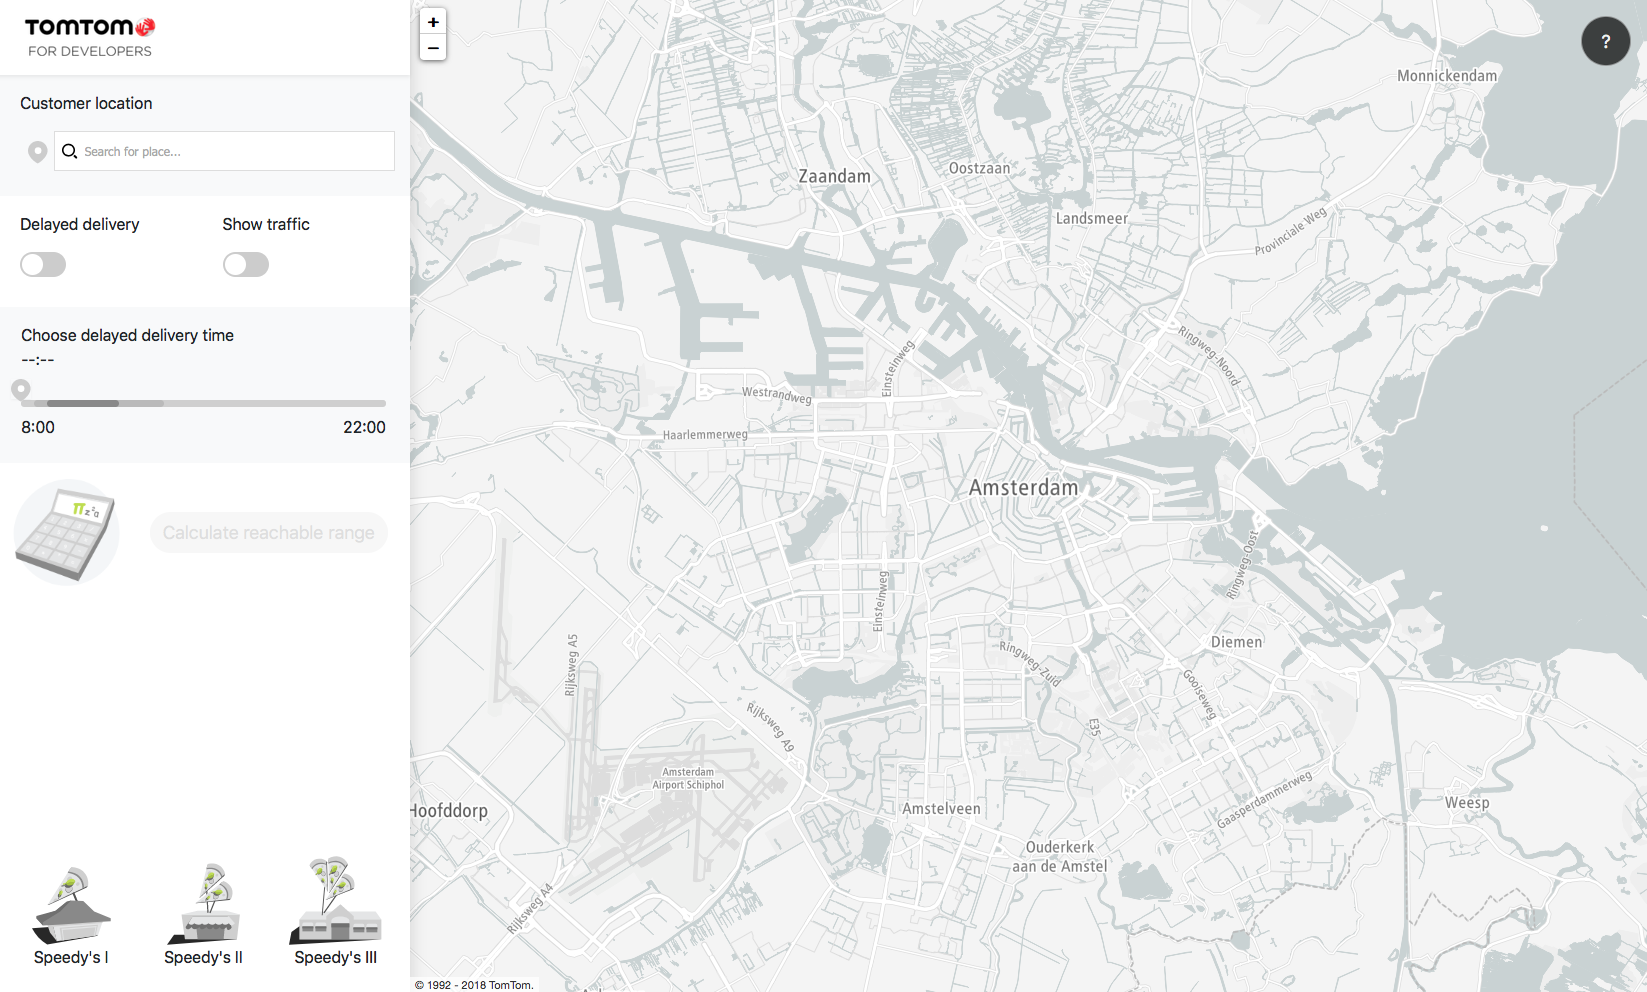
This tutorial shows you how to use the TomTom Maps SDK for Web to create a web application that helps a pizza chain select from which restaurant a pizza should be delivered to the customer.
It shows how to use:
- The Routing API:
- Its Reachable Range method to calculate and display a vehicle-reachable range in a specified time.
- Its Calculate Route method to calculate travel time between 2 points.
- The Batch Routing API to execute multiple Calculate Route and Reachable Range queries in a single request.
- An autocomplete search input box map control to find addresses and points of interest (POIs).
A user can start interacting with the application by typing the address of a place where the pizza should be delivered inside the search box.
When the user clicks on the Calculate Route button:
- Polygons with a reachable range from each pizza restaurant are shown on the map.
- A travel time from each restaurant is calculated and displayed.
Prerequisites
To start using the TomTom Maps SDK for Web, you need the following:
- An application template that can be downloaded: Pizza delivery template.
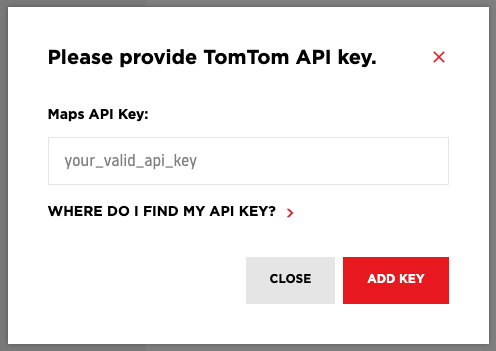
- If you don't have an API key visit a How to get a TomTom API key site and create one.
- Custom Map Style
Create your style with Map Styler now
To create a custom map style you need to use the Map Styler Tool. Once you have your own API Key, there are a few steps remaining:
Paste your API Key inside the Map Styler tool:
Open a new style and choose a Basic Light style template from the gallery. You can modify a style according to your needs.
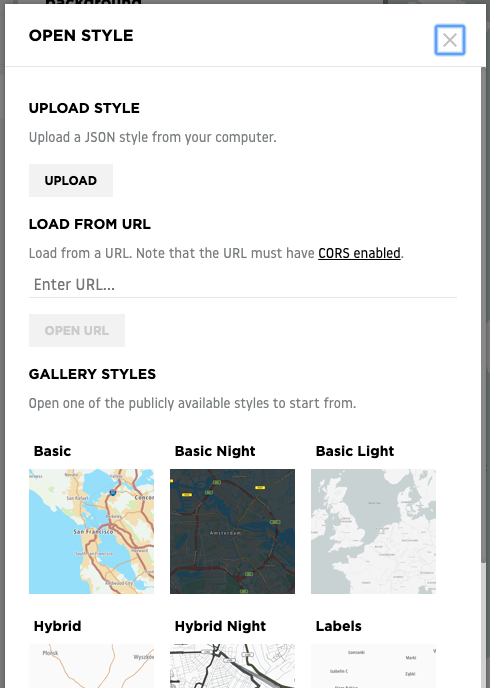
Click 'Export' and download the file with a map style. Save the downloaded file as 'mono.json' and put it inside the application template folder.
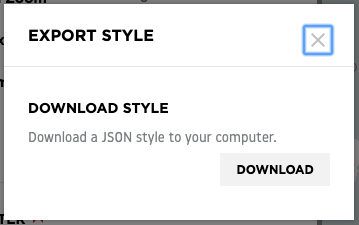
Save it as 'mono.json' inside the application template folder.
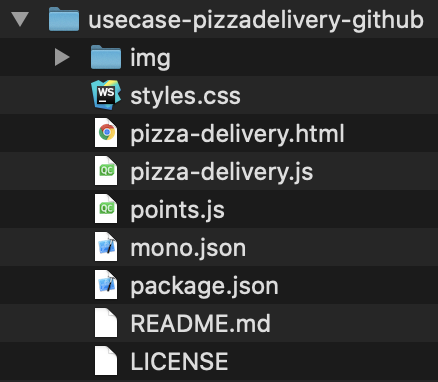
Inside the directory with the application template (that you just downloaded) you can see multiple files:
- pizza-delivery.html with an application HTML code.
- points.js where you can find a GeoJSON definition with coordinates to pizza restaurants on the map.
- The points.js file contains a collection
of GeoJSON features assigned to a variable
named
geojson. - These features represent points where pizza restaurants are placed on the map. For each point _
additional properties_ are defined:
- a path to a marker image named iconUrl and
- a color of a range polygon named polygonColor.
- See the following code example.
1var geojson = {2 type: "FeatureCollection",3 features: [4 {5 type: "Feature",6 geometry: {7 type: "Point",8 coordinates: [4.87408, 52.37617],9 },10 properties: {11 iconUrl: "img/ic_restaurant_1_map.png",12 polygonColor: "#abc3f2",13 },14 },15 // other geojson features16 ],17}
- The points.js script file is already included as a
<script>HTML element in the _ pizza-delivery.html_ file. This means you can use thegeojsonvariable inside other scripts included after the geojson.js file. - styles.css where CSS styles for the map and other HTML elements are defined.
- pizza-delivery.js with the application JavaScript code. This is the main file which you will be working with in the following parts of this tutorial.
- img directory with all images needed in the tutorial.
- mono.json vector map style used to display a map with custom colors. You created that file in the previous section.
The Pizza delivery application uses CSS classes defined inside a Bootstrap 4 library. Additionally, it uses the Bootstrap Slider component to allow users to choose a time to have the pizza delivered.
Vector map initialization (with UI elements)
To display a TomTom map with a custom map style you need to use a vector map. You can initialize the map by adding the following code inside the pizza-delivery.js file. See the following code example.
1var apiKey = "YOUR_API_KEY"2var centerCoords = [4.89218, 52.37187]3var map = tt.map({4 key: apiKey,5 container: "map",6 center: centerCoords,7 style: "mono.json",8 zoom: 12,9})
The first parameter of the tt.map container requires the same value as the id of a HTML div
element where the map will be embedded. Make sure that you replace the YOUR_API_KEY placeholder
with your own, valid API Key.
Inside the preceding code snippet, a custom map style is used. It's done by adding a 'style' option
to the constructor pointing to our 'mono.json' file. Make sure that you replace the YOUR_API_KEY
placeholders inside the 'mono.json' file like in the previous step.
To run your application with a vector map you need to start a HTTP server.
- The easiest way to get a server running is to use an existing
http-serverpackage from a npm repository. - To install this package, type the command
npm install http-serverin your terminal, inside the directory with the pizza-delivery.js file. - Now you can start the server by typing a
http-servercommand in the terminal. - To see your application with the map displayed, go to
the
http://127.0.0.1:8080/pizza-delivery.htmlurl.
Note: You may need to clear your browser cache after each change inside the pizza-delivery.js file.
Initializing the side menu
- Define the variables used in the following section of this tutorial:
MILLIS_IN_SECOND: A constant with the number of milliseconds in one minute.DELIVERY_TIME_IN_MINUTES: The amount of the time in minutes necessary to calculate delivery range polygons.MIN_SLIDER_VALUE: The start of a range for a delivery time slider with the time in minutes, equal to 480 (8:00).MAX_SLIDER_VALUE: The end of a range for a delivery time slider with the time in minutes, equal to 1320(22:00).reachableRangeBudgetTimeInSeconds: The amount of time in seconds needed to calculate range polygons.pizzaPrefixId: A prefix used in identifiers of the elements from the side menu.polygonLayers: An array where polygons displayed on the map are stored.pizzaMarkers: An array where pizza restaurant map markers are stored.clientMarker: A variable where a pizza delivery destination marker is stored.deliveryTimeSlider: A variable with the delivery time slider interface control.
- Add all variables to the pizza-delivery.js file. See the following code example.
1var MILLIS_IN_SECOND = 10002var DELIVERY_TIME_IN_MINUTES = 153var MIN_SLIDER_RANGE = 4804var MAX_SLIDER_RANGE = 13205var reachableRangeBudgetTimeInSeconds = 60 * DELIVERY_TIME_IN_MINUTES6var pizzaPrefixId = "pizza-"7var polygonLayers = []8var pizzaMarkers = []9var clientMarker10var deliveryTimeSlider
- Inside the pizza-delivery.html file you will find an already-defined structure of the side
menu. You need to initialize:
- A delivery time slider
- An autocomplete search box
- To do that, add a method
initControlMenuto the pizza-delivery.js file and execute it. See the following code example.1function initControlMenu() {2 var commonOptions = {3 key: apiKey,4 center: map.getCenter(),5 radius: 1000,6 }7 var searchBoxInstance = new tt.plugins.SearchBox(tt.services, {8 minNumberOfCharacters: 0,9 searchOptions: commonOptions,10 autocompleteOptions: commonOptions,11 })12 document13 .getElementById("search-panel")14 .append(searchBoxInstance.getSearchBoxHTML())15 deliveryTimeSlider = new Slider("#slider-input", {16 min: MIN_SLIDER_RANGE,17 max: MAX_SLIDER_RANGE,18 value: MIN_SLIDER_RANGE,19 step: 15,20 tooltip: "hide",21 enabled: false,22 rangeHighlights: [23 { start: 510, end: 810, class: "medium-traffic" },24 { start: 540, end: 705, class: "high-traffic" },25 ],26 })27 deliveryTimeSlider.on(28 "change",29 function (event) {30 document.getElementById("delivery-time").innerText =31 convertSliderValueToTimeString(event.newValue)32 },33 false34 )35 deliveryTimeSlider.on("slideStop", function () {36 setDeliveryTimeSliderValue()37 setDeliveryTimeSpanValue()38 })39 document40 .getElementById("calculate-range")41 .addEventListener("click", displayReachableRangePolygons)42 document43 .getElementById("delivery-toggle")44 .addEventListener("change", toggleDelayedDelivery)45 document46 .getElementById("traffic-toggle")47 .addEventListener("change", toggleTrafficFlowLayer)48 searchBoxInstance.on(49 "tomtom.searchbox.resultselected",50 showClientMarkerOnTheMap51 )52}53initControlMenu()- Inside this function the search box with an autocomplete functionality is initialized and
assigned to a variable
searchBoxInstance. - This search box is a map control, which means that it can only be initialized when the map is present.
- In the next step:
- The search box is moved under a HTML element with an id
search-panelin the side menu. - The delivery time slider is initialized and assigned to the variable
deliveryTimeSlider. This slider’s‘change’event updates the currently displayed delivery time. A‘slideStop’event makes sure that the slider’s selected value is later than the current time.
- The search box is moved under a HTML element with an id
- Inside this function the search box with an autocomplete functionality is initialized and
assigned to a variable
- You also need helper methods:
convertSliderValueToTimeString:Used to convert the delivery time slider value (current time in minutes) tohour:minute(hh:mm)format.setDeliveryTimeSpanValue:Where the delivery time is displayed inside a HTML element with an id ofdelivery-time.setDeliveryTimeSliderValue:Where the delivery time slider allowed values are restricted to the time which is later than the current time. See the following code example.
1function convertSliderValueToTimeString(sliderValue) {2 var hours = Math.floor(sliderValue / 60)3 var minutes = sliderValue % 604 if (hours < 10) {5 hours = "0" + hours6 }7 if (minutes < 10) {8 minutes = "0" + minutes9 }10 return hours + ":" + minutes11}12function setDeliveryTimeSliderValue() {13 var currentDate = new Date()14 var currentTimeInMinutesWithDeliveryTime =15 currentDate.getHours() * 60 +16 currentDate.getMinutes() +17 DELIVERY_TIME_IN_MINUTES18 if (deliveryTimeSlider.getValue() < currentTimeInMinutesWithDeliveryTime) {19 if (currentTimeInMinutesWithDeliveryTime < MIN_SLIDER_RANGE) {20 deliveryTimeSlider.setValue(MIN_SLIDER_RANGE)21 } else if (currentTimeInMinutesWithDeliveryTime > MAX_SLIDER_RANGE) {22 deliveryTimeSlider.setValue(MAX_SLIDER_RANGE)23 } else {24 var roundedCurrentTime =25 currentTimeInMinutesWithDeliveryTime % 15 === 026 ? currentTimeInMinutesWithDeliveryTime27 : Math.ceil(currentTimeInMinutesWithDeliveryTime / 15) * 1528 deliveryTimeSlider.setValue(roundedCurrentTime)29 }30 }31}32function setDeliveryTimeSpanValue() {33 var deliveryTimeSpan = document.getElementById("delivery-time")34 if (deliveryTimeSlider.isEnabled()) {35 deliveryTimeSpan.innerText = convertSliderValueToTimeString(36 deliveryTimeSlider.getValue()37 )38 } else {39 deliveryTimeSpan.innerText = "--:--"40 }41} - Now go to the
http://127.0.0.1:8080/pizza-delivery.htmlurl and refresh/reload the page to see the map with the side menu (you may need to clear your browser cache before you refresh/reload the page).
Displaying markers on the map
As the map is now visible on the page, you can add pizza restaurant markers with their custom icons.
- Add the method “
displayPizzaMarkers”where pizza restaurant marker icons are added to the map. See the following code example.1function displayPizzaMarkers() {2 geojson.features.forEach(function (marker) {3 createMarker(marker)4 })5}6function createMarker(geoJsonPoint) {7 var position = geoJsonPoint.geometry.coordinates8 const markerElement = document.createElement("div")9 markerElement.innerHTML = ""10 marker = new tt.Marker({11 draggable: true,12 element: markerElement,13 })14 .setLngLat(position)15 .addTo(map)16 marker.on("dragend", function () {17 if (polygonLayers.length > 0) {18 displayReachableRangePolygons()19 }20 })21 marker.polygonColor = geoJsonPoint.properties.polygonColor22 pizzaMarkers.push(marker)23 return marker24}25function displayReachableRangePolygons() {} - Inside the
displayPizzaMarkersmethod, we are iterating throughout the feature and points inside thegeojsonvariable (defined in the points.js file). - For each point, a map marker is created in the
createMarkermethod. - The
createMarkermethod constructstt.Markerobjects, with HTML elements containing icons loaded from urls defined as GeoJSON properties.- Those icons are displayed on the map for each pizza restaurant marker.
- Optionally you can implement a
‘dragend’marker event, where range polygons (added in a later part of this tutorial) are recalculated each time a user moves any pizza restaurant marker to another position on the map.
- Next, push all markers to the
pizzaMarkersarray.- By adding the placeholder method
displayReachableRangePolygons, you will implement this method in next section of the tutorial.
- By adding the placeholder method
- Execute the
displayPizzaMarkersmethod after theinitControlMenumethod. See the following code example.initControlMenu()displayPizzaMarkers() - Now you also need a marker representing the customer of the pizza restaurant.
- This marker is added whenever a user of the application types a customer address inside the autocomplete search box.
- Add a
tomtom.searchbox.resultselectedevent on thesearchBoxInstance. See the following code example.and implement this event handling with the following code:1searchBoxInstance.on(2 "tomtom.searchbox.resultselected",3 showClientMarkerOnTheMap4)1function showClientMarkerOnTheMap(result) {2 document.getElementById("calculate-range").disabled = false3 if (clientMarker) {4 map.removeLayer(clientMarker)5 }6 const markerElement = document.createElement("div")7 markerElement.innerHTML = ""8 var position = result.data.result.position9 clientMarker = new tt.Marker({ element: markerElement })10 .setLngLat([position.lng, position.lat])11 .addTo(map)12 if (polygonLayers.length > 0) {13 displayReachableRangePolygons()14 }15} - In the method
showClientMarkerOnTheMap, the marker representing the customer:- Is removed from the map (if it exists).
- A new customer marker is created in another position and added to the map.
- Let’s quickly summarize what you implemented so far.
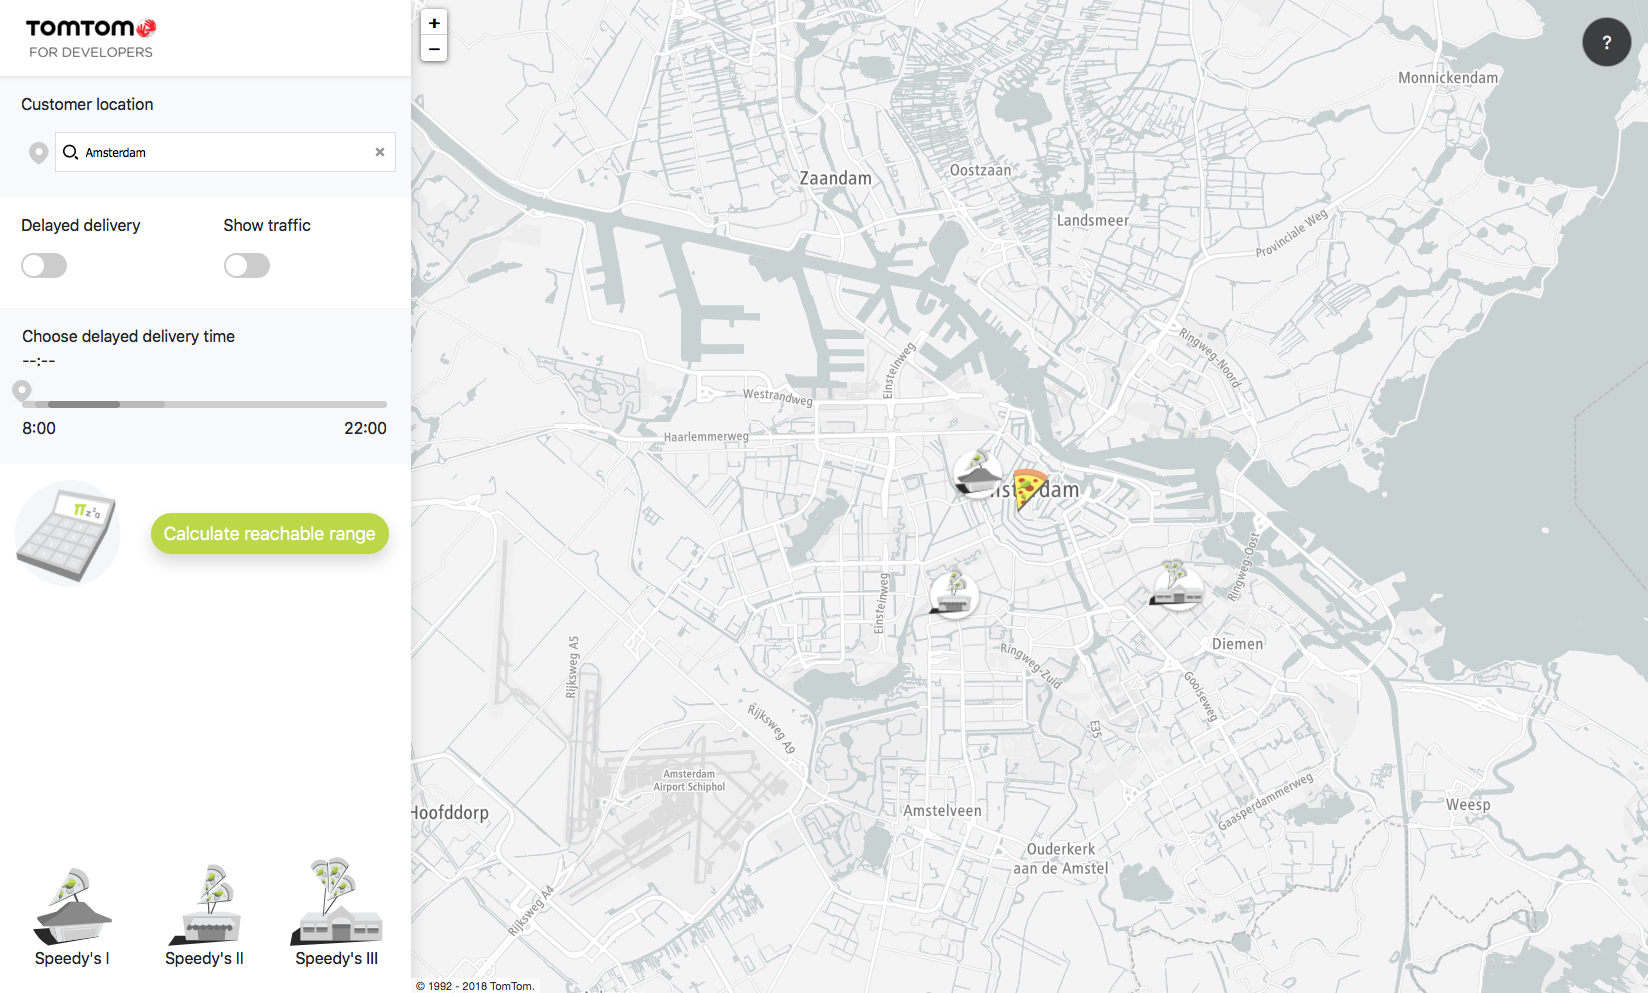
- At this point you should see the markers representing pizza restaurants on the map.
- Search for an address by typing it inside the search box on the side menu.
- Click a found address to show it on the map as the customer marker.
Display reachable range polygons
Now you can implement a displayReachableRangePolygons method. See the following code example.
1function displayReachableRangePolygons() {2 closeAllPopups()3 clearPolygonLayers()4 tt.services5 .calculateReachableRange({6 batchMode: "sync",7 key: apiKey,8 batchItems: constructRangeBatchRequest(),9 })10 .then(function (polygons) {11 displayMarkerPolygons(polygons)12 })1314 calculateTravelTime()15}16function constructRangeBatchRequest() {17 var queries = []18 pizzaMarkers.forEach(function (marker) {19 var query = {20 origin: [marker.getLngLat().lng, marker.getLngLat().lat],21 timeBudgetInSec: reachableRangeBudgetTimeInSeconds,22 }23 if (isDeliveryDelayed()) {24 var departureDeliveryDate = getDepartureDeliveryDate()25 if (departureDeliveryDate > new Date()) {26 query.departAt = departureDeliveryDate27 }28 }29 queries.push(query)30 })31 return queries32}33function closeAllPopups() {34 pizzaMarkers.forEach(function (marker) {35 if (marker.getPopup().isOpen()) {36 marker.togglePopup()37 }38 })39}40function clearPolygonLayers() {41 polygonLayers.forEach(function (layer) {42 map.removeLayer(layer.id)43 map.removeSource(layer.id)44 })45 polygonLayers = []46}
- The first line inside the
displayReachableRangePolygonsmethod executes aclearPolygonLayersfunction.- In this function, all polygons which are in the
polygonLayersarray are removed from the map.
- In this function, all polygons which are in the
- In this tutorial you are using Batch services to send multiple Requests to the TomTom Routing API
at the same time.
- The
constructRangeBatchRequestmethod returns an array of queries which are sent to the Batch Routing service. - Each query is defined by specifying an
originproperty and atimeBudgetInSecproperty.
- The
- When the Batch Calculate Route service returns a response, a
displayMarkerPolygonsmethod is executed.- You can define a
displayMarkerPolygonsmethod with the following code:
1function displayMarkerPolygons(polygons) {2 polygons.batchItems.forEach(function (rangeData, index) {3 if (pizzaMarkers[index]) {4 addPolygonToMap(5 "polygon_" + index,6 rangeData,7 pizzaMarkers[index].polygonColor8 )9 }10 })11}12function addPolygonToMap(id, rangeData, polygonColor) {13 let polygonLayer = buildStyle(id, rangeData.toGeoJson(), polygonColor)14 map.addLayer(polygonLayer)15 polygonLayer.id = id16 polygonLayers.push(polygonLayer)17}18function buildStyle(id, data, color) {19 return {20 id: id,21 type: "fill",22 source: {23 type: "geojson",24 data: data,25 },26 paint: {27 "fill-color": color,28 "fill-opacity": 0.68,29 },30 layout: {},31 }32} - You can define a
- Inside this method, GeoJSON polygons received from the Batch Calculate Reachable Range service are added to the map.
- Each range polygon uses a style with a different color. The style is created by calling
a
buildStylemethod. - Polygon colors are separately defined inside the geojson.js file for each point from which ranges are calculated.
- Make sure to add an on
‘click’button event for a button with acalculate-rangeid inside theinitControlMenumethod. See the following code example.1document2 .getElementById("calculate-range")3 .addEventListener("click", displayReachableRangePolygons) - Now each time when the Calculate route button is clicked:
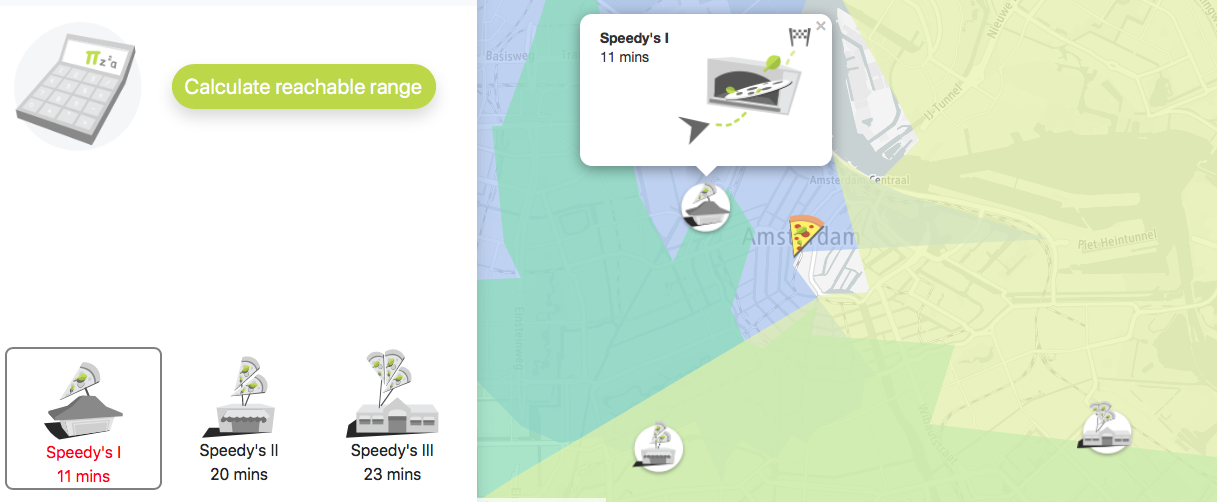
- Polygons with the reachable range from each pizza restaurant are shown on the map.
- All polygons have display styles with different colors.
- You can drag-and-drop any of the pizza marker icons to a new position on the map.
- When you drop the marker, reachable range polygon coordinates are re-calculated and new
polygons are displayed on the map.

- When you drop the marker, reachable range polygon coordinates are re-calculated and new
polygons are displayed on the map.
Calculate travel time
Now that you can see polygons with the reachable range on the map, you need to calculate travel times from each pizza restaurant to the customer.
- Add a
calculateTravelTimefunction to the pizza-delivery.js file. See the following code example.1function calculateTravelTime() {2 if (clientMarker && pizzaMarkers.length > 0) {3 tt.services4 .calculateRoute({5 batchMode: "sync",6 key: apiKey,7 batchItems: constructBatchRequest(),8 })9 .then(displayBatchRoutingResults)10 }11} - Inside this function, routing queries are sent to the Batch Routing service.
- When a Response is received from the service, results with travel times from each pizza restaurant to the customer are displayed on the side menu.
- Execute the
calculateTravelTimemethod from inside thedisplayReachableRangefunction.- Insert following line as the last line of the
displayReachableRangefunction:
calculateTravelTime() - Insert following line as the last line of the
- You also need a method to construct multiple routing queries which are sent to the Batch service.
- To construct queries, add a
constructBatchRequestmethod. See the following code example.
1function constructBatchRequest() {2 var queries = []3 pizzaMarkers.forEach(function (marker) {4 var query = {5 locations: [marker.getLngLat(), clientMarker.getLngLat()],6 computeTravelTimeFor: "all",7 }8 if (isDeliveryDelayed()) {9 var departureDeliveryDate = getDepartureDeliveryDate()10 if (departureDeliveryDate > new Date()) {11 query.departAt = departureDeliveryDate12 }13 }14 queries.push(query)15 })16 return queries17}- Inside this method for each pizza restaurant, you create a Routing API query with the
following parameters:
Locations:Each query has a different origin (pizza restaurant) and a common destination location (the customer).computeTravelTimeFor: ‘all’The query result contains additional information regarding travel times.
- The
constructBatchRequestmethod returns an array of Routing service queries, which can be used in a single Batch Routing service Request.
- To construct queries, add a
- In the final step, add a
displayBatchRoutingResultsmethod to display the information about travel times from each pizza restaurant to the customer inside the side menu. See the following code example.1function displayBatchRoutingResults(resultData) {2 var indexShortestTime3 var shortestTime4 resultData.batchItems.forEach(function (routeData, index) {5 const routeGeoJson = routeData.toGeoJson()6 var pizzaElement = document.getElementById(pizzaPrefixId + (index + 1))7 pizzaElement.classList.remove("active")8 var travelTimesElements = pizzaElement.getElementsByClassName(9 "travel-time-minutes"10 )11 if (travelTimesElements.length > 0) {12 pizzaElement.removeChild(travelTimesElements[0])13 }1415 if (routeData && !routeData.error) {16 var travelTime =17 routeGeoJson.features[0].properties.summary.travelTimeInSeconds18 if (!shortestTime || shortestTime > travelTime) {19 indexShortestTime = index20 shortestTime = travelTime21 }22 var travelTimeSpan = document.createElement("span")23 travelTimeSpan.innerHTML =24 Math.ceil(travelTime / 60).toString() + " mins"25 travelTimeSpan.classList.add("travel-time-minutes")26 pizzaElement.appendChild(travelTimeSpan)27 }28 })29 if (30 typeof indexShortestTime !== "undefined" ||31 indexShortestTime !== null32 ) {33 document34 .getElementById(pizzaPrefixId + (indexShortestTime + 1))35 .classList.add("active")36 }37 closeAllPopups()38 createAndBindPopups()39 pizzaMarkers[indexShortestTime].togglePopup()40}- This method for each result received from the Batch Routing service, which did not end with an error, takes information about the travel time in seconds and displays this information at the bottom of the side menu.
- Travel times are inserted inside HTML elements with ids equal to:
Where thepizzaPrefixId + (index + 1)pizzaPrefixIdvariable is equal to “pizza-” andindexis an index of the Batch Routing query results array. - Additionally, the CSS class
activeis assigned to the pizza restaurant HTML element on the side menu.- This adds CSS styling with an additional border to this element.
- The last two lines from this method are used to:
- Close any open marker popup.
- Recreate popups to include travel time information.
Choosing delivery time
The prototype which you downloaded as part of the prerequisites includes a functionality to allow a user to select the time when the customer requested to have the pizza delivered.
- First, you need methods to get information about the delivery time that the user chooses on the time slider from the side menu and if the delayed delivery is currently enabled.
- You can find out if the delivery is delayed by checking if
deliveryTimeSlideris enabled inside theisDeliveryDelayedmethod. See the following code example.1function getDeliveryDateTime() {2 var timeParts = document3 .getElementById("delivery-time")4 .innerText.split(":")5 var chosenDeliveryDate = new Date()6 chosenDeliveryDate.setHours(parseInt(timeParts[0]))7 chosenDeliveryDate.setMinutes(parseInt(timeParts[1]))8 return chosenDeliveryDate9}10function getDepartureDeliveryDate() {11 return new Date(12 getDeliveryDateTime().getTime() -13 reachableRangeBudgetTimeInSeconds * MILLIS_IN_SECOND14 )15}16function isDeliveryDelayed() {17 return deliveryTimeSlider.isEnabled()18} - In next step add the following lines:
inside the1if (isDeliveryDelayed()) {2 var departureDeliveryDate = getDepartureDeliveryDate()3 if (departureDeliveryDate > new Date()) {4 query.departAt = departureDeliveryDate5 }6}
constructRangeBatchRequestandconstructBatchRequestmethods where you create reachable range and calculate route queries.
Make sure that those lines are inserted just before any routing queries are pushed to the array, with all queries to be sent in a batch Request. - In the final step, add an
‘on-change’event listener to the HTML element with adelivery-toggleid at the end of theinitControlMenumethod. See the following code example.With the implementation:1document2 .getElementById("delivery-toggle")3 .addEventListener("change", toggleDelayedDelivery)1function toggleDelayedDelivery() {2 deliveryTimeSlider.toggle()3 setDeliveryTimeSliderValue()4 setDeliveryTimeSpanValue()5}
Now you should be able to choose the delivery time using the slider from the side menu to configure the time when the customer wants to have his pizza delivered.
Marker popups with custom icons
To display a popup with information about the specific pizza restaurant after you click on its marker:
-
Add a
createAndBindPopupsmethod. See the following code example.1function createAndBindPopups() {2 pizzaMarkers.forEach(function (marker, index) {3 var pizzaMenuDiv = document.getElementById(pizzaPrefixId + (index + 1))4 var pizzaSpans = pizzaMenuDiv.getElementsByTagName("span")5 var pizzaString = "<span><b>" + pizzaSpans[0].textContent + "</b>"6 if (pizzaSpans.length > 1) {7 pizzaString += "<br>" + pizzaSpans[1].textContent8 }9 pizzaString += "</span>"10 var customPopup =11 '<div class="pizza-balloon">' +12 pizzaString +13 '<img src="img/pizza_oven_illustration.png" alt="pizza oven"/></div>'14 marker.setPopup(new tt.Popup({ offset: 35 }).setHTML(customPopup))15 })16}- Inside this method you need to create and bind the popup for each pizza marker from
the
pizzaMarkersarray. - Popups are created by using HTML markup and values from HTML elements with travel times.
- Created popups are later bound to pizza restaurant markers and added to the map.
- Inside this method you need to create and bind the popup for each pizza marker from
the
-
To initialize popups, execute the
createAndBindPopupsmethod after thedisplayPizzaMarkersmethod. See the following code example.1initControlMenu()2displayPizzaMarkers()3createAndBindPopups()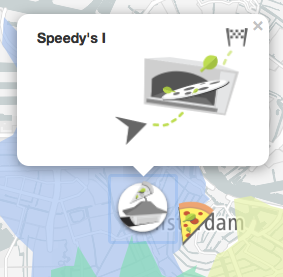
Traffic layer
To display traffic flow information on the map:
- Add a
toggleTrafficFlowLayermethod. See the following code example.1function toggleTrafficFlowLayer() {2 if (document.getElementById("traffic-toggle").checked) {3 map.showTrafficFlow()4 } else {5 map.hideTrafficFlow()6 }7} - To make sure that the traffic layer is shown (or hidden) whenever the
Show traffictoggle switch is clicked, add an‘on-change’event listener to thetraffic-toggleHTML element inside theinitControlMenumethod. See the following code example.1document2 .getElementById("traffic-toggle")3 .addEventListener("change", toggleTrafficFlowLayer)
You can see the full application here:
Summary
This tutorial explained:
- How to create an application that uses the Batch Routing service to send multiple queries to the Routing API in a single Request.
- The Routing API Reachable Range endpoint was used to calculate and display range polygons on the map, and the Routing Calculate Route endpoint was used to calculate a travel time from an origin to the destination.
- An autocomplete search box map control was used to find addresses and points of interest based on the user’s input. The full application is visible below.
All the source code of the application can be found on Github.