Create Custom Map Styles with TomTom's Map Styler
)
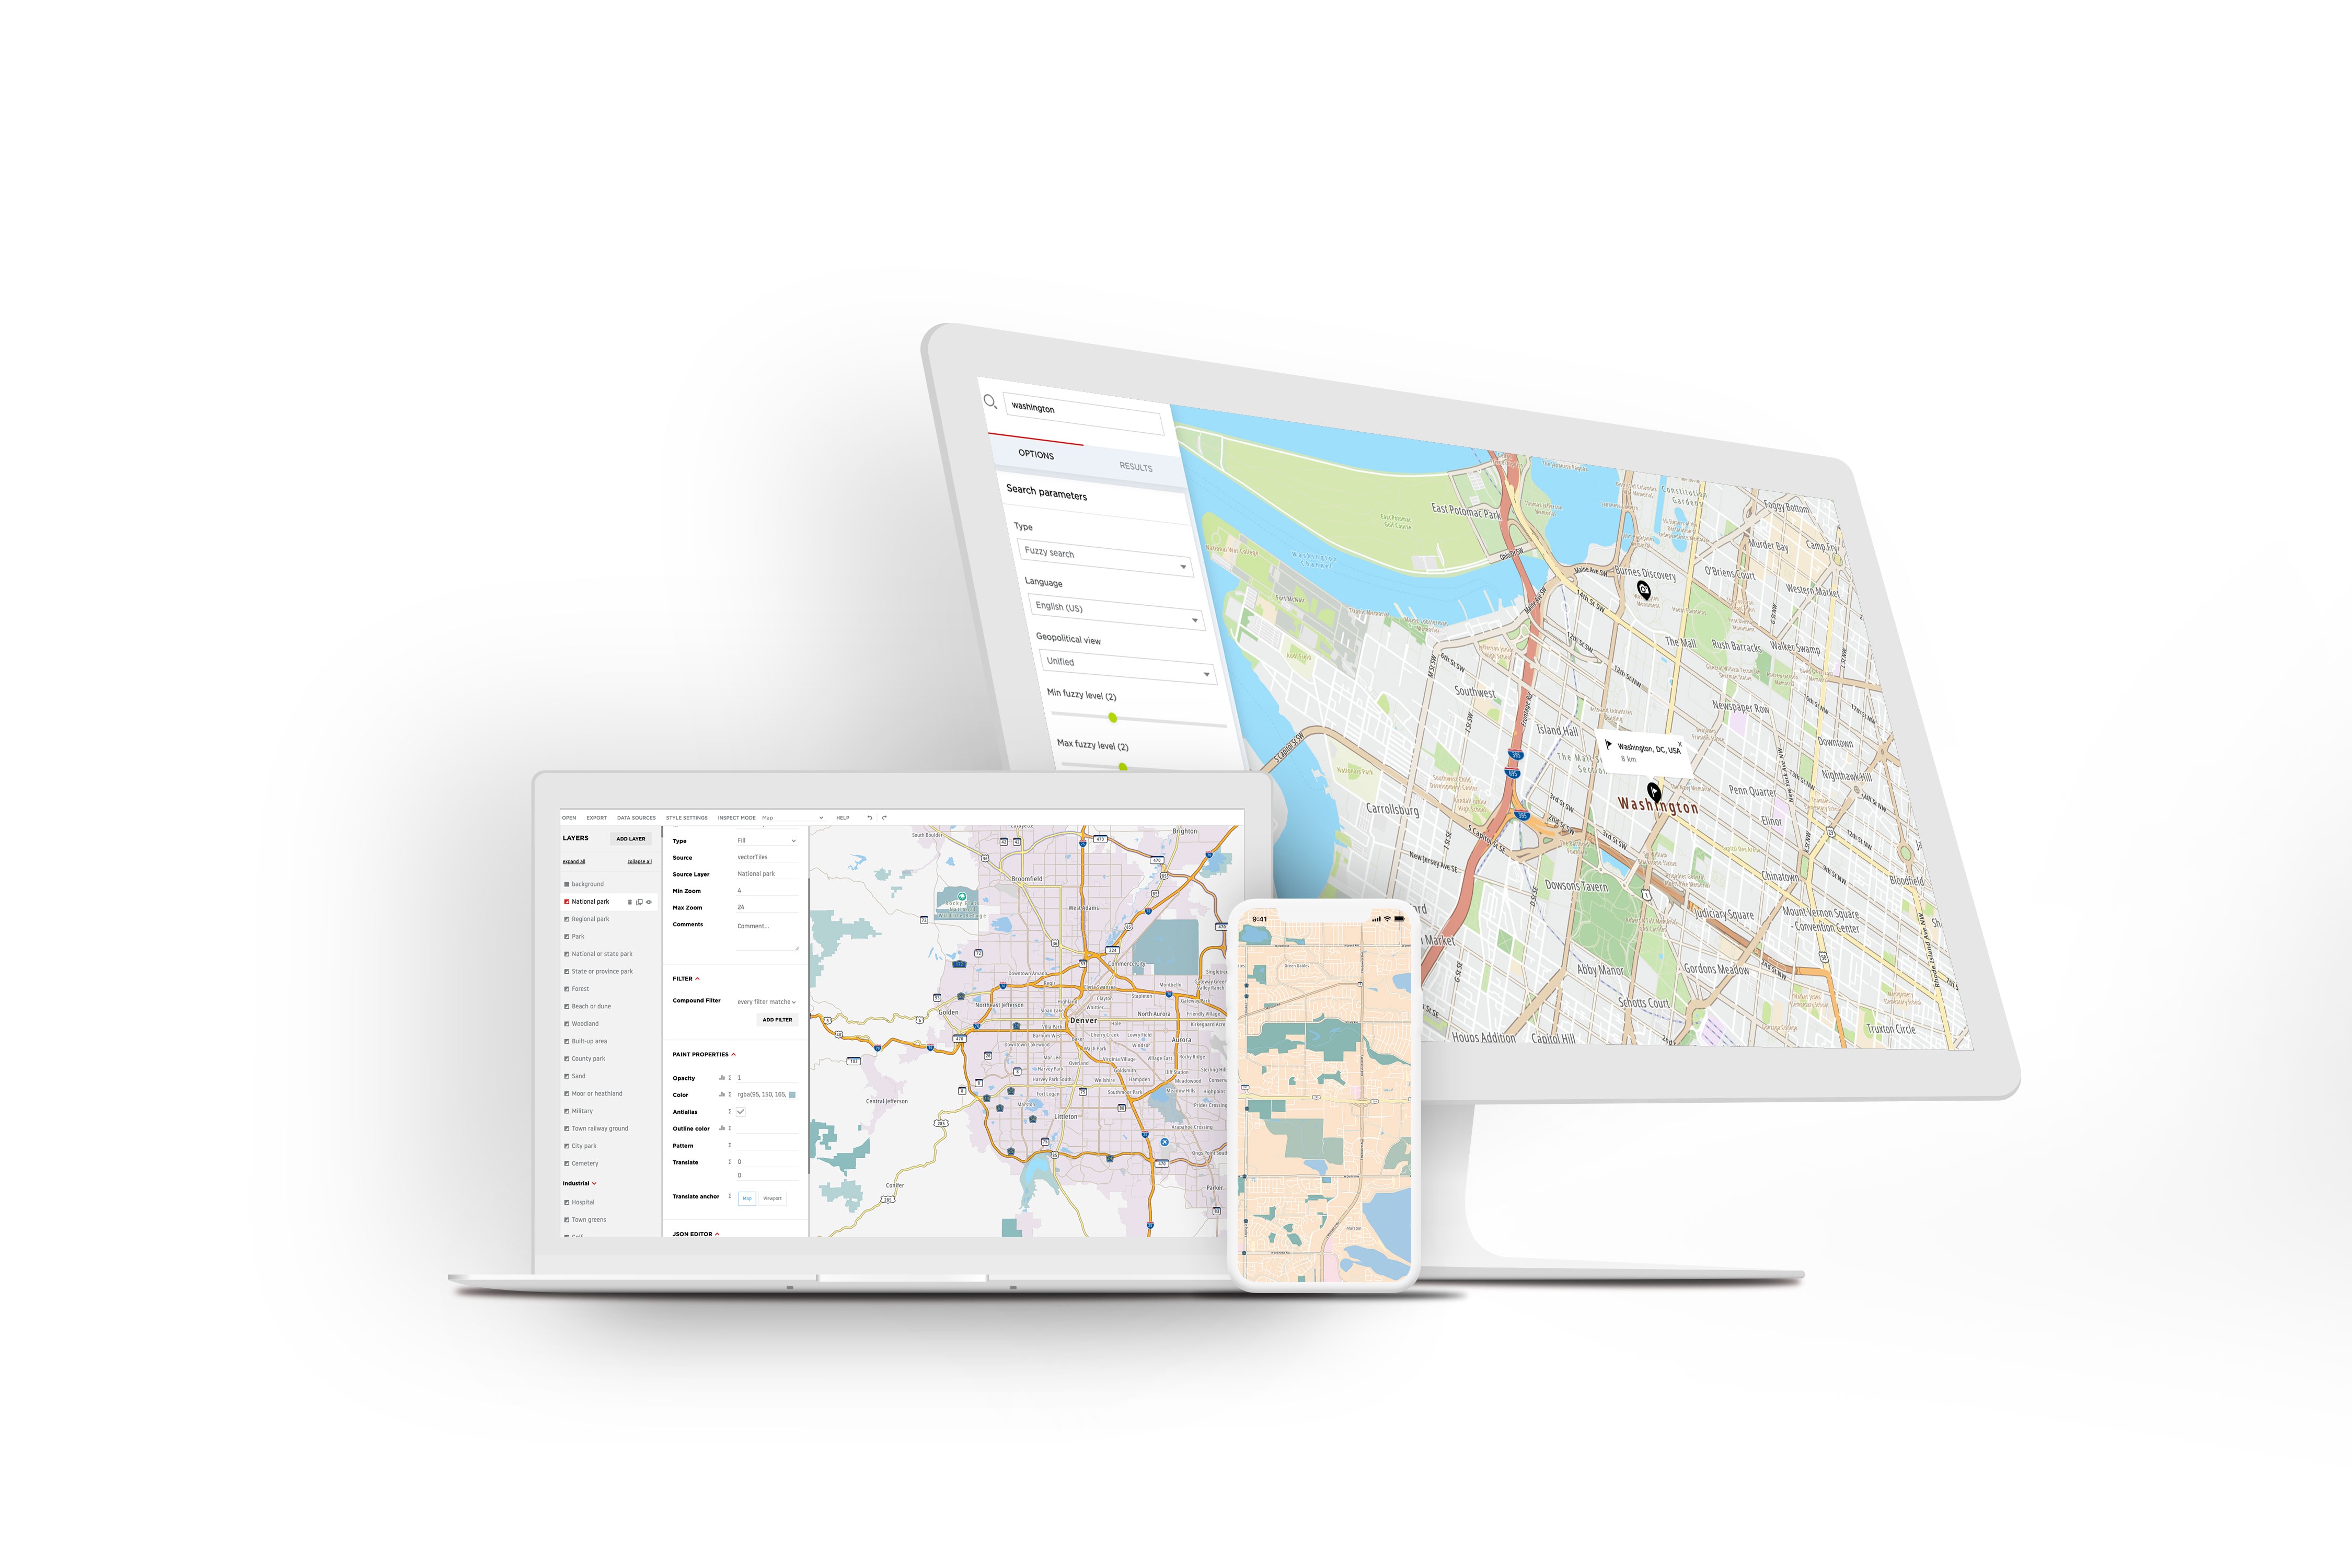
Whether your building an application or creating art, the Map Styler enables you to create beautiful maps and add it to your project. Learn how to build a customized map using TomTom's Map Styler with this quick tutorial on how to modify your map to build a simple, modern, black and white map of your favorite city.
Customized Gifts
My friend Alessandro just graduated from a university in Amsterdam and was about to go back to his home country – Italy.
Before he left, I wanted to give him a personalized goodbye gift that would remind him of the city where he spent the last two years. My gift idea was to find a map of Amsterdam that could be framed and hung up on the wall as a decoration. I had a specific look in mind and unfortunately, I couldn’t find what I was looking for in stores or online.
So, I started researching alternative gifts and I quickly realized that TomTom's Map Styler was a tool that I could use to create the map I was looking for. I opened the tool, spent some time playing with it and within less than an hour I had the perfect goodbye gift ready.
Custom map styles from A to Z
So, if you're interested in creating map art, then here’s the step-by tutorial on how I completed my first project using the Map Styler. The Map Styler and it's documentation can be found on TomTom Developer Portal under Tools section.
First, I was asked to insert my API key. The API key was created automatically when I registered on developer.tomtom.com and it was easy to find in the My Dashboard tab. The short instruction how to find the API key that was quite useful in getting started.

The tool allows you to start with 7 pre-made map styles: Basic, Basic Night, Basic Light, Hybrid, Hybrid Night, Labels and Labels Night. They all can be found by clicking ‘Open’ in the top-right corner. I browsed through all of them and decided to go for the Hybrid Night. This map style has the layers that I was interested in - road network and the color palette that I liked – white background and dark-grey color of the streets.

The next step was choosing the zoom level, which is a value representing the magnification on the map. TomTom maps have 23 zoom levels. The most optimal zoom level for me was 13, because I could see an entire map of the city.
The closer the zoom level the more customized the map can be - if you zoom in you can modify small details of the map. It’s worth to mention that each zoom level can be customized separately, e.g. you can specify which zoom level should display the name of the city or choose different colors of the water on each zoom level. It was not relevant in my case because I only needed a picture of the map taken from a certain zoom level. All the changes I made further were related to 13th zoom level only.

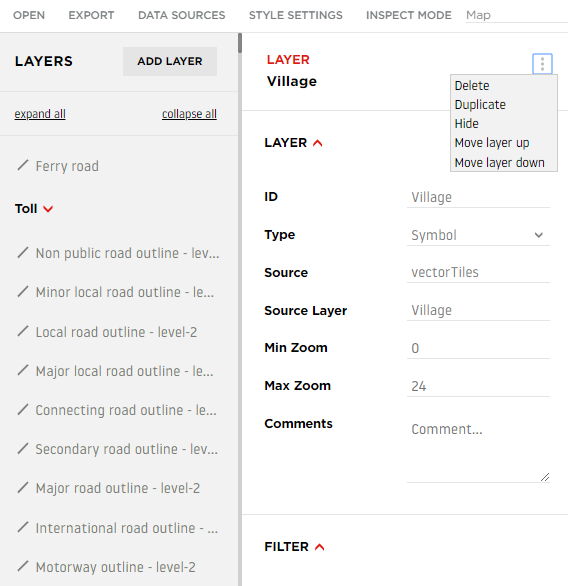
The Hybrid Night maps style had couple of things that I didn’t want, e.g. icons of the bus stops, street names or landmarks. Getting rid of them was easy, using the left menu bar. To delete all the street names, I clicked on one of them and then under the tab ‘Layer’ I selected ‘Delete’. The entire layer of all street names disappeared.
The next step was coloring of the roads or in my case - blacking the roads. There are two attributes related to colors: the outline and fill. I needed to change both as by default the roads were painted in dark grey. To change the color, I clicked on the item I wanted to color and went to ‘Paint properties’ menu. Then, from a color palette that popped up I selected the color and shade I had in mind.
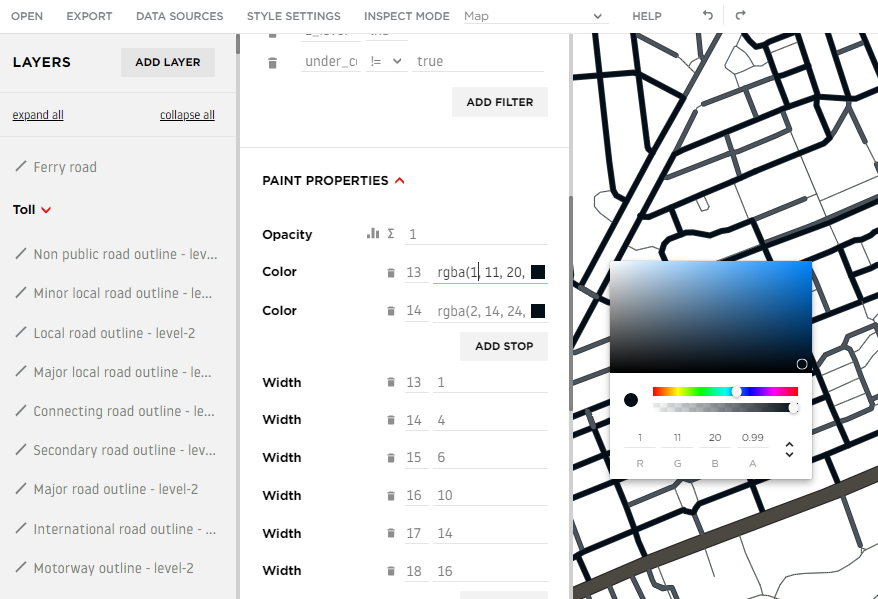
When I blacked all the roads, I realized that some of them didn’t look right – the back color emphasized the width of the roads. I easily changed it, by using the ‘Width’ section and increased the value, which in result made thinner lines.
 Et voilà - my map style was ready!
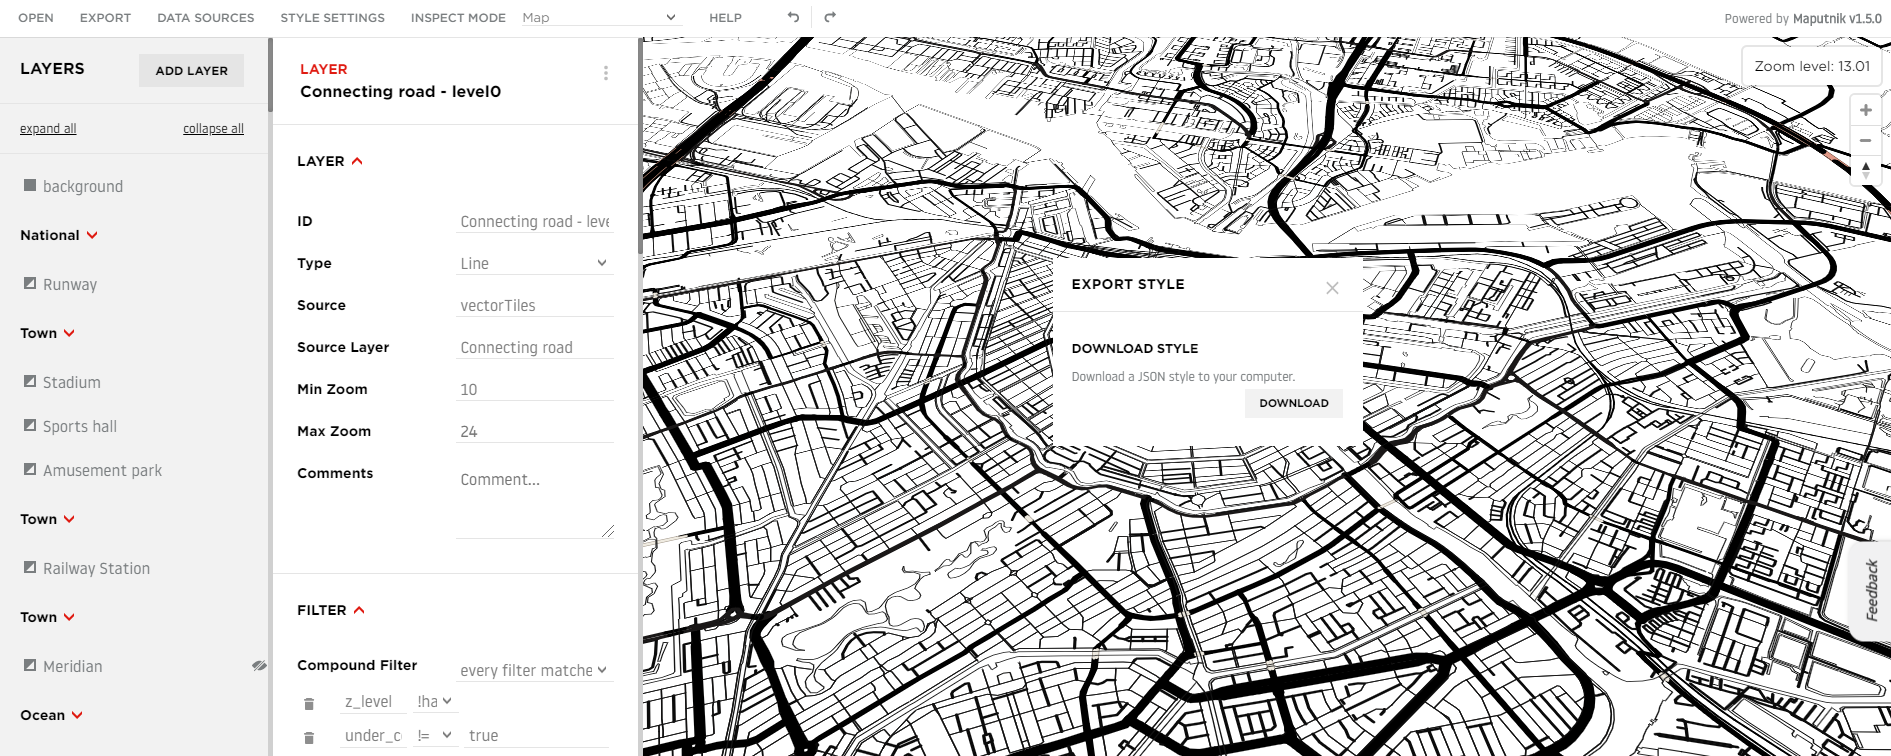
To save my work I used ‘Export’ function which allowed me to download the project as a JSON file. The part of work involving the Map Styler was completed.
Next, I took a screenshot of my map design and as the last step I used some simple graphics program do add ‘Amsterdam’ sign. I printed it out and put it in a frame!
One size does not fit all
The Map Styler enabled me to create a custom map style in less than an hour.
Of course, my use case of the Map Styler was very simple - I only created a map style, took a screenshot and printed it out. However, this product allows users to do much more. The map style you create can be used for the map displayed in your mobile or web application – fully interactive, with high level of details and your design.
Every app has a different purpose, and therefore different maps are relevant for each app. Based on the use case, maps will have different level of details, different look and feel or simply different colors to match with the brand of the app. That’s why one of the most important characteristics of the map embedded in your app is the possibility to customize it and Map Styler allows you to do it.
You can add, remove or modify layers, change their order to determine what should be displayed, change the colors, opacity, visibility or patterns of all the features, width of the lines as well as font size and color of the labels. At the same time, the functionality is simple: you can build and edit your map style, export the results to JSON file and incorporate the project to display in your app.
Below is the final version of my map:

Conclusion: if I can do it, you can too
Creating a custom map style with Map Styler is so easy that any average tech-savvy person can do it.
Get started with TomTom Map Styler ! Share your map style designs and tag them using #StyledbyTomTom on Twitter. We’d love to see your projects and hear your feedback!