Routes
The Map Display module allows you to handle route planning and driving actions on the map. This guide covers how to draw a Route, show the progress along it, and track the user’s location during the trip.
If you’re looking for route planning, see the Routing guide.
Adding a route
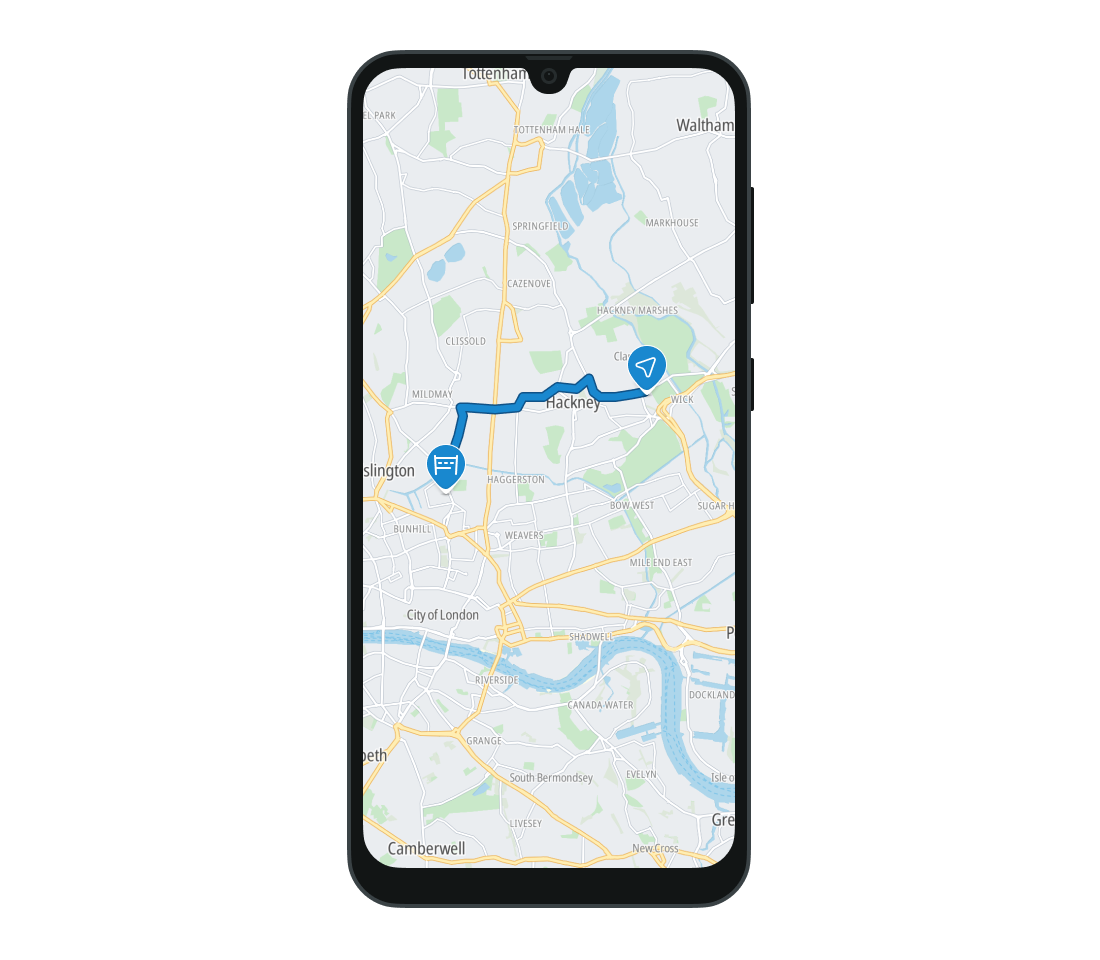
To show a Route on the map, you need to call the TomTomMap.addRoute(RouteOptions) method. To configure its shape and appearance, use the RouteOptions class. Drawing a route on the map requires a list with coordinates of the route points. You can also define its appearance by setting its color, width, and the visibility of departure and destination markers. Route width can be defined as a single value (which will be the same for all zoom levels), or different route widths can be set for different zoom levels. The width will be then interpolated for all the zoom levels in between. RouteOptions also supports specific routing features such as showing the user’s progress, or providing a list of instructions along the route.
It is crucial to pass the correct route offsets for the route. The property RouteOptions.routeOffset determines where instructions and route progress are rendered. Although this field is optional, we highly recommend passing the route offset directly to the RouteOptions. Ensure that the route offsets are synchronized with the route instructions offset to avoid misplaced instructions or inaccurate progress. If you use products like the TomTom Routing API, we recommend using route offsets directly from the API.
1val routeOptions =2 RouteOptions(3 geometry =4 listOf(5 GeoPoint(52.377956, 4.897070),6 GeoPoint(51.377956, 4.997070),7 GeoPoint(50.377956, 5.897070),8 GeoPoint(52.377956, 5.897070),9 ),10 color = Color.BLUE,11 outlineWidth = 3.0,12 widths = listOf(WidthByZoom(5.0)),13 progress = Distance.meters(1000.0),14 instructions =15 listOf(16 Instruction(17 routeOffset = Distance.meters(1000.0),18 combineWithNext = false,19 ),20 Instruction(21 routeOffset = Distance.meters(2000.0),22 combineWithNext = true,23 ),24 Instruction(routeOffset = Distance.meters(3000.0)),25 ),26 tag = "Extra information about the route",27 departureMarkerVisible = true,28 destinationMarkerVisible = true,29 )30val route = tomTomMap.addRoute(routeOptions)
You can pass the optional instructions parameter to show arrows for each maneuver on route line. This also enables automatic zoom and tilt changes when following a chevron.
When a route is added to the map, a Route object is returned. Use the object to retrieve information about the route and change its color, progress and instructions. The Route can also be moved to the top layer using the Route.bringToFront() method, or removed using Route.remove().
All routes added to the map can be removed with a single method, TomTomMap.removeRoutes(), called on the TomTomMap object.
tomTomMap.removeRoutes()
To show an overview of the route, update the camera to fit all the route points. Padding can also be added (optional).
tomTomMap.zoomToRoutes(padding = 100)
OnRouteClickListener
You can use a listener to listen for click events on Route objects. Add the RouteClickListener to the map to report when any Route was clicked. The selected Route is provided as a parameter for the RouteClickListener.onRouteClick(Route) method.
val routeClickListener = RouteClickListener { /* YOUR CODE GOES HERE */ }tomTomMap.addRouteClickListener(routeClickListener)
You can remove the RouteClickListener listener if it is no longer needed.
tomTomMap.removeRouteClickListener(routeClickListener)
Updating route progress
The progress made along the Route can be indicated on the drawn map. The traveled part of the route is colored with the outline color. See the example below.
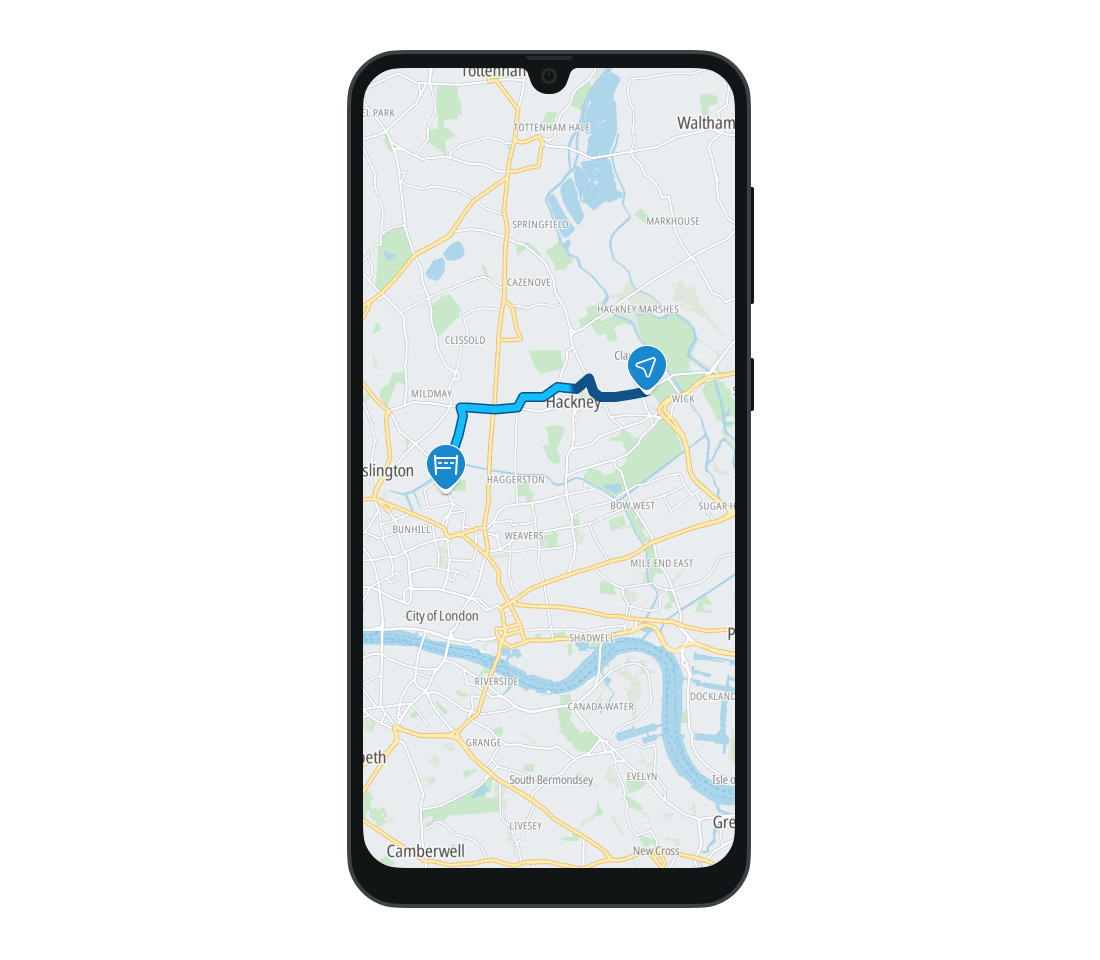
The progress can be updated by operating on the Route object returned during drawing. Its value is expressed in meters. In the example below, the map will show that 2km have already been traveled.
route.progress = Distance.meters(2000.0)
CameraTrackingMode
The Map Display module allows you to set how the camera tracks the user locations to suit different interaction modes. Do this by setting CameraTrackingMode to the TomTomMap instance. There are five options for tracking mode:
None- The camera does not track the user’s location. This is the default setting and is mainly used to show the user’s location on the map.FollowNorthUp- The camera follows the user’s location, but its tilt and zoom do not change.FollowDirection- The camera follows the user’s location and heading to position the camera in the heading direction. Camera is always following from the top (the tilt is set to 0 degrees).FollowRouteDirection- The camera follows the user’s location and heading to best present the route. Camera properties like tilt and zoom may be adjusted to better display the route and its guidance instructions.FollowRouteNorthUp- The camera follows the user’s location; the camera is fixed to due north. Camera properties like tilt and zoom may be adjusted to better display the route and its guidance instructions.RouteOverview- The camera tries to fit the routes in the current view, by changing the zoom level and other camera properties.
The last three modes are mainly used in navigation applications.
To apply a given tracking mode, set cameraTrackingMode:
tomTomMap.cameraTrackingMode = CameraTrackingMode.FollowRouteDirection
To check what tracking mode is currently set:
val cameraTrackingMode = tomTomMap.cameraTrackingMode
Instructions
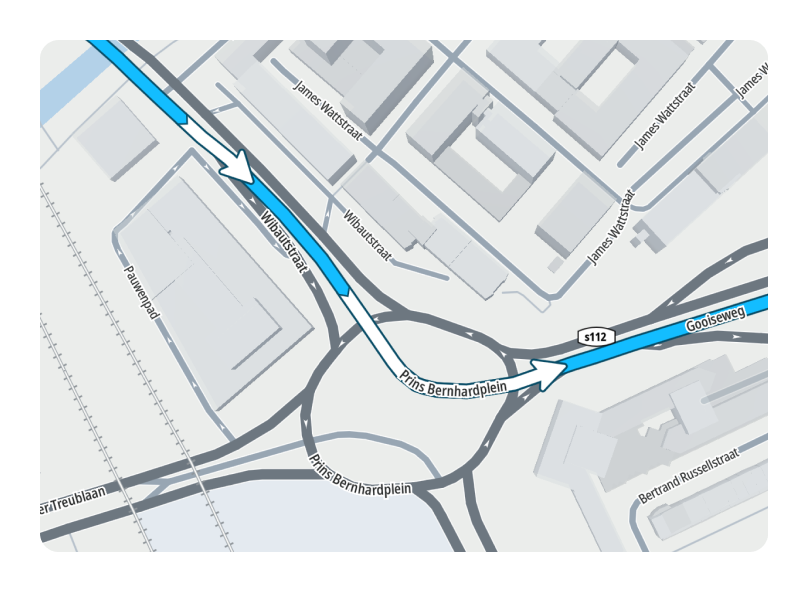
The Route added to the map can also show the location and type of the maneuvers the driver must perform to follow it. These maneuvers are indicated with arrows displayed on the route (see the image below).
The instructions for the maneuvers can be provided as a parameter to RouteOptions class while adding a route. You can also update them during runtime by setting the Route.instructions property.
Note that the
Routeinstance is returned whenRouteOptionsis added to the map.
An Instruction requires the distance from the start of the route to the instruction point in meters. You can also specify whether the arrow can be merged with the next one and define its length.
1route.instructions =2 listOf(3 Instruction(4 routeOffset = Distance.meters(1000.0),5 length = Distance.meters(40.0),6 combineWithNext = true,7 ),8 Instruction(9 routeOffset = Distance.meters(1100.0),10 length = Distance.meters(40.0),11 combineWithNext = false,12 ),13 )
Next steps
Since you have learned how to work with routes on the map, here are recommendations for the next steps: