WordPress Plugins and TomTom: Adding Routing and Geocoding
) Gregory De Jans
Gregory De Jans
We conclude our series of articles on creating a WordPress Plugin that use the TomTom Maps and Search APIs, adding the final touch to our plugin: intelligent routing that helps a site user generate driving directions to guide them from their present location to their chosen store location. Moreover, they'll be smart directions based on current traffic conditions.
WordPress Plugins and TomTom - Part 5
We’ve come a long way. Starting from scratch, we’ve built a store locator WordPress Plugin that creates a database table and allows admins to use a TomTom map to add store locations to the database. Beyond that, we've added a WordPress shortcode that allows us to easily display a map and list of store locations to a WordPress site's users.
It's now time to add the final touch to our plugin: intelligent routing that helps a site user generate driving directions to guide them from their present location to their chosen store location. Moreover, these won't be plain, boring driving directions; instead, they'll be smart directions based on current traffic conditions.
Adding The Routing API
First, we'll need to add routing API access to our app. When we created our TomTom API application, we only asked for access to the Maps and Search APIs. Since we'll need to use an API we don't yet have access too, we'll have to modify our application. Fortunately, this is easy to do.
Start by signing in to your TomTom Developer account. After signing in, you'll end up on your account dashboard:
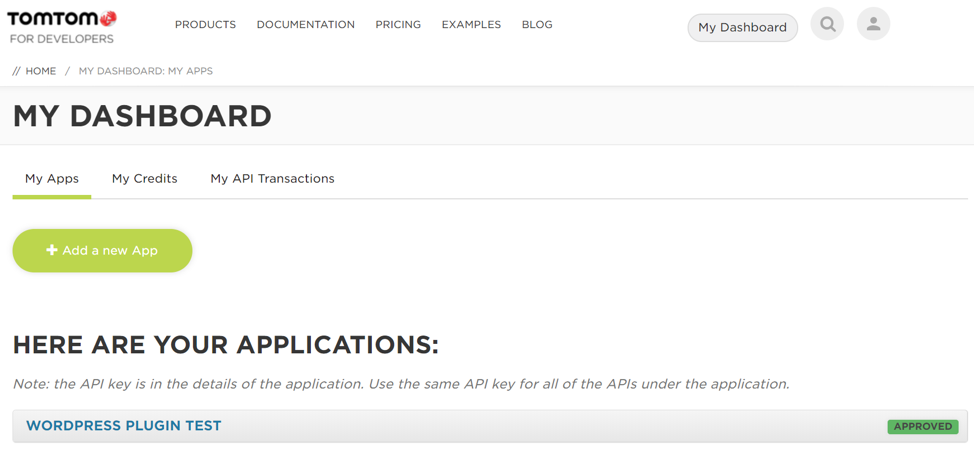
Click on the application you created in the first article of this series. When you do, a new UI panel appears showing your application's details. You'll see an option that says ‘Edit "Application Name"’. Click it, and you end up on a screen that looks like this:
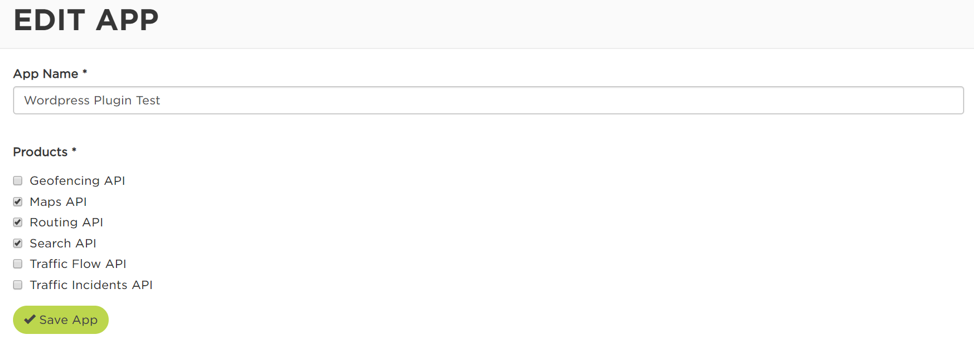
Click the Routing API checkbox, then click the "Save App" button. That's it for the first step! Your application now has access to TomTom's Routing API. You don’t need a new API key, you just added new capabilities to the existing key you’ve been using.
Determining Start and End Points
Now that setup is out of the way, let's dive into the code that makes this work.
We'll start by modifying the popup that appears when a user clicks a store location on the map. Notice that we have added a "Directions" link to the popup:
function addStoreMarkerToMap(store) {

   var location = [store.latitude, store.longitude];

   var marker = tomtom.L.marker(location).addTo(map);

   var el = jQuery("<div><b>" + store.name + "</b>" + store.address + "</div>");

   var dir = jQuery("<a href='#'>Driving Directions</a>");

   dir.click(function(ev) {

       directionsClickHandler(ev, store);

   });

   el.append(dir);

   marker.bindPopup(el[0]);

   markers.push(marker);

}
We've also added a click handler that hides the store list and displays a directions panel when the user clicks for directions:
function directionsClickHandler(ev, store) {

   ev.preventDefault();

   selectedStore = store;

   var addressHtml = "<div>"+ store.name + "</div>" + "<div>"+ store.address + "</div>" + "<div>" + store.city + "</div>";

   jQuery(".ttlocator-driving-directions-destination").html(addressHtml);

   jQuery(".ttlocator-driving-directions-page").show();

   jQuery(".ttlocator-user-stores-list-page").hide();

   jQuery(".ttlocator-step-by-step-instructions").empty();

   jQuery(".ttlocator-user-address").val("");

}
As we see above, the code also does some other housekeeping such as setting up the HTML to display the address of the store we’ll be creating directions to and clearing out any previous directions the user has looked up.
Next, let's take a look at the directions panel. The HTML for this panel is generated in PHP, and can be found in store-locator-user.php:
function ttlocator_user_driving_directions_html() {

   ?>

   <div class="ttlocator-driving-directions-page">

       <div class="ttlocator-driving-directions-container">

           <h4>Driving Directions</h4>

           <h5>Driving From</h5>

           <div>

               <input type="radio" name="ttlocator-user-driving-from" value="current" checked/> Current Location

           </div>

           <div>

               <input type="radio" name="ttlocator-user-driving-from" value="enter"/>

               Address: <input type="text" class="ttlocator-user-address" name="ttlocation-user-address" />

           </div>

           <h5>Destination</h5>

           <div class="ttlocator-driving-directions-destination"></div>

           <div class="ttlocator-step-by-step-instructions"></div>

           <button class="ttlocator-user-get-directions ttlocator-user-button">Get Directions</button>

           <button class="ttlocator-user-back-to-stores ttlocator-user-button">Back to Stores</button>

       </div>

   </div>

   <?php

}
There's nothing complicated here. We display the information about the store location and then ask where they’ll be departing from. We provide a radio input that allows the user to choose whether to use their current location as the starting point or enter an address to use as a starting point. Finally, we have a button the user can click to look up directions.
Here's the code that makes the button work:
jQuery(".ttlocator-user-get-directions").click(function(e) {

  e.preventDefault();

   if(jQuery("input[name='ttlocator-user-driving-from']:checked").val() == "current") {

       navigator.geolocation.getCurrentPosition(currentPosition);

   } else {

       lookupPosition();

   }

});
Again, nothing too complicated. If the user wants to use their current position, we use the HTML5 Location API to ask the browser for the user's location. When called, this API asks the user's permission before giving our code access to the user's location. We give it a callback, which receives the latitude and longitude from the geolocation API:
function currentPosition(position) {

   var latitude = position.coords.latitude;

   var longitude = position.coords.longitude;

   showDirections(latitude,longitude);

}
The callback then calls showDirections, which gets routing directions from the TomTom Web SDK and displays them. We’ll circle back to showDirections in a moment. First, let’s see what we have to do if a user wants to manually enter a starting address.
If the user doesn't want to use geolocation, they can type the address in the text box we provided. In this case, we'll have to use the Search API to look up the address, the same way we looked up addresses when adding stores in the admin panel:
function lookupPosition() {

   var query = jQuery(".ttlocator-user-address").val();

   tomtom.fuzzySearch()

       .key(window.tomtomSdkKey)

       .query(query)

       .go()

       .then(locateCallback)

       .catch(function(error) {

           console.log(error);

       });

}
This is identical to the code we used to look up address coordinates in the admin side of our plugin. We call the TomTom Fuzzy Search API, give it our SDK key, pass it the user-entered address as the query string, and then pass it a callback named locateCallback. The callback is a simplified version of the one we used for the admin panel:
function locateCallback(result) {

   var filteredResult = result && result.filter(r => r.type === "Point Address") || [];

   if(filteredResult.length > 0) {

       var topResult = filteredResult[0];

       showDirections(topResult.position.lat, topResult.position.lon);

   } else {

       jQuery(".ttlocator-step-by-step-instructions").text("Address not found. Try changing the address or adding more information, such as country and zip/postal code.")

   }

}
We filter the results to extract information about the address the user entered. If we found the address, we use its coordinates to call showDirections. If we don’t find the address, we show an error message and ask the user to provide more detailed address information.
Routing Directions
Once we have starting coordinates, we can use the Routing API to look up driving directions from the user's location to their desired store location. Whether we get coordinates via geolocation or the TomTomSearch API, the magic happens in showDirections:
function showDirections(destLat, destLon) {

   tomtom.routing({instructionsType: 'text'})

       .locations(`${destLat},${destLon}:${selectedStore.latitude},${selectedStore.longitude}`)

       .go()

       .then(function(routeGeoJson){

          generateRouteHtml(routeGeoJson);

          currentRoute = tomtom.L.geoJson(routeGeoJson, {

              style: {color: '#00d7ff', opacity: 0.6, weight: 8}

          }).addTo(map);

          map.fitBounds(currentRoute.getBounds(), {padding: [5, 5]});

       });

}
Here, we call tomtom.routing to start our call to the Routing API. We pass it an options object containing a single property: instructionsType. We do this to ensure we will receive a set of text driving directions we can display to the user.
We call the go method to start the API call, then provide a callback function that will be calling after a route has been generated. The callback receives a GeoJSON object and passes it to generateRouteHtml. This function doesn’t do anything out of the ordinary. It simply extracts the driving directions that the TomTom Routing API send and builds up HTML to display them:
function generateRouteHtml(routeGeoJson) {

   var guidance = routeGeoJson.features[0].properties.guidance;

   var resultsContainer = jQuery("<div><h5>Directions</h5></div>");

   guidance.instructionGroups.forEach(function(instructionGroup) {

       // Print name of the group

       var groupEl = tomtom.L.DomUtil.create('p', 'tt-locator-user-directions-group');

       groupEl.innerHTML = instructionGroup.groupMessage;

       resultsContainer.append(groupEl);

       // Print steps of the group

       var stepsEl = tomtom.L.DomUtil.create('p', 'ttlocator-user-directions-step');

       stepsEl.innerHTML = formatGroupSteps(guidance.instructions, instructionGroup);

       resultsContainer.append(stepsEl);

   });

   jQuery(".ttlocator-step-by-step-instructions").empty();

    jQuery(".ttlocator-step-by-step-instructions").append(resultsContainer)

}
After the call to generateRouteHtml completes, we add a route overlay to the map to display our route, and then fit the bounds of the map to center it on the route.
That’s really all there is to it! With a bit of JavaScript and a couple of API calls, we’ve successfully added trip routing to our plugin
COnclusion
That concludes our whirlwind tour of creating a store locator WordPress Plugin from scratch using the TomTom Developer APIs.
We started with nothing, and with a relatively small amount of code, we've been able to put together a great, usable plugin. If you've downloaded the code and have been following along, you'll be able to use it on your WordPress site right away.
We hope this has been a useful introduction to using the TomTom API with WordPress. As you can imagine, a store locator is only one of the many plugins that are possible by combining TomTom and WordPress. What great plugin are you going to create?