Using the TomTom Maps SDK with Angular and TypeScript
)
The TomTom Maps SDK makes adding maps to web apps easy. Angular, the popular web application framework, takes much of the pain out of creating data driven websites. And it's simple to use the Maps SDK for Web with Angular to create data-driven apps.
The TomTom Maps SDK makes adding maps to web apps an easy task. Angular, the popular TypeScript-based web application framework, takes much of the pain out of creating data driven apps. But did you know that you can easily use Angular, TypeScript, and the TomTom Maps SDK for Web together to create data-driven map apps that are both easy to build and easy to maintain?
Some think that, because Angular uses TypeScript rather than plain old JavaScript, you can’t easily use JavaScript libraries such as TomTom Maps SDK for Web. Integrating Angular and the Maps SDK is not only possible, but incredibly simple — partly because TypeScript is just a superset of JavaScript, and partly because using the TomTom Maps SDK in any web app takes just a few lines of code.
This article will discuss how to add a map to a web site with the TomTom Maps SDK for Web using Angular and TypeScript. After creating a simple Angular 9 app using Angular CLI tool, we’ll extend the code to add a data-driven table by fetching data from a JSON Web API source. Then we’ll keep building on the same code to create a map using the Maps SDK, finally adding data-driven map markers, also driven using Angular data binding.
Typescript and JavaScript Integration with Angular
First, a little history if you're not already familiar with Angular. The original releases of the Angular framework used JavaScript. To reduce confusion, the original version is called “AngularJS”. Since the version 2 rewrite of Angular to the current version 9, Angular apps are usually written using TypeScript, a JavaScript-compatible programming language created by Microsoft. Because your web browser doesn’t run TypeScript directly, the TypeScript code in your app is converted from TypeScript to the equivalent JavaScript.
Why use TypeScript instead of just writing JavaScript code? The main reason is that TypeScript, as the name suggests, uses static data types, which provide added safety and stability. JavaScript uses quite simple number, date, and string data types. Errors from accidentally mixing or converting data incorrectly between JavaScript types are still a common source of run-time bugs in JavaScript applications. With TypeScript the incidence of these errors is much lower as data types are enforced and checked in the design-time code.
TypeScript’s built-in support for classes and interfaces is also more like C# or Java. Developers can feel that writing TypeScript code is easier and less quirky than JavaScript.
Getting Started with Angular
Note: To save time and not obscure the code, this example is not “production ready”. At the very least you ought to add appropriate error handling. Please refer to the links at the end of this article for more Angular, TypeScript, and TomTom SDK information.
To create an Angular application you first need to download and install Node.js (or upgrade your existing version) so that you are running the latest “LTS” version.
At a command prompt or terminal window type node -v to check that the installation path is correct and the version up to date. We’ll also be using Node Package Manager (npm) to install various packages. Check that npm is installed by typing npm -v in the terminal window.
To install Angular CLI globally, just type the following in your terminal:
npm install -g @angular/cli
Next we’ll create our Angular app using the Angular CLI ng command. Change to a suitable directory first, and then type:
ng new my-map-app
To keep this simple just answer “N” for the Routing option and select the default “CSS” for your stylesheet format.
The ng new command creates your new app inside a new directory with the same name as your app. After your app is created just change your current directory:
cd my-map-app
Now we’ll need to load the files of our new app into a text editor. In the examples here I use Visual Studio Code editor. Whatever editor you choose, just edit the new app in the directory just created.
Finally type ng serve in the same terminal window as this will launch the Angular development server. This cool tool will build the app (and automatically rebuild after any edits) as well as providing a tiny web server. All you need to do is type:
ng serve -o
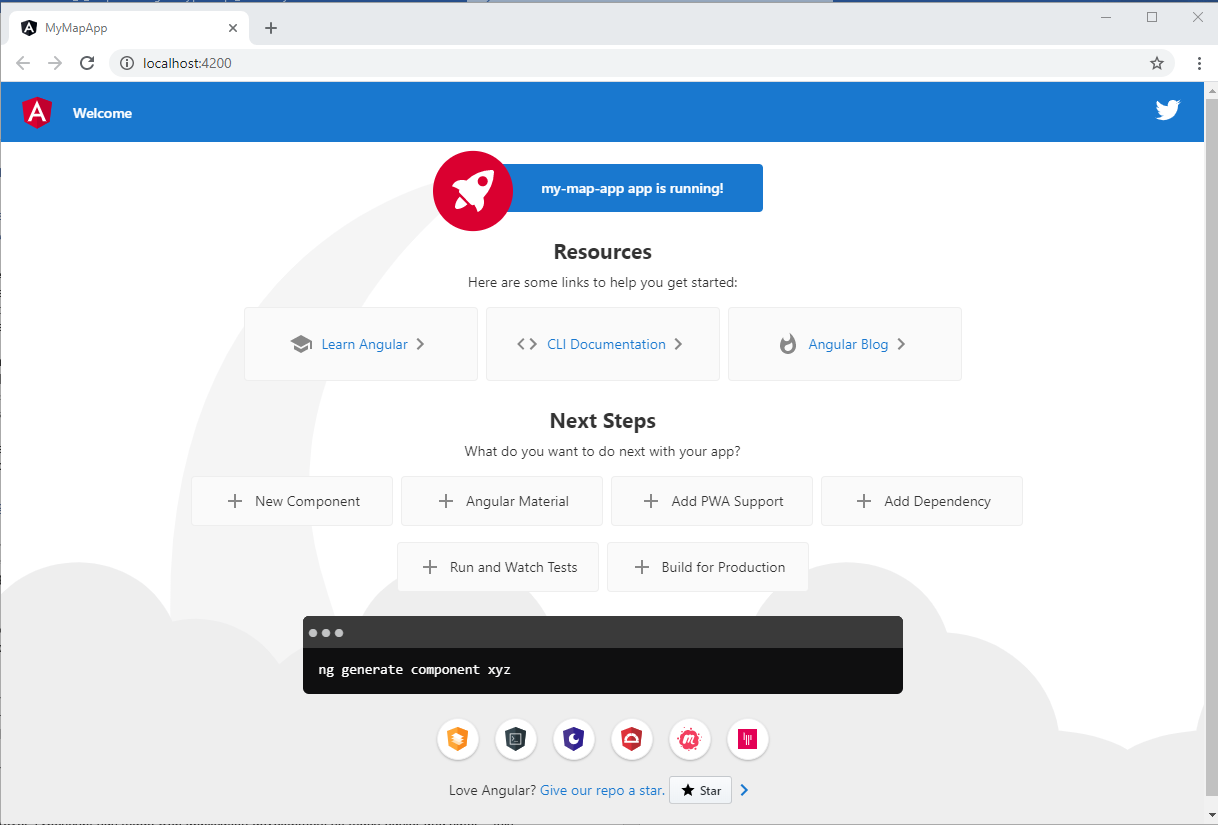
Where the optional -o flag opens your default browser to the application site, http://localhost:4200.
After a few seconds compiling you should soon see your new app running in your browser:
In your editor, open the file src\app\app.component.html. The default content is shown below:

Replace the contents of this file with the following HTML markup, then save the file. This is a simple HTML table that will demonstrate basic Angular data binding.
<table>
<thead>
<tr>
<th>#ID</th>
<th>Company Name</th>
<th>Long</th>
<th>Lat</th>
</tr>
</thead>
<tbody>
<tr *ngFor="let item of userData">
<th>{{ item.id }}</th>
<td>{{ item.company.name }}</td>
<td>{{ item.address.geo.lng }}</td>
<td>{{ item.address.geo.lat }}</td>
</tr>
</tbody>
</table><hr>After you save the page you will see the browser automatically refresh and then redisplay this new content. It will be a little empty right now, but should look like this:

Don’t be too alarmed if you edit a file and save it, but then see an error in your terminal/console window. Some dependencies will be resolved with further edits of our code. If you get a more serious error or typo sometimes you might need to manually refresh your browser. If you still can’t resolve the issue, just backtrack and check the steps and your spelling.
Building the App
TypeScript allows us to easily create and use strongly typed data as the above interface will soon demonstrate. You can use the Angular CLI to create new classes, interfaces, pages, or components with the ng generate command (see the Angular CLI documentation for details). For brevity, I'll just demonstrate creating them in a code editor.
Create a new file called user.ts inside the src/app directory, and add the following content, then save the file:
export interface GeoLocation{
  lat:number;
  lng:number;
 }

export interface StreetAddress{
 street:string;
 suite:string;
 city:string;
 zipcode:string;
 geo:GeoLocation;
}

export interface CompanyDetails{
  name:string;
  catchPhrase:string;
  bs:string;
 }

export interface User {
  id:number;
  name:string;
  username: string;
  email:string;
  address:StreetAddress;
  phone:string;
  website:string;
  company:CompanyDetails;
}
Now we’ll fetch some JSON data to populate our HTML table. Well need to import the Angular HTTP Client Module for this, so edit the src/app/app.module.ts file to read:
import { BrowserModule } from '@angular/platform-browser';
import { HttpClientModule } from '@angular/common/http';
import { NgModule } from '@angular/core';

import { AppComponent } from './app.component';

@NgModule({
  declarations: [
    AppComponent
  ],
  imports: [
    BrowserModule,
    HttpClientModule
  ],
  providers: [],
  bootstrap: [AppComponent]
})
export class AppModule { }
Next edit src/app/app.component.ts to add a reference to our new user interface that defines our custom user data type, and also add a local reference to import the HttpClient module here, along with some code that will to fetch our JSON data when the page loads or reloads. Your app.component.ts file should now contain this:
import { Component, OnInit } from '@angular/core';
import { User } from './user';
import { HttpClient } from '@angular/common/http';

@Component({
  selector: 'app-root',
  templateUrl: './app.component.html',
  styleUrls: ['./app.component.css']
})
export class AppComponent {
  title = 'my-map-app';
  userData:User[];

  constructor(
    private httpclient: HttpClient
  ) {  }

  ngOnInit() {
    this.getJsonData();
  }

  getJsonData() {
    this.httpclient.get<User[]>('https://jsonplaceholder.typicode.com/users').subscribe((res) => {
      this.userData = res;
    });
  }
}
Save the file. Your app should recompile automatically in the terminal/console window and then cause the browser to refresh as well. Your browser should now show our sample JSON data using Angular data binding:

Adding TomTom Maps SDK to an Angular App
Now that we have a functioning Angular app with some data, let’s add a map using the TomTom Maps SDK. You can use npm to do this in one step.
In your terminal where ng serve is running press Ctrl-C to exit back to the command prompt, then type:
npm i @tomtom-international/web-sdk-maps
This installs the npm version of the TomTom Maps SDK for Web library.
After installation is completed you can re-run ng serve to restart the development server.
Next we’ll update src/app/app.component.ts to set up our map. Use this new code below:
import { Component, OnInit,ViewEncapsulation } from '@angular/core';
import { User } from './user';
import { HttpClient } from '@angular/common/http';
import tt from '@tomtom-international/web-sdk-maps';

@Component({
  selector: 'app-root',
  templateUrl: './app.component.html',
  styleUrls: ['./app.component.css'],
  encapsulation: ViewEncapsulation.None
})
export class AppComponent {
  title = 'my-map-app';
  userData:User[];
  map:any;
  marker:any;

  constructor(
    private httpclient: HttpClient
  ) {  }

  ngOnInit() {
    this.map = tt.map({
      key: '<add your key here>',
      container: 'map',
      style: 'tomtom://vector/1/basic-main',
      zoom:1.2
    });
    this.getJsonData();
  }

  getJsonData() {
    this.httpclient.get<User[]>('https://jsonplaceholder.typicode.com/users').subscribe((res) => {
      this.userData = res;
      for (var i=0;i<this.userData.length;i++) {
        this.marker = new tt.Marker({draggable:false})
            .setLngLat([this.userData[i].address.geo.lng,this.userData[i].address.geo.lat])
            .addTo(this.map);
      }
    });
  }
}
Next edit src\app\app.component.html to add the container for our map, just after the <hr> tag:
<div id="map"></div>
Don’t forget to add your key where shown! We are still loading our JSON data on page load (or refresh) using ngOnInit, but we’re also adding a map marker for each data point.
Here it’s worth comparing the TypeScript code with ordinary JavaScript code.
Using TypeScript we create a variable userData that is initialized as an array of the data type user. On the other hand, we’ve used a special TypeScript shortcut datatype any to define our map and map marker variables for convenience, as these refer to external JavaScript types that we’re importing. Too much use of any in your business logic will defeat the benefits of TypeScript static types, but here this makes importing external JavaScript libraries much easier.
Finally for our map markers to appear properly we’ll just need to import a few styles, so edit src/app/app.component.css to contain:
@import "@tomtom-international/web-sdk-maps";

#map {
    height: 80vh;
    width: 80vw;
}
Your browser should now display a map and, through the magic of Angular data binding, also have map markers for each of the coordinates, all sourced from the same JSON data:
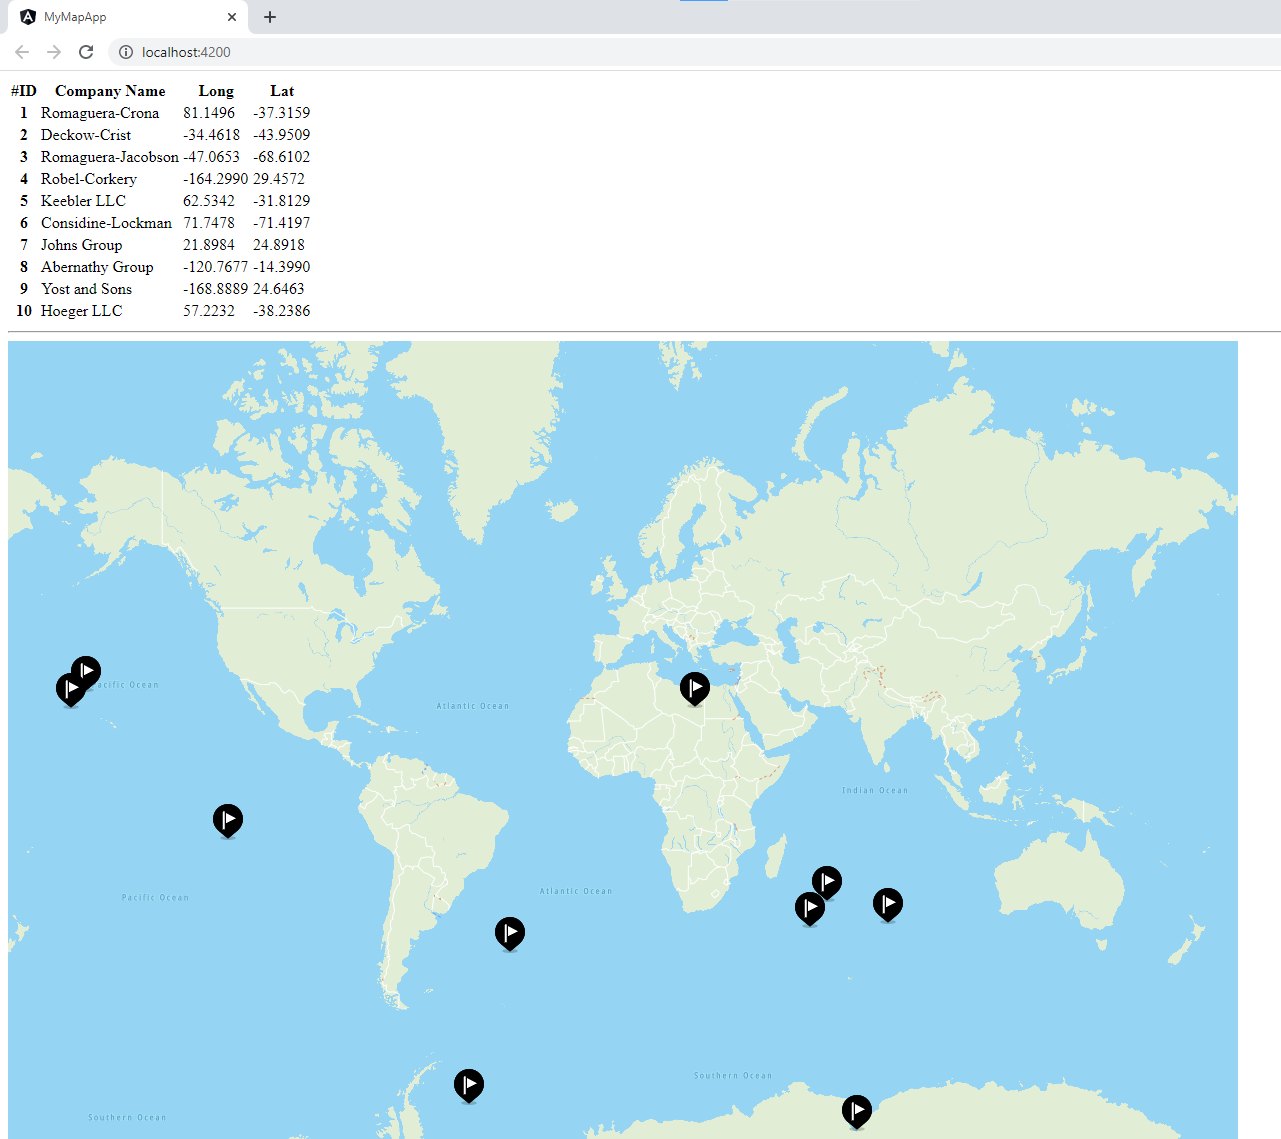
Using Angular you can have clean separation of your application into different components and layers. If you’re working in a team or on a large enterprise application, this is great news. No need for spaghetti code or tripping over others in the team while you’re editing code as can easily happen using JavaScript or jQuery methods.
Next Steps
This demonstration uses a simple map and map markers however there is nothing stopping you using geofences, geocoding, or routing APIs as well. You can fetch data and, using Angular data binding, easily create real-time updates to your maps by integrating weather data, health information, vehicle locations – the options are limitless.
In your Angular application, you should consider moving the code fetching the JSON data into an Angular service, add some error handling and, depending on your needs, address application and data security.
For more information:
TomTom Maps SDK - https://developer.tomtom.com/maps-sdk-web-js
Node.js download - https://nodejs.org/en/download/
Angular CLI - https://cli.angular.io/
Using published libraries with Angular - https://angular.io/guide/using-libraries
TypeScript documentation - https://www.typescriptlang.org/docs/handbook/typescript-in-5-minutes.html