)
You may have heard of UI component libraries if you work with client-side frameworks like React or Angular. DevExpress offers a suite of JavaScript UI components called DevExtreme to add new features to our web and mobile applications.
You may have heard of or used user interface (UI) component libraries if you work with client-side frameworks like React, Vue, or Angular. DevExpress offers a suite of JavaScript UI components for frameworks like React, Vue, and Angular, called DevExtreme, for use in web and mobile applications. DevExtreme gives developers pre-built components, widgets, and controls that we can use to add new features to our applications.
This tutorial looks at how to include a TomTom map in a React app built using the DevExtreme UI Components library.

So, what do you need to continue with this tutorial? You should be familiar with React to get the most out of what we cover in this tutorial.
Getting Started
We can add DevExtreme to an existing React application project, or we can use it to create a new React application using the DevExtreme CLI. To install the DevExtreme CLI, open your terminal and run the following command:
npm i -g devextreme-cliRun the code below to create a new DevExtreme React app once you have installed DevExtreme globally:
devextreme new react-app app-name --layout=side-nav-inner-toolbarOnce you have created your app and installed all dependencies, make app-name your current directory:
cd app-nameFinally, use the following command to start the development server:
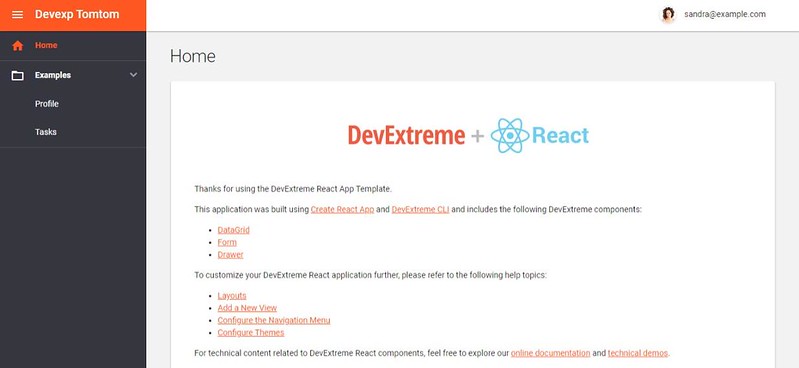
npm startIf everything goes well, you should have a simple app like the one below:
Creating the Map
We need our API key to add TomTom’s map to our application. If you don’t already have an account with TomTom, register one.
Once you have an account, log in to it. Copy the API key on the dashboard. We’ll come back to it later.
Now we must install the TomTom web SDK to use TomTom’s map with React.
In the application’s src directory, you find a directory named Components, and as the name indicates, that’s where we’ll add our components. Create a new file called Map.js in that directory.
To create the map, we’ll import the TomTom Maps SDK we previously installed and add the following code to the Map.js file that we just created.
import tt from "@tomtom-international/web-sdk-maps";
import @tomtom-international/web-sdk-maps/dist/maps.css;
Above, we imported the basic Maps SDK and the cascading style sheet (CSS) used to style our map. Let’s add our API key next.
...
import { useEffect, useState, useRef } from "react";

function Map() {
  const mapElement = useRef();
  const [map, setMap] = useState(null);
  const api_key = "xxxxxxxxxxxxxxxxxxxxxxxxx";
    const center = [-118.196271, 33.8388368];

    useEffect(() => {
    let map = tt.map({
      key: api_key,
      container: mapElement.current,
      center: center, //4600 N Virginia Rd
      zoom: 11,
    });
    map.addControl(new tt.FullscreenControl());
    map.addControl(new tt.NavigationControl());


    setMap(map);
    return () => map.remove();
  }, []);

  return <div ref={mapElement} className="mapDiv" />;
}

export default Map;
We replaced the API key with the TomTom API key. We also selected a div element on the page using React’s useRef hook. This element is where we attach our map. We also added the JavaScript necessary to create the map. The complete code is now as follows:
import "@tomtom-international/web-sdk-maps/dist/maps.css";
import tt from "@tomtom-international/web-sdk-maps";
import { useEffect, useState, useRef } from "react";

function Map() {
  const mapElement = useRef();
  const api_key = "xxxxxxxxxxxxxxxxxxxxxxx";
  const [map, setMap] = useState({});


  const center = [-118.196271, 33.8388368];


  useEffect(() => {
    let map = tt.map({
      key: api_key,
      container: mapElement.current,
      center: center, //4600 N Virginia Rd
      zoom: 11,
    });
    map.addControl(new tt.FullscreenControl());
    map.addControl(new tt.NavigationControl());

    setMap(map);
    return () => map.remove();
  }, []);


  return <div ref={mapElement} className="mapDiv" />;
}

export default Map;
With the help of the TomTom Maps SDK we previously installed, the code above creates a map. However, we must still show this map on a page, which brings us to our next topic.
Creating the Contact Page
Looking at the React application we built using DevExtreme, you will see four pages created for us: an index page, a home page, a profile page, and a task page. To add a new page, we can use the DevExtreme CLI.
Run the following code in your terminal:
devextreme add view contact-pageNow, if you open the src/pages directory, you should see the newly created page. Let’s add the contact form by opening the contact-page.js file and adding the following code:
import React from "react";
import "./contact-page.scss";
// import Form, Button from devextreme UI library
import { Form, ButtonItem, Item } from "devextreme-react/form";
export default () => (
<React.Fragment>
<h2 className={"content-block"}>Contact Us</h2>
<div className={"content-block"}>
<div className={"dx-card responsive-paddings"}>
<address>
<strong>Address</strong>
<p>
<cite>4600 N Virginia Rd.</cite>
</p>
</address>
</div>
</div>
<div className={"content-block"}>
<div className={"dx-card responsive-paddings flex"}>
// add the Form Component to the page
<Form id="form">
// Input type text
<Item
editorType="dxTextBox"
editorOptions={{ placeholder: "Enter your full name" }}
label={{ location: "top", text: "Full Name" }}
/>
// Input type text
<Item
editorType="dxTextBox"
editorOptions={{ placeholder: "Example@email.com" }}
label={{ location: "top", text: "Email" }}
isRequired
/>
// Input type number
<Item
editorType="dxNumberBox"
editorOptions={{ placeholder: "Phone Number" }}
label={{ location: "top", text: "Number" }}
isRequired
/>
// Input type textarea
<Item
colSpan={2}
editorType="dxTextArea"
editorOptions={{ placeholder: "Add notes...", height: 140 }}
/>
// Input type button
<ButtonItem
horizontalAlignment="left"
buttonOptions={{
text: "Contact Me",
type: "success",
useSubmitBehavior: true,
}}
/>
</Form>
</div>
</div>
</React.Fragment>
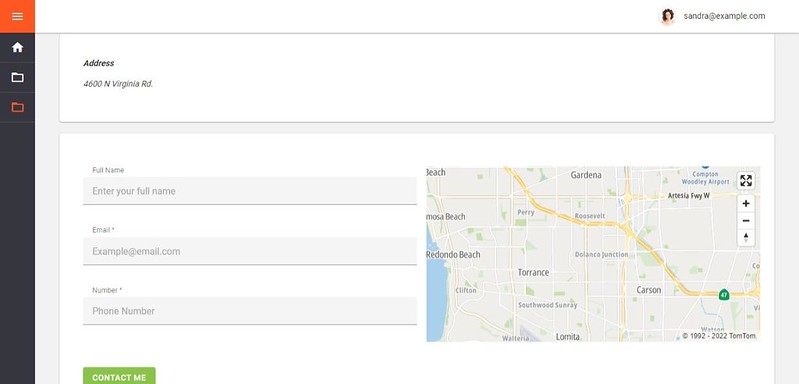
);We updated our contact page with a simple contact form by using the DevExtreme Form UI component, and it now looks like the one below:

Adding the Map to Our Page
After we have created our contact form, we can now add our map so that users can easily find our company’s location. To do this, open the contact-page.js file and add the following code to import the map component we made previously.
import React from "react";
import "./contact-page.scss";
import { Form, ButtonItem, Item } from "devextreme-react/form";
// import the map component
import Map from "../../components/Map";


export default () => (
  <React.Fragment>
     ...
  </React.Fragment>
);
After we’ve imported our map, we can add it to the page right next to the contact form:
import React from "react";
import "./contact-page.scss";
import { Form, ButtonItem, Item } from "devextreme-react/form";
// import the map component
import Map from "../../components/Map";

export default () => (
  <React.Fragment>
    <h2 className={"content-block"}>Contact Us</h2>
    <div className={"content-block"}>
      <div className={"dx-card responsive-paddings"}>
...
      </div>
    </div>
    <div className={"content-block"}>
      <div className={"dx-card responsive-paddings flex"}>
        <Form id="form">...
        </Form>
        <Map /> // Map Component
      </div>
    </div>
  </React.Fragment>
);
After we’ve included the map, the final preview of our contact page should look something like this:
Adding a Marker to Our Map
Finally, let’s add a marker to the map to indicate where our company is. To accomplish this, open the Map.js file and add the following code:
import "@tomtom-international/web-sdk-maps/dist/maps.css";
import tt from "@tomtom-international/web-sdk-maps";
import { useEffect, useState, useRef } from "react";

function Map() {
  const mapElement = useRef();
  const api_key = "xxxxxxxxxxxxxxxxxxxxxxx";
  const [map, setMap] = useState({});

  ...
 useEffect(() => {
    if (map) {
      map.on("load", () => {
        const popup = new tt.Popup({ offset: 50 }).setText(
          "4600 N Virginia Rd."
        );

        new tt.Marker({ anchor: "bottom" })
          .setLngLat(center)
          .setPopup(popup)
          .addTo(map);
      });
    }
  }, [map]);

  return <div ref={mapElement} className="mapDiv" />;
}

export default Map;
Let’s break this down a little bit. First, we created another useEffect, but this time we passed a dependency, initialized, which means our useEffect runs every time initialized is updated. And if initialized is set to true and our map is loaded using map.on("load", function()), we can add a new Marker with the following code:
const popup = new tt.Popup({ offset: 50 }).setText(
"4600 N Virginia Rd."
);
new tt.Marker({ anchor: "bottom" })
.setLngLat(center)
.setPopup(popup)
.addTo(map);
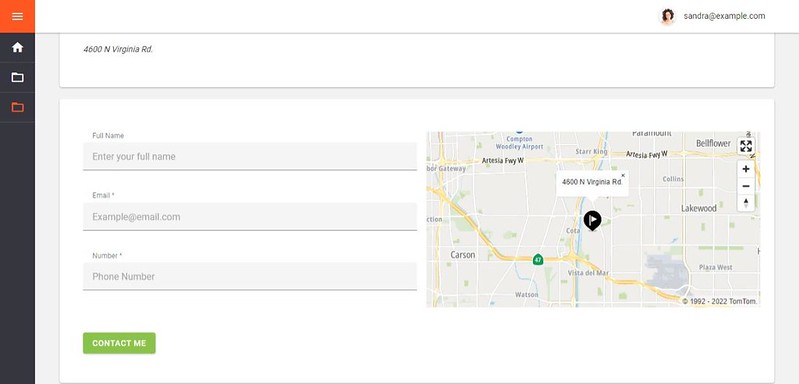
});We can now see the exact position of our company on the map thanks to the addition of our marker.
Customizing the Map Component
Now that our Map component is ready, we can make some modifications, one of which is altering the Map style. TomTom Maps feature a variety of styles, including:
basic_main
basic_night
hybrid_main
labels_main
Please see TomTom’s Map Display API documentation for other map styles.
To apply this style to our map, open the Map.js file and make the following changes:
useEffect(() => {
    let map = tt.map({
      key: api_key,
      container: mapElement.current,
      center: center, //4600 N Virginia Rd
      style: { map: "basic_night" }, // add the map style, set to night
      zoom: 11,
    });
    map.addControl(new tt.FullscreenControl());
    map.addControl(new tt.NavigationControl());


    setMap(map);
    return () => map.remove();
  }, []);
Now that we have added the style, our map should resemble the one below, which has a dark theme and represents the “basic night” style that we have chosen.

Since the entire map is now dark, it would be a great idea to change the color of the black marker — let’s make it green. In the same Map.js file, make the following changes:
  useEffect(() => {
    if (map) {
      map.on("load", () => {
        const popup = new tt.Popup({ offset: 50 }).setText(
          "4600 N Virginia Rd."
        );


        new tt.Marker({
          anchor: "bottom",
          color: "#00bb00", // green color
          width: "50px", // specify new height of Marker
          height: "50px", // specify new width of Marker
        })
          .setLngLat(center)
          .setPopup(popup)
          .addTo(map);
      });
    }
  }, [map]);
Our marker now resembles the one below with the addition of the new color.

There are many other methods to customize TomTom Maps. To learn more, please refer to TomTom’s Map documentation.
Conclusion
In this article, we created a web application with React and the DevExpress UI library that displays a map using TomTom’s Maps Web SDK.
TomTom’s Map Display API works well with a variety of UI libraries. See the TomTom Map API documentation for more information on the TomTom Map Display API and how to incorporate it into your applications.