Displaying Multiple Map Locations with Vue and the TomTom Web SDK
)
The TomTom Maps SDK enables you to create location-based web apps with powerful search capability and much more. Learn how to create a Vue app for users to save and display multiple map locations to keep track of various points in an area.
Countless online platforms base their primary services upon reliable geolocation and mapping. Whether we want to include mapping tools on a website or build the next Uber-style mobile app, TomTom Maps software development kit (SDK) enables us to incorporate mapping and location-based features into our web, Android, or iOS application. This SDK exposes several APIs that grant access to various features, ranging from maps with just the bare essentials to route-planning capabilities and fuzzy search functions.
The TomTom Maps SDK integrates capably with increasingly-popular front-end frameworks like React and Vue. It conveniently hides bare RESTful calls from developers, further simplifying its use.
This article guides you through building a fast, dynamic, and performant location-based Vue application using the TomTom Map SDK. Our application will enable users to specify multiple map locations to display as markers on a dynamic map, helping them keep track of relevant places. You should be familiar with JavaScript to follow along.
Exploring Vue 3 and Vite
Vue is one of the most popular JavaScript libraries for building user interfaces. Vue 3 is the newest version of Vue.js, introducing features that make end applications lighter, faster, and leaner.
One such feature is the new Composition API. This set of additive functions enables a more understandable code organization system in Vue apps.
The Vue.js team also introduced a tool for their teeming community of developers to enhance development speed and efficiency. Vite is an advanced front-end building solution for web applications. It even features a dev server with impressively-fast hot module replacement. Vite is framework agnostic, allowing you to use it with various alternatives.
In the following sections, we will:
• Set up Vite to create a new Vue 3 project using the composition API • Integrate the TomTom Map SDK into a Vue app from the content delivery network (CDN) • Create a Map component that renders a TomTom map with multiple marked locations when first mounted to the document object module (DOM) • Manage map coordinates data using Vue’s reactive state system • Create a UI Form component for collecting new coordinate values that we will add to the map without repainting the map on the browser
Visit GitHub for the source code and follow the installation guide below for complete setup instructions.
Setting up the Project
Let's start by initializing a fresh Vite project using the command-line interface (CLI). Open your command terminal, cd into the project’s target folder, and run the following command:
npm init @vitejs/appThe CLI asks for information about your application, starting with the project name. We use vue-tomtom.
Be sure to select Vue as the development framework. When setup is complete, run the following commands:
cd vue-tomtom
npm install
This command quickly installs all other project dependencies from npm.
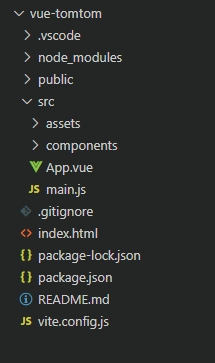
When the installation is complete, open your project inside your code editor. You should find a folder structure like this:
Finally, run the Vite dev server with the following command:
npm run devThis command runs your dev server at https://localhost:3000, which should display the Vite starter template:

Now let’s check out the TomTom SDK.
Using TomTom’s Map SDK in Vue
Before bringing the TomTom Map SDK into our project, we must register an account to receive an API key for our application. Read how to get a TomTom API key for more information. It’s free to register an account if you don’t already have one, and you get thousands of free requests per day. No credit card is needed to sign up and you only pay as your application grows more popular.
You can use the TomTom Maps SDK through various channels. To learn more, visit the Map SDK’s downloads section. This guide uses the CDN version 6.
Now, in your code editor, go to vue-tomtom/index.html and include links to the script and style files from the CDN as follows:
<!DOCTYPE html>
<html lang="en">
  <head>
    <!-- [...] -->
    <link rel='stylesheet' type='text/css' href='https://api.tomtom.com/maps-sdk-for-web/cdn/6.x/6.15.0/maps/maps.css'>
  </head>
  <body>
    <div id="app"></div>
    <script type="module" src="/src/main.js"></script>
    <script src="https://api.tomtom.com/maps-sdk-for-web/cdn/6.x/6.15.0/maps/maps-web.min.js"></script>
    <script src="https://api.tomtom.com/maps-sdk-for-web/cdn/6.x/6.15.0/services/services-web.min.js"></script>
  </body>
</html>
Now we can use the Maps and Services API to create a TomTom map.
Displaying a Map
Let's create a Map component to display a map.
Inside your project’s src/components folder, create a Map.vue file with the following code:
<template>
    <div>
        <!-- <Form /> -->
        <div ref="mapRef" id="map"></div>
    </div>
</template>


<script>
export default {
name: 'Map',
// [...]
}
</script>
The Map component renders a Form component (which we implement later) and a wrapper div element to insert the map. We later reference this wrapper by its id and ref attributes.
Next, in the script section of Map.vue, we include some native imports and additional code:
<script>
import {onMounted, reactive, ref } from 'vue'

export default {
   name: 'Map',
   setup() {
         const mapRef = ref(null)

         onMounted(() => {
             const tt = window.tt;
             const focus = { lat: 6.4434, lng: 3.3553 }

             var map = tt.map({
                 key: 'Ka5JcBchkVsJSr3gxVgHPC1NcvPO90lG',
                 container: mapRef.value,
                 center: focus,
                 zoom: 15
             })

             map.addControl(new tt.FullscreenControl());
             map.addControl(new tt.NavigationControl());

             window.map = map

             // insertLocs(map)
        })

        return {
            mapRef
        }
    },

// [...]
</script>
Using the Vue Composition API’s ref function in this code, we created a ref variable, which provides a reference to the DOM element where we will insert our map. Then, inside the onMounted hook, which runs after mounting a component on the DOM, we initialized a new map, passing in an options object containing the following properties:
• Key is our application’s API key, from the developer dashboard • Container is a reference to the div where we want to insert the map • Center is our map’s focus area • Zoom is our map’s zoom level
We also passed our map instance to a global object for future reference.
Finally, we ran the insertLocs function to fill the map with multiple markers. We commented out the function because we had not yet defined it. So, let’s define the function next.
Adding Multiple Locations to the Map
In the src/components/Map.vue file, add the following code inside the setup function:
setup() {
        const state = reactive({
            locations: [
                { lat: 6.4434, lng: 3.3553 },
                { lat: 6.4442, lng: 3.3561 },
                { lat: 6.4451, lng: 3.3573 },
                { lat: 6.4459, lng: 3.3520 }
            ]
        })

        const insertLocs = (map) => {
            const tomtom = window.tt;

            state.locations.forEach(function (location) {
                var marker = new tomtom.Marker().setLngLat(location).addTo(map)
                const popup = new tt.Popup({ anchor: 'top' }).setText('UBABank')
                marker.setPopup(popup).togglePopup()
            })
        }
        // [...]
    },
The reactive function is part of the Vue reactivity system and manages reactive state data in a Vue application. We created a state object using the reactive function, then passed an array of coordinates to the locations property.
When we invoke insertLocs, the function recursively inserts four new markers inside our map. These markers appear immediately after the app mounts the Map component.
The following section examines how to collect and dynamically insert a user-added location.
Adding a New Location
Let's create and render a form to collect location coordinates from the user interface (UI).
Inside the src/components folder, create a Form component by making a Form.vue file with the following code:
<template>
    <div class="form">
        <input type="text"  placeholder="longitude" v-model="longitude">
        <input type="text"  placeholder="latitude" v-model="latitude">
        <button @click="sendLocation">Add Location</button>
    </div>
</template>

<script>
import { ref } from 'vue'

export default {
    setup(props, context) {
        const latitude = ref('')
        const longitude = ref('')

        const sendLocation = () => {
            context.emit('useLocation', {lat: Number(latitude.value), lng: Number(longitude.value)})
        }

        return {
            longitude,
            latitude,
            sendLocation
        }
    },
}
</script>
This code defined two inputs with the v-model directive. This approach binds the inputs to their respective ref variables, enabling us to access both latitude and longitude values from the UI.
When the user clicks Submit, we emit an event (useLocation) and an object containing both input values to the parent component, Map.
Now, inside Map.vue, handle the event as follows:
<template>
    <div>
        <Form @useLocation="useLocation" />
        <div ref="mapRef" class="map"></div>
    </div>
</template>

<script>
import Form from './Form.vue'

export default {
    components: {
        Form
    },
    setup() {
        // [...]
        const useLocation = (location) => {
            state.locations.push(location)
            const lastLocation = state.locations[state.locations.length - 1]

            const tete = window.tt;
            new tete.Marker().setLngLat(lastLocation).addTo(window.map)
        }
      // [...]
   }
}
</script>
We imported and registered the Form component as a child of Map in this code. Then we listened for the custom useLocation event, for which we called the useLocation function.
We first updated our component state with the emitted location inside the function. Then we grabbed the latest location data from the array and inserted that location into our Map instance (stored in a Windows object).
As a result, clicking the button emits an event from child to parent, which updates the reactive state data of Map and adds the new marker to the map.
Using the Map
Now that we have implemented the Map and Form components, it's time to use them in App.vue.
First, open the src/App.vue file and replace the boilerplate code with the following:
<template>
  <Map />
</template>

<script setup>
import Map from './components/Map.vue'
Save the file and go to https://localhost:3000. Now try adding new locations through the form.

Whenever we add a new location, a flag appears on the map to mark that location. The map continues displaying all places as we add them.
Next Steps
Throughout this article, we have experienced the ease of integrating the TomTom Web SDK into a modern Vue 3 app, enabling the use of real-time location-based features.
The Map Display API is only one of TomTom Web SDK’s many seamless integrative services. You can learn more about TomTom Web SDK features from the TomTom API documentation.
Sign up for a free TomTom Developer account now to introduce top-tier map features into your application.