Creating and Using TomTom Geofences with Vue
)
Geofencing is key to managing locations. In this tutorial, you’ll learn how to create and visualize TomTom Maps geofences in a Vue app. You’ll see how Vue’s built-in state management can store and manage locations that represent where a device entered or left the geofenced area.
Geofences are virtual fences around a given geographical area. They enable us to monitor a site and add functionality to a map. We can determine if an object is inside or outside the area using its coordinates. A geofencing API’s reporting service can even provide the distance between the object and the geofence.
Geofences help solve many practical problems, including enabling ride-hailing apps, notifying a customer when their parcel or delivery is almost at their doorstep, detecting deviation from the route or potential theft of trucks carrying valuable cargo, and much more. So, in this tutorial, let’s explore how to add a geofence to a TomTom map within a Vue application. We’ll then use our geofence to track movement into and out of an area on the map. Our Vue application will run on Vite.
You should be familiar with JavaScript and Vue to follow this tutorial. We’ll show you how to work with TomTom’s features. You also need a TomTom developer account to follow along — it’s free even for commercial use with thousands of daily requests (then you can pay as you grow if you need more capacity, or reach out to TomTom for a personalized offer).
Getting Started
Installing Vite
Vite provides us with a fast development server. To get started with Vite, run the following command:
npm init vite@latest geofence -- --template vueYou can then install other external npm libraries that you might need for your project.
For a deep dive into everything you need to know about getting started, check out Vite’s complete documentation.
Installing TomTom Maps SDK
Next, we install TomTom Maps SDK to view the map on the Document Object Model (DOM) by running this command:
npm i @tomtom-international/web-sdk-mapsInstalling Axios
Then, we install Axios to handle API requests:
npm i axiosAdding a Map
Now, let’s add our map into our Vue component. First, let’s import all the necessary libraries inside our <script> tag, starting with Axios:
import axios from 'axios';We also import onMounted, ref, and reactive into our component. We’ll use this inside our Vue composition API:
import { onMounted, ref, reactive } from 'vue';We’ll then add the setup() method to the component to initialize and insert the map:
export default {
  name: 'App',
  setup() {
    const mapRef = ref(null);
    onMounted(() => {
      const tt = window.tt;
      var map = tt.map({
      key: '<YOUR API KEY HERE>',
      container: mapRef.value,
      style: 'tomtom://vector/1/basic-main',
    });
        map.addControl(new tt.FullscreenControl());
        map.addControl(new tt.NavigationControl());
    })

    return {
      mapRef,
    };
  }
}
Inside the setup() method, we used the ref function to create a variable called mapRef. Refs allow us to access the DOM element, which is how we add the map.
Next, we use our onMounted life-cycle to initialize and add the map to the DOM while the component is mounted. We set mapRef as the map’s container and add visual controls for navigation and full-screen to the map using map.addControl. In the end, we’ll return mapRef and use it in our <template>.
We use ref to add the map to the <div> element.
<div id="map" ref="mapRef"></div>Let’s also add these styles:
<style>
#app {
  font-family: Avenir, Helvetica, Arial, sans-serif;
  -webkit-font-smoothing: antialiased;
  -moz-osx-font-smoothing: grayscale;
  text-align: center;
  color: #2c3e50;
  margin-top: 60px;
}
#map {
  height: 60vh;
}
</style>
Creating the Geofence
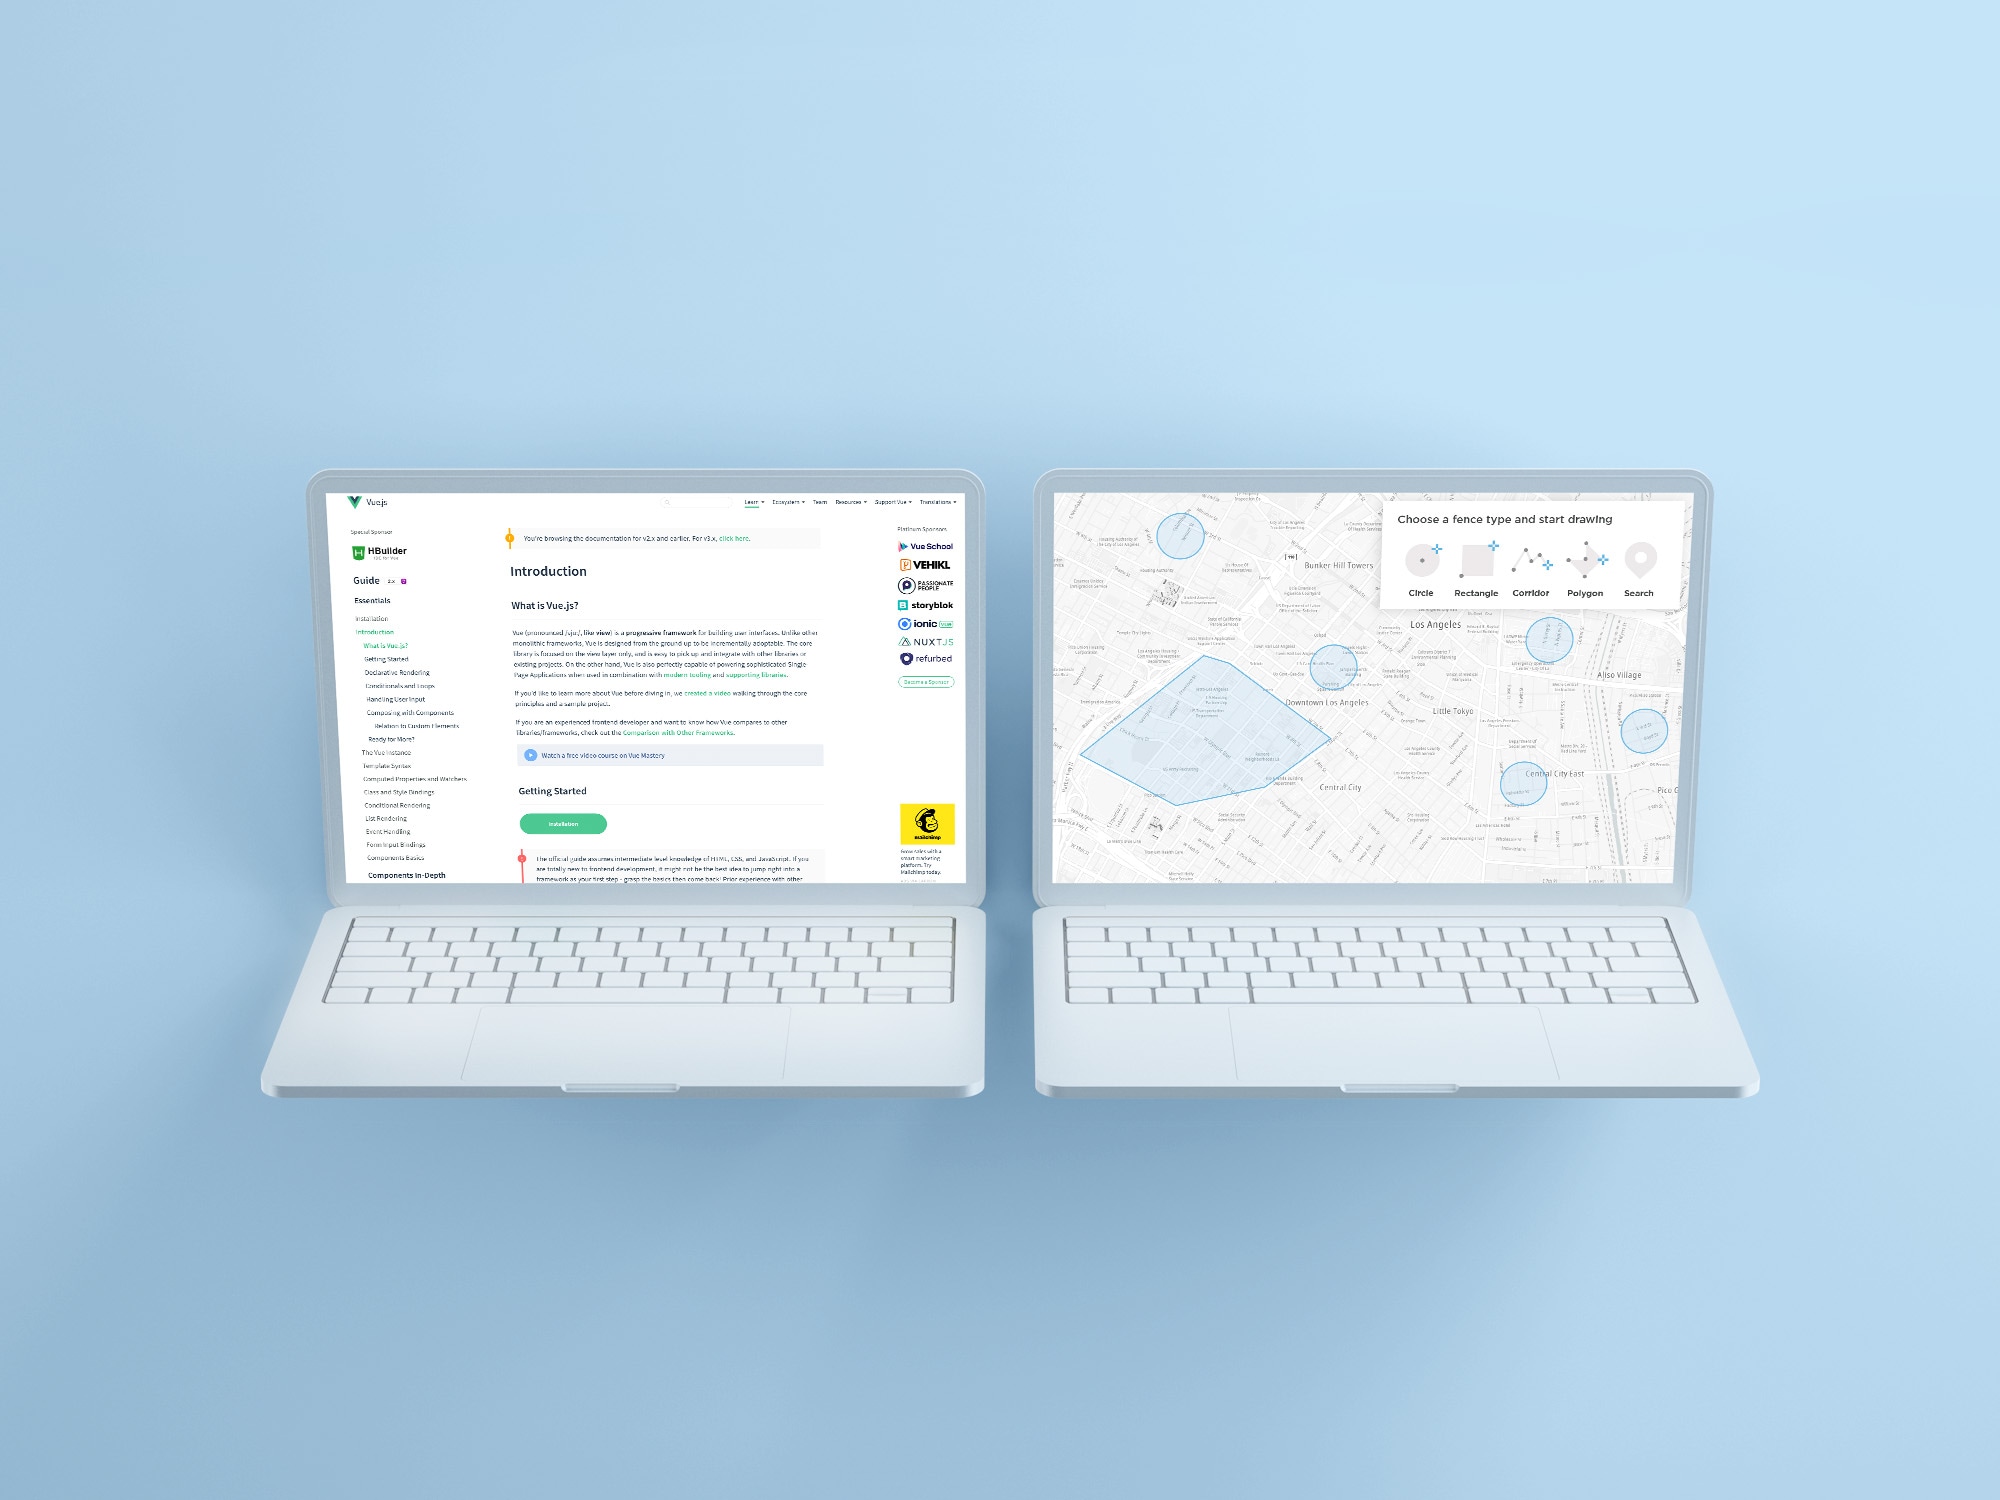
Our next step is to create the geofence. The geofencing service enables us to draw a virtual boundary, and we can use the Geofences creator tool to draw geofences of any shape or form. Applications can then use this virtual boundary to check if a location or object is inside or outside the enclosed space. A particular object’s coordinates — its latitude and longitude — allow us to check if it's within the geofence.
To get these coordinates and determine the object’s location, we want a user to click on the map and have the app automatically draw a circular geofence centered on that point.
We need an Admin Key to do this. The Admin Key is one of the query parameters we need to handle the geofence’s API requests. Then, we’ll use Postman to send a POST request to TomTom’s API to register our Admin Key.
This request will include a body containing a secret phase. We’re using "my_secret_key” for this project. However, you can use another custom string.
{
  "secret": "my_secret_key"
}
We’re also using our API key as a parameter, so it’s all tied to one account:
https://api.tomtom.com/geofencing/1/register?key=Your_API_Key
We’ll get back a response containing our adminKey.
Creating a New Project
We now have the adminKey, but we need to create a project that connects to the geofence we’re about to draw. Every geofence is associated with a particular project.
Send another POST request to register the new project:
https://api.tomtom.com/geofencing/1/projects/project?key=${apiKey}&adminKey=${adminKey}Send it with the project name as the body:
{
  "name": "Geofence map"
}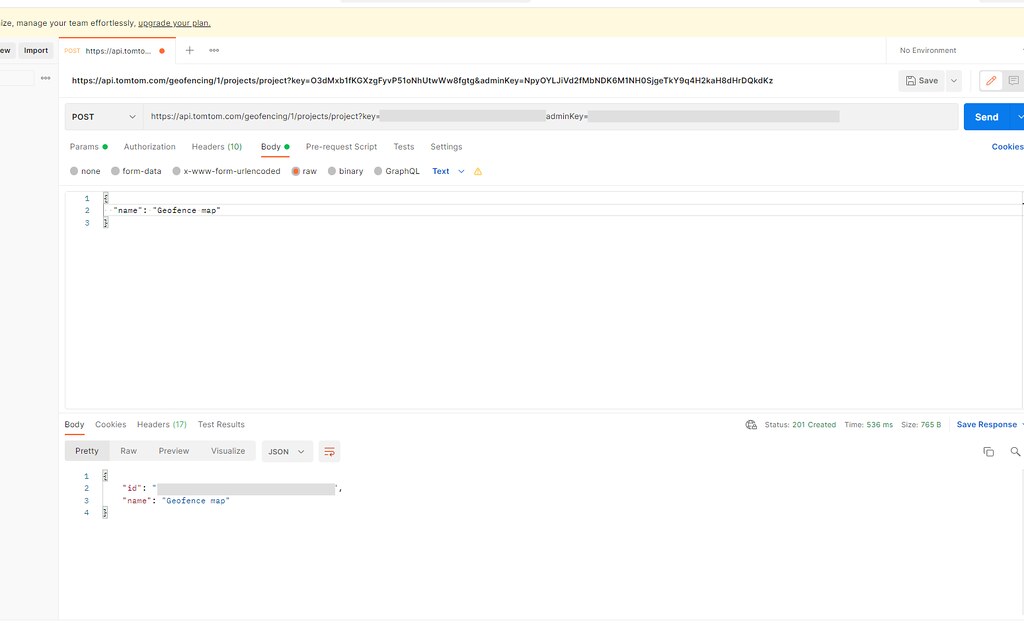
The response contains the project id and name.
Creating the Geofence
Now that we have our project, we can create the geofence in our code using its coordinates. First, let’s install Turf to help us draw on the map.
npm i @turf/turfGo back inside the onMounted component and add map.on to monitor where and when the user clicks. The app will use that particular coordinate to draw our geofence. Send the request like this:
map.on('click', function (event) {
const position = event.lngLat;
        console.log(position);
axios.post('https://api.tomtom.com/geofencing/1/projects/${YOUR_PRODUCT_ID}/fence?key=${YOUR_API_KEY}=${YOUR_ADMIN_KEY}',
            {
              name: `Our location ${Math.floor(Math.random() * 10000)}`,
              type: 'Feature',
              geometry: {
                radius: 85,
                type: 'Point',
                shapeType: 'Circle',
                coordinates: [position.lat, position.lng],
              },
            }
          )
}
We get back a response containing information about the geofence we just created. In the response, we use turf to collect our coordinates and eventually feed them into map.addSource.
.then((res) => {
            console.log(res.data);
            console.log(position)
            let _center = turf.point([position.lng,position.lat]);
            let _radius = 45;
            let _options = {
              steps: 80,
              units: 'kilometers' // or "mile"
            };

            let _circle = turf.circle(_center, _radius, _options);

            map.addSource("circleData", {
              type: "geojson",
              data: _circle,
            });

            map.addLayer({
              id: "circle-fill",
              type: "fill",
              source: "circleData",
              paint: {
                "fill-color": "red",
                "fill-opacity": 0.5,
              },
            });
            //map.setCenter([parseFloat(position.lat), parseFloat(position.lng)]);
          })
          .catch((err) => console.log(err));
map.addLayer collects the data through map.addSource and uses it to draw the geofence directly on our map.

When we click any point on the map, the app takes the coordinates, creates a new geofence, and uses addLayer to draw a circular outline.
Here’s the full code inside onMounted:
  onMounted(() => {
      const tt = window.tt;
      var map = tt.map({
        key: '{YOUR_API_KEY}',
        container: mapRef.value,
        style: 'tomtom://vector/1/basic-main',
        zoom: 5,
        center: [12.3, 32.992578],
      });
      map.addControl(new tt.FullscreenControl());
      map.addControl(new tt.NavigationControl());
      state.map = map;

      map.on('click', function (event) {
        const position = event.lngLat;
        console.log(position);
        axios
          .post(
            'https://api.tomtom.com/geofencing/1/projects/1c2f4c1d-c1eb-43b3-a023-18e503469104/fence?key=${YOUR_API_KEY}=${YOUR_ADMIN_KEY}',
            {
              name: `Our location ${Math.floor(Math.random() * 10000)}`,
              type: 'Feature',
              geometry: {
                radius: 85,
                type: 'Point',
                shapeType: 'Circle',
                coordinates: [position.lat, position.lng],
              },
            }
          )
          .then((res) => {
            console.log(res.data);
            console.log(position)
            let _center = turf.point([position.lng,position.lat]);
            let _radius = 45;
            let _options = {
              steps: 80,
              units: 'kilometers' // or "mile"
            };
            let _circle = turf.circle(_center, _radius, _options);
            map.addSource("circleData", {
              type: "geojson",
              data: _circle,
            });
            map.addLayer({
              id: "circle-fill",
              type: "fill",
              source: "circleData",
              paint: {
                "fill-color": "red",
                "fill-opacity": 0.5,
              },
            });
            //map.setCenter([parseFloat(position.lat), parseFloat(position.lng)]);
          })
          .catch((err) => console.log(err));
      });
    });
Handling Geofence Notifications
TomTom maps enable us to monitor our geofence, checking if an object is within or outside it. This feature is mostly beyond the scope of this tutorial. You would need to register and track an object and connect your backend to the Notifications API and Geofencing Alert Service. This approach would require a webhook and email where it will send notifications if the device crosses the geofence.
Instead, using its coordinates, we can use the TomTom Geofencing Report service to determine if an object is within or outside the geofence. Let’s first create an object’s location and add a marker for that location on the map. We make a new function directly under our onMounted component called addMarker.
 function addMarker(map) {
    const tt = window.tt;
    var location = [-12.3423, 65.67346189482023];
    var popupOffset = 25;

    var marker = new tt.Marker().setLngLat(location).addTo(map);
    var popup = new tt.Popup({ offset: popupOffset }).setHTML("Your object!");
            marker.setPopup(popup).togglePopup();
}
Then add this code to our onMounted component:
onMounted(() => {
    // [...]
    addMarker(map);
})
This marker will display on our map, like this screenshot:

We can now take our object’s coordinates and send a POST request using this endpoint. We’ll use the projectId, apiKey, adminKey, and the object’s latitude and longitude as query parameters:
https://api.tomtom.com/geofencing/1/report/${projectId}?key=${apiKey}&adminKey=${adminKey}&point=${lat,lng}The response looks like this:
{
    "summary": {
        "project": "c2f56e6d-8395-4aa2-bf64-e36f7b7d229c",
        "type": "Point",
        "coordinates": [
            41.670966,
            2.750529,
            0.0
        ],
        "range": 0.0
    },
    "inside": {
        "type": "FeatureCollection",
        "features":     },
    "outside": {
        "type": "FeatureCollection",
        "features": [
            {
                "id": "0c803717-b862-4548-ab47-20bf544b2d84",
                "name": "Geofence map",
                "distance": 3298398.0,
                "type": "Feature",
                "geometry": {
                    "type": "Point",
                    "coordinates": [
                        12.138017,
                        6.137388
                    ]
                },
                "properties": {
                    "maxSpeedKmh": 70
                }
            }
        ]
    }
}
The response shows whether the point is inside or outside the app’s geofences. The response also includes the object’s distance from the geofence.
Conclusion
Congratulations on completing the tutorial! We’ve explored geofences and demonstrated how to use them to optimize mapping and tracking in your Vue application. Here’s a link to our complete code.
You can customize TomTom’s Geofencing API to handle your unique use case, from tracking flower deliveries to notifying ridesharing travelers when their lift to the airport is almost there to alerting fleet managers when their truck packed with computer equipment is not where it should be. Now that you’ve learned how to use TomTom with Vue, dive in and get started adding geofencing features to your next app.