Creating and Using TomTom Geofences with Angular
)
Geofencing is a technique used to create virtual boundaries around a geographical area. It is typically used in conjunction with the location of a tracked object to let you know whether the object is entering or exiting the area. In this tutorial, you'll create Geofences using TomTom's web SDKs.
Geofencing is a technique used to create virtual boundaries around a geographical area. It is typically used in conjunction with the location of a tracked object to let you know whether the object is entering or exiting the area. Some real-life applications include determining if a truck driver deviates from assigned routes, notifying law enforcement authorities if an individual under house arrest leaves the premises, activating home security systems if a homeowner leaves the house, and much more.
In this tutorial, you’ll create Geofences using TomTom’s web SDKs. You’ll create a map and add a geofence within an Angular web application.
Prerequisites
You need to be familiar with NodeJS, TypeScript, and Angular to follow along. Make sure you have NodeJS v14+ installed on your development machine. You can get it from the official NodeJS Downloads page. You’ll also need to have Angular CLI installed. It will help in scaffolding and developing your app.
Run the following command to install Angular CLI:
npm i -g @angular/cliMake sure you have the TypeScript compiler installed by running the following command:
npm i -g typescriptFinally, make sure you have the free version of Postman installed.
Create Your Angular Application
Angular CLI allows you to scaffold your web application and install the dependencies. Run the following command to create the app:
ng new tomtom-geofences --styles=scss --routingThis will ensure the app uses SCSS for styling and configures a routing module. Once the process completes, open the project in your favorite code editor. Access the project folder from your terminal using the following command:
cd tomtom-geofences/Install TomTom Maps SDK
Next, you’ll need to install TomTom Maps SDK by running the command below in your terminal:
npm i -g @tomtom-international/web-sdk-mapsThe SDK enables your web application to display TomTom maps.
TomTom Maps SDK for Web provides built-in TypeScript annotations support. It also provides a type system that helps reduce runtime errors. Check out TomTom's TypeScript Annotations documentation for more information.
Now it’s time to configure the TypeScript compiler. This will suppress import errors thrown by the TomTom Maps SDK. Open the tsconfig.json file in the root project folder. Add "allowSyntheticDefaultImports": true within compiler options.
For more information about this, check out the documentation for TypeScript Compiler Options. From now on, we will focus on files located under the src/ folder.
Adding a TomTom API Key
You need to get an API Key from TomTom so that your web application can communicate with their services. To do so, register for the TomTom developer portal and you can Register / Sign In now before continuing. This account is free for commercial use with thousands of daily requests. You can pay as you scale up your application.
After signing in, head over to Dashboard and locate the API Key created for you (or you can create another one).

In your code editor, edit the two environment files under the environments/ folder. Add a new key as shown below. The environment.prod.ts is used in production and the following one is for development:
ttApiKey: '<your-tomtom-API-Key>'Adding a Map
In this section, you’ll add a map to your angular application. Focus on the app.component.ts file in the app/ folder. Import the TomTom Maps SDK and the environment file, and import key components from Angular’s core library that are necessary for the app to work:
import * as tt from '@tomtom-international/web-sdk-maps' ;
import { environment } from 'src/environments/environment';
import { AfterViewInit, Component, ElementRef, ViewChild } from '@angular/core'
Create a reference to a div element using the ViewChild annotation. This will be responsible for getting the DOM element to add the map:
@ViewChild('mapContainer') mapContainer!: ElementRef;Make sure your AppComponent class implements the AfterViewInit interface as shown below. Refer to the official guide to learn more about Angular's Component Lifecycle.
export class AppComponent implements AfterViewInit {
…
}
Initialize a map using your API Key and the DOM element, and set the center and zoom properties.
ngAfterViewInit(): void{
    this.map = tt.map({
      key: environment.ttApiKey,
      container: this.mapContainer.nativeElement,
      zoom: 5,
      center: [-1.286389, 36.817223],
    });

    this.map.addControl(new tt.FullscreenControl());
    this.map.addControl(new tt.NavigationControl());
}
Open the app.component.html file and add the following:
<div class="map" #mapContainer></div>Finally, open the app.component.scss file to add styling rules for your map as shown below:
@import "@tomtom-international/web-sdk-maps";
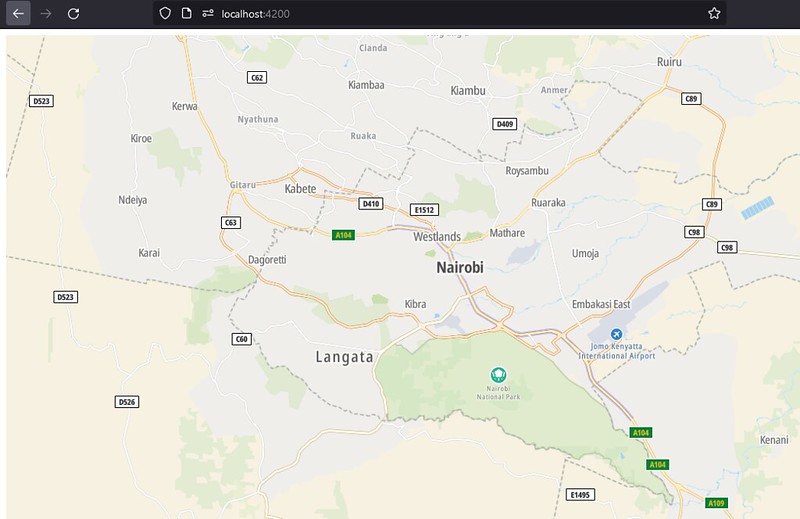
.map { height: 100vh; }Start your development server by running the command on your terminal:
ng serveAccess your application at the URL http://localhost:4200/
Creating the Geofence
TomTom’s Geofencing API allows developers to add geofencing features to apps. In this section, you are going to add a geofence to your map. To achieve this, we’re going to follow this process:
Create an admin key using TomTom’s Geofencing API and add it to Angular’s environment file.
Create a new project for managing the fences you’ll create.
Create a circular fence around a location within your Angular app.
Use TomTom’s Geofence Creator to create a fence and include it in the Angular app.
Creating an Admin Key
You need to create an admin key for accessing TomTom’s Geofencing API. To create this key, you need to use the TomTom API Key that you created earlier on. Also, you need to supply a secret phrase while registering the admin key.
{
  "secret": "your_secret_phrase"
}
The API URL for creating an admin key is
[https://api.tomtom.com/geofencing/1/register?key=<YOUR_API_KEY>]Replace YOUR_API_KEY with your own key generated in the previous steps. Use Postman to make a POST request to the URL shown above.
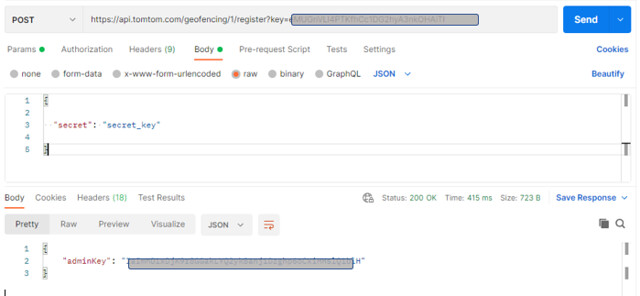
This API call will respond with the admin key that you need. Add it to your environment configuration files.
ttAdminKey: 'YOUR_ADMIN_KEY'Creating a Project
Now we’ll create a project for organizing the fences created, by making another POST call to TomTom’s API.
To prepare the request, enter the project name as the request body in Postman:
{
  "name": "Angular Geofence"
}
Then use Postman to make the POST request to the URL shown below. Make sure you replace YOUR_API_KEY and YOUR_ADMIN_KEY with your API and admin keys, respectively.
https://api.tomtom.com/geofencing/1/projects/project?key=<YOUR_API_KEY>&adminKey=<YOUR_ADMIN_KEY>This API call will respond with the project ID and name. Add the project ID to your environment configuration files like so:
ttProjectId: 'YOUR_PROJECT_ID'Creating a Geofence
Before you start creating a geofence, install the turf library. It will help in drawing shapes on top of the map. Run the following command in your terminal to install it:
npm i -s @turf/turfOpen the app.component.ts file and import the turf module:
import * as turf from '@turf/turf';In the AfterViewInit function, add a click event listener to the map. This event listener will get the geolocation of where the user clicked on the map. We’ll create a fence around this location with a pre-defined radius by making an HTTP request to TomTom’s Geofencing API.
this.map.on('click', (event) => {
      const position = event.lngLat;
      const URL = `https://api.tomtom.com/geofencing/1/projects/${environment.ttProjectId}/fence?key=${environment.ttApiKey}&adminKey=${environment.ttAdminKey}`;
      const payload = {
        name: `Our location ${Math.floor(Math.random() * 100)}`,
        type: 'Feature',
        geometry: {
          radius: 85,
          type: 'Point',
          shapeType: 'Circle',
          coordinates: [position.lat, position.lng],
        },
      };
});
Make an HTTP POST request using the HTTP service. To do this, you need to add Angular's HttpClient module to your app. Open the app.module.ts file, import the HttpClient module then add it as an import.
import { HttpClientModule } from '@angular/common/http';
@NgModule({
   …
   imports: [ HttpClientModule ]
});
Next, open the app.component.ts file, import the HttpClient and inject it as a dependency in the app component class:
// import the HttpClient
import { HttpClient } from '@angular/common/http';
constructor(private httpClient: HttpClient) {}
This request will create a Geofence as described in the payload above. Use the response and the turf module to create the circle visualization of the area covered by the fence:
this.httpClient.post(URL, payload).subscribe((result) => {
  let _center = turf.point([position.lng, position.lat]);
  let _radius = 45;
  let _options = {};
  let _circle = turf.circle(_center, _radius, _options);
  this.map.addSource('circlularFence', {
    type: 'geojson',
    data: _circle,
  });
  this.map.addLayer({
    id: 'circle-fill',
    type: 'fill',
    source: 'circlularFence',
    paint: {
      'fill-color': 'blue',
      'fill-opacity': 0.5,
    },
  });
});
If you check the map again, you’ll see that it now has a blue circle that shows the fence you created.

Using Geofence Creator
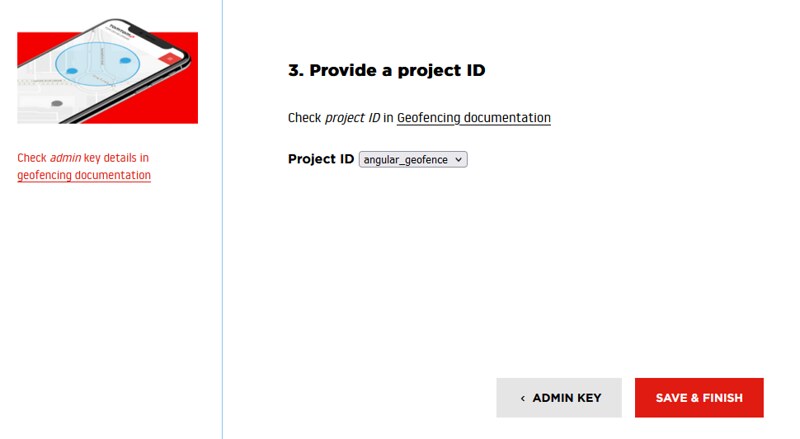
TomTom’s Geofence Creator is a graphical user interface for creating fences. Head over to TomTom’s Developer Portal to access it. Enter your API Key and Admin Key that you created earlier. Select the project you want to create fences for.
Once the UI opens, you’ll see a map and a panel with the different shapes that you could use to create your geofence. For demonstration purposes, we’re going to create a fence with an irregular shape. This fence will be around Nairobi but feel free to create one at any location.
To do this, use the panning and zooming buttons to position the map around your desired location. In this case, Nairobi City. Select the Polygon button from the panel in the top-right corner. A polygon is a shape made of vertexes. To draw a polygon fence, click on one point to create the first vertex on the map.
Continue clicking to create vertexes around the area you want to geofence. When finished, double-click to end the drawing. A pop-up prompts you to enter the name of the fence and add more properties.

You’ve created a fence using TomTom’s Geofence Creator. Now it’s time to load it in your angular app. Open the app.component.ts file and add the following method to the App Component class:
loadGeofence(fenceId: string){
  const URL = `https://api.tomtom.com/geofencing/1/fences/${fenceId}?key=${environment.ttApiKey}`
  this.map.on("load", () => {
    this.httpClient.get(URL).subscribe((result: any) => {
      this.map.addLayer({
        id: "Fence ",
        type: "fill",
        source: {
          type: "geojson",
          data: result,
        },
        paint: {
          "fill-color": "purple",
          "fill-opacity": 0.6,
        }
      })
    })
  });
}
Finally, call the function created above in the AfterViewInit function. Use the fence ID from TomTom Geofence Creator to load the fence in your Angular application:
this.loadGeofence('<YOUR_FENCE_ID>');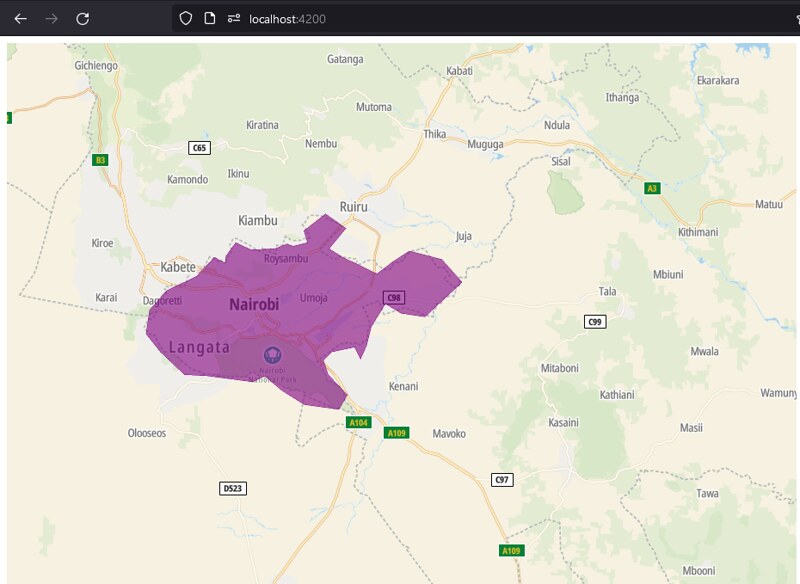
Conclusion
Congratulations on completing this tutorial! We explored how geofencing is valuable in various use cases and learned how to integrate TomTom’s Maps SDK for Web in an Angular application. We created a geofence by using TomTom’s Geofencing Creator and the API. These fences are all loaded and displayed in your Angular application.
You can use TomTom’s Geofencing API to solve different real-world problems like tracking the fleet of delivery trucks to ensure they take the required route, notify customers when their delivery is almost there, and so much more. Dive in and start adding geofencing features to your Angular app.