5 Cool Ways to Use Maps APIs
) Jose Jose Rojas
Jose Jose Rojas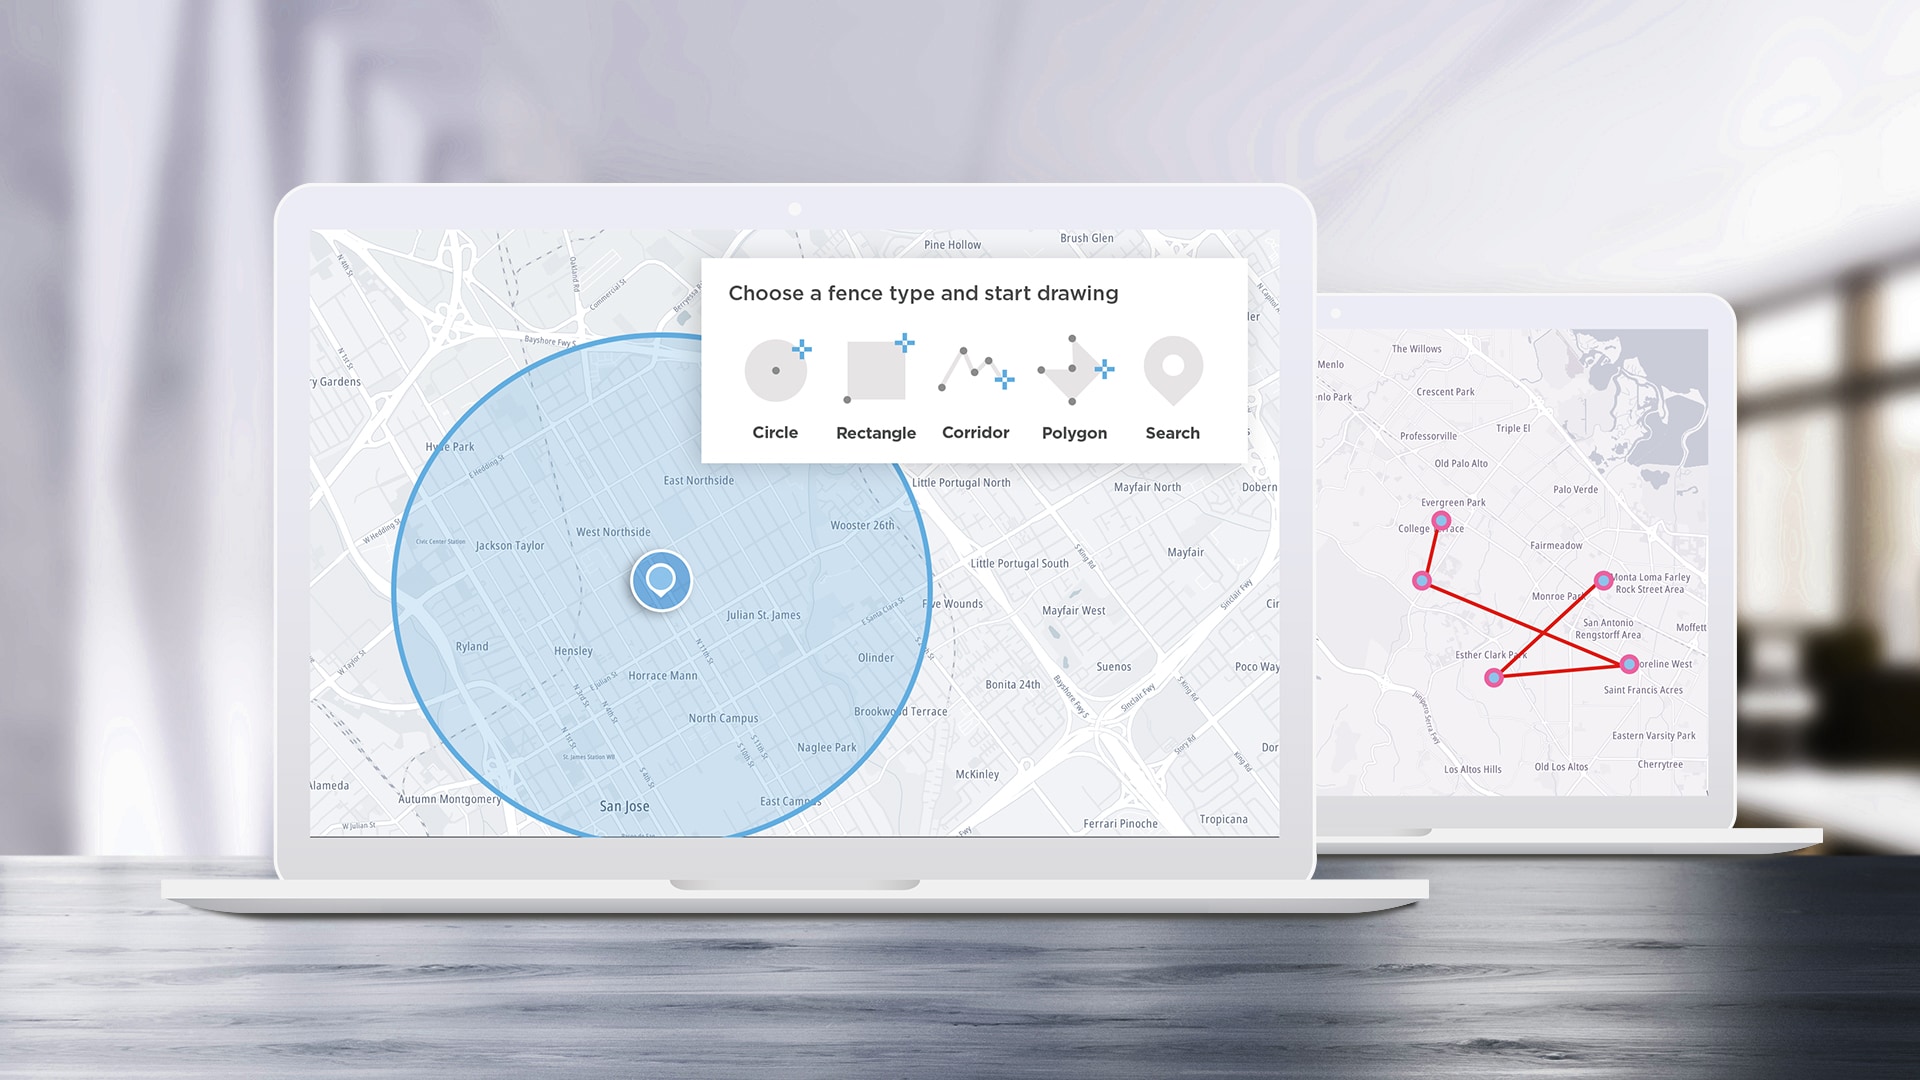
APIs are designed to help developers build applications easier and faster, and SDKs help speed up the process by turning some of the most complex APIs into even easier-to-use functions. We’ll take a look at some of the most interesting ideas we see the TomTom Maps SDK for Web being used for and how to implement them.
APIs here, APIs there…
As software developers we know that APIs are designed to help us build applications easier and faster. Then with an SDK, it can help speed up the process by wrapping the most complex APIs into even easier to use functions and methods. While SDKs make it so much easier for developers, sometimes we have to take a step back and look at all the cool things we can build by using them.
In this article I’ll go over some of the most interesting ideas we see the TomTom Maps SDK for Web being used for and how they were implemented. Let’s take a look at this short list:
Take a picture of your location for a website – fast!
Find ice cream parlors near you.
Build your own geocaching application.
Get walking alternatives when visiting a new place.
Get the address of where you are right now, copy it and send it.
Take a picture of a location for your website
If you need a quick way to display a specific location on your website, for example maybe a store front or location in a shopping mall, then TomTom maps APIs has the "tt.services.straticImage" service to help.
You can check the documentation of this API here.
Using just a single line, you can request a static image of a location and zoom level, language and style for your website!
But first we need to know where we are. In JavaScript, for example, you can request the current location with:
function getLocation() {
    if (navigator.geolocation) {
        navigator.geolocation.getCurrentPosition(showPosition);
    } else {
         // "Geolocation is not supported by this browser.";
 }
}
Note that this will be more accurate on a mobile phone. The coordinates will be passed in the function “showPosition”.
function showPosition(position) {
    getScreenShot(position.coords, 10)
}
At the “getScreenShot” function we request the image to the TomTom Maps APIs.
function getScreenShot(coords, zoom) {
    tt.services.staticImage({
    key: <<INSERT YOUR API KEY, Get one free at developer.tomtom.com>>
    zoom: zoom,
    center: new tt.LngLat(coords.longitude,coords.latitude),
    width: 500,
    height: 500
    }).go().then(function(url){
    return url
    // this url can be now used as a source for a img ref.
    })
}
If you have in your HTML:
<html>
<img id="screenshot" src="" width="500" height="500">
</html>
You can now replace the source of a <img> html tag with the result of this function:
<script>
document.getElementById("screenshot").src= url
</script>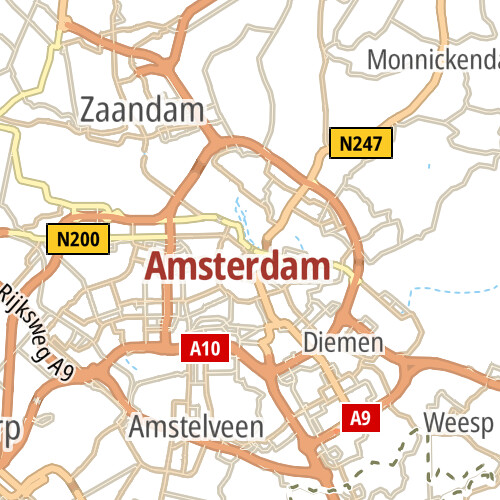
For more options to create a screenshot of a map for your application, take a look at this documentation.
Find ice cream parlors near you
Let’s imagine you are strolling around a city and you’d like to find a place to get ice cream nearby. With a simple circle, we can search in the area around you and display options. We can choose one of the many categories we support in our Search API.
If we already have our current location (from the previous section) together with a radius (let’s say 500 meters) we can create our API call with the following:
tt.services.categorySearch({
    key: <<API KEY>>,
    query: 'ice cream parlor',
    center: new tt.LngLat(coords.longitude,coords.latitude),
    radius: 500
})
.go()
.then(function (response) {
    var list = response.results.map(function (value) {
    new tt.Marker().setLngLat(value.position).addTo(map)
    return {
        name: value.poi.name,
        position: value.position
    }
    })
console.log(list)
});
The function handling the response will provide a list of the possible ice cream POIs – also known as points of interest.
In this case we are parsing the result POIs (coming in an array) and mapping them in another list with a location and name. Easy, no?

Build your own Geocaching Application
When we think about track & trace we are usually talking about delivery services – but creating geofences can also be used in building geocaching apps. Here we are going to create a small application that will allow you to create a geometrical fence that circles a small treasure to be found by you!
While someone is strolling in the city, let’s see if they can find a fun cache that we can hide.Instead of adding a location for our small treasured cache – like geocaching.com does – we are adding a virtual geofence of, let’s say 10 meters in which we would search.
We need to create a project to hold all our fences (as you may add more caches later).
First we will assume that you have already an AdminKey. If this is not the case, by making a POST call to ‘https://api.tomtom.com/geofencing/1/register’ with the following command:
curl -XPOST "Content-type: application/json" -d
'{
 "secret": "your_secret"
 }'
'https://api.tomtom.com/geofencing/1/register?key=<<Your_API_Key>>
We are doing this with a cURL command since it is needed only once. The secret is unique, so don’t forget about it.
Now with an AdminKey, we create a project. This next code would be in our JavaScript project.
const requestOptions = (body) => {
    return { method: 'POST', headers: {'ContentType':'application/json'}, body: JSON.stringify(body);}
const baseUrl = "https://api.tomtom.com/geofencing/1";
const keyPhrase =`key=${APIKEY}&adminKey=${ADMINKEY}`;
async function createProject() {
    const projectUrl = `${baseUrl}/projects/project?${keyPhrase}`;
    const projectResponse = await fetch(projectUrl, requestOptions({ name: "geocaching project" }));
    const project = await projectResponse.json();
    return project; // we need the project.id from this object
}
Almost there! Finally, we just need to create the fence, or better: the area where the cache is. We will use the location that we got from the browser as we did in the first section of the article.
async function createFence(projectId, position) {
    const fenceUrl = `${baseUrl}/projects/${projectId}/fence?${keyPhrase}`;
    const fence = {
    name: `Here lies a treasure!`,
    type: 'Feature',
    geometry: {
    radius: 10,
    type: 'Point',
    shapeType: 'Circle',
    coordinates: [position.lng, position.lat]
 };
    await fetch(fenceUrl, requestOptions(fence));
}
Note that we are using the project ID from the previous call. If you want to create these fences more interactively you can use the Geofences Creator online app. Here you just need to enter your Admin Key and project name to create your fences. Here is the link: https://developer.tomtom.com/ demos/geofences-creator/index.html
Look at how many caches we have created around Vancouver!

Coming back to the topic, now we need to provide a report if we are close or inside the area where the treasure is.
For that we will use the Geofencing API report service.
But in our application, we would use:
async function checkForTreasures(projectId, position) {
    var params =`key=${APIKEY}&point=${position.longitude},${position.latitude}`;
    const reportUrl = `${baseUrl}/report/${projectId}?${params}`;
    var report = await fetch(reportUrl);
}
The response from the function is a JSON object following this structure.
The “inside” field will display which areas we are inside – so that means closer than 10 meters from the cache.
To announce if we are close to other caches, we take the list from the “outside” section. Let’s say we can start telling users that we they are close to a treasure once the distance in this list is less than 100 meters.
Geocaching is a fun outdoor activity and using the Geofencing API will make it even easier to implement.
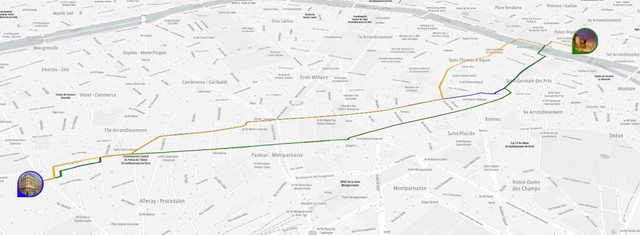
Get walking alternatives when visiting a new place
You feel like going on a stroll today, and maybe you are visiting a city center. Using the Routing API we can select two or more alternatives to walk around an area.
Let’s say you are in Paris, just getting out of your hotel, and you want to walk to the Louvre museum. How about a suggested route to enjoy the day?
Something like what we have in this picture:
By using this service function:
tt.services.calculateRoute(options).go().then(function (response) {
    var features = response.toGeoJson().features;
    features.forEach(function (feature, index) {
    map.addLayer({
        'id': 'route' + index,
        'type': 'line',
        'source': {
        'type': 'geojson',
        'data': feature
    },
        'paint': {
        'line-color': routeColors[index],
        'line-width': 6,
        'line-dasharray': [1, 0]
    },
        'layout': {
        'line-cap': 'round',
        'line-join': 'round'
    }
});
})
})
With these options:
{
    key: API_KEY,
    locations: [HOTEL, LOUVRE],
    travelMode: 'pedestrian',
    maxAlternatives: 2,
}
We create a route with that can be displayed in the map and perhaps you can follow to two nice strolls: one to go to the Louvre and one to come back to the hotel.
Here, the secret is to request at least two alternatives – you can ask for a max of five – so we have more options on the way back.
For more options on creating alternative routes, check the documentation here.
Let’s walk!
Get the address where you are right now
Do you need to send your current address to someone ASAP? How about opening this small app that copies your current address to your clipboard so you can paste it in your message application. Check out the small but powerful Reverse Geocoding API from TomTom.
But first, remember that we can ask for the current location in a browser (mobile or desktop) using the code in the first section of this article.
Then we just reverse geocode the location to fetch the free format address and copy it.
tt.services.reverseGeocode({
    key: <Your API key>,
    position: new tt.LngLat(coords.longitude,coords.latitude)
})
.go()
.then(callback)
The callback function will receive the result to extract the value of ‘’freeformAddress”.
function callback(result) {
    var firstResult = response.addresses[0]
    var address = firstResult.address.freeformAddress
    // Copy the address to the clipboard
    navigator.clipboard.writeText(address)
}
Now you can paste it in your message! You can even combine it with the screenshot we took in the first section of this article to send it together.
Check the reverse geocode functionality documentation here.
BONUS: CREATE A FULLY CUSTOMIZABLE MAP
We’re adding a bonus point, because we believe that one of the coolest things you can do with a map is make it your own.
Luckily, to do this it takes little no coding experience and is super easy to implement.
If you haven’t already, check out the tutorial on how to use TomTom’s Map Styler here. When creating a customized map, it’s easy to get lost on all the items you can customize. There’s routes, borders, oceans, forests, highways, labels and so much more – every one of these items can be changed to your liking, which can get a little confusing.
Instead of going in a changing every detail, you’ll want to adjust a few items for the biggest impact. We recommend starting with these:
Selecting a specific base layer
Customizing labels & fonts
Adjust road displays
Customize large polygon features (like water, land cover or background)
The base layer is the easiest way to adjust your map with the Map Styler. There are currently over 25 styles to choose from, including a satellite base that enables you to have a photorealistic map.

Wrapping Up
This is just a small list of easy things you can implement on your app to up the cool factor. We’re rooting for someone to build a geocaching app using the satellite layer as their base. We hope you enjoyed this list, and of course if you have any questions drop us a note in the Developer Forum or send us a DM on Twitter.