How to route navigation apps right for fleet and logistics vehicles
)

Every developer working on routing applications should know this: using a standard navigation app for fleet vehicles is like trying to fit a square peg into a round hole.
Just as the square peg doesn't quite fit the round hole, the routes designed for passenger cars are not the best fit for fleet vehicles.
When incorporating vehicle-specific routes in the Nav SDK, it's essential to consider the unique challenges of the fleet and logistics sector.
Consider a scenario where a vehicle crashes into a bridge along the designated route. What could be a contributing factor? It's possible that the driver overlooked traffic signs and blindly followed navigation instructions on their phone. This is a common issue that arises from using an unsuitable navigation app.
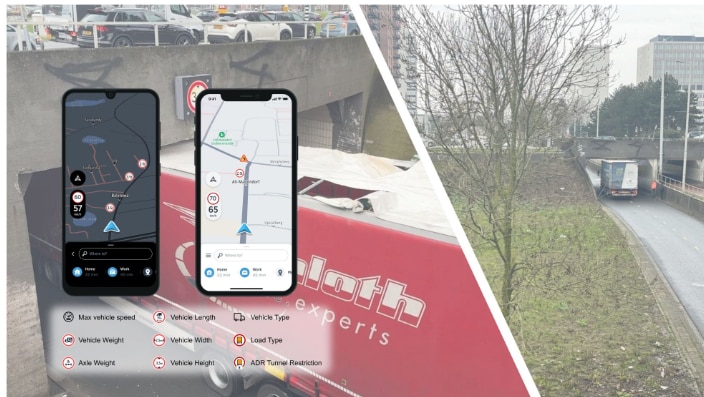
Furthermore, fleet and logistics vehicles’ drivers may accidentally drive on roads that are restricted during specific periods, which can lead to penalties. A navigation system tailored for fleet and logistics can assist drivers in avoiding such situations and stay safe.
In this article, we will explain the process of implementing truck-specific routes in the Nav SDK.
We begin the project setup by following the instructions on the developer portal's project setup page.
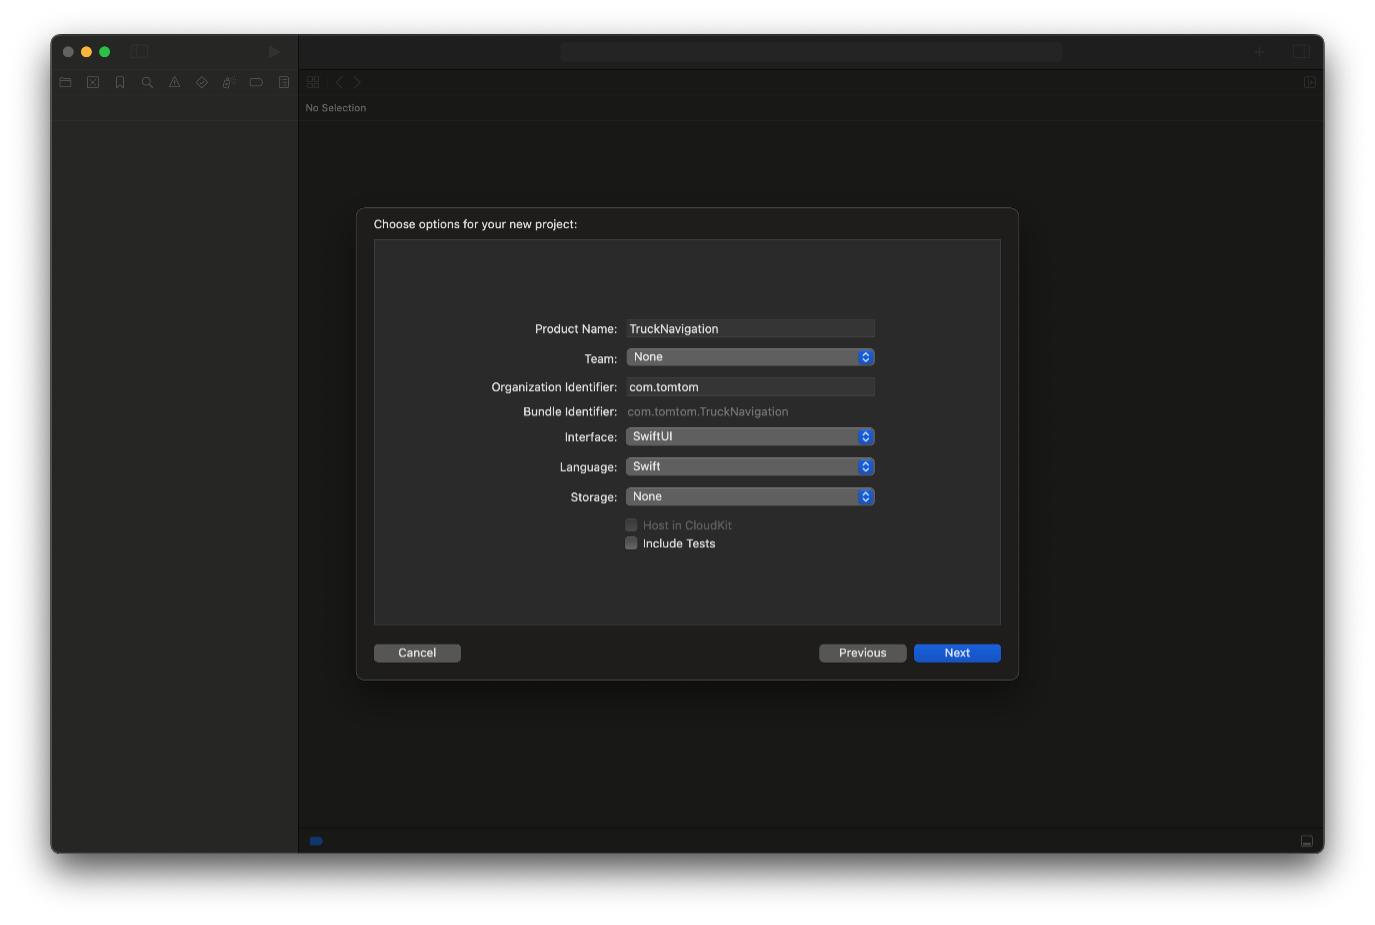
The example codes in this article demonstrate using Nav SDK version 0.47.0 for iOS.
Step 1: Defining Map Style
To begin, we will display a map in our example. We will set the map style to incorporate the restriction style, enabling the automatic display of vehicle restrictions on the map.
 var mapView = TomTomSDKMapDisplay.MapView(
    mapOptions: MapOptions(
      mapStyle: .restrictionsStyle,
      apiKey: Keys.ttAPIKey
    )
  )
Step 2: Specifying Vehicle Dimensions
Following the map display, we need to associate a vehicle with the map to automatically showcase the restrictions relevant for the specific vehicle. In this section, we will establish the specifications for a truck. Find more guidance at: Vehicle Restrictions - TomTom Developer Portal.
import TomTomSDKCommon
struct VehicleProvider {
static let myTruck = Truck(
dimensions: try? VehicleDimensions(
weight: Measurement.tt.kilograms(8000),
axleWeight: Measurement.tt.kilograms(4000),
length: Measurement.tt.millimeters(8340),
width: Measurement.tt.millimeters(4650),
height: Measurement.tt.millimeters(3445),
numberOfAxles: 3
)
)
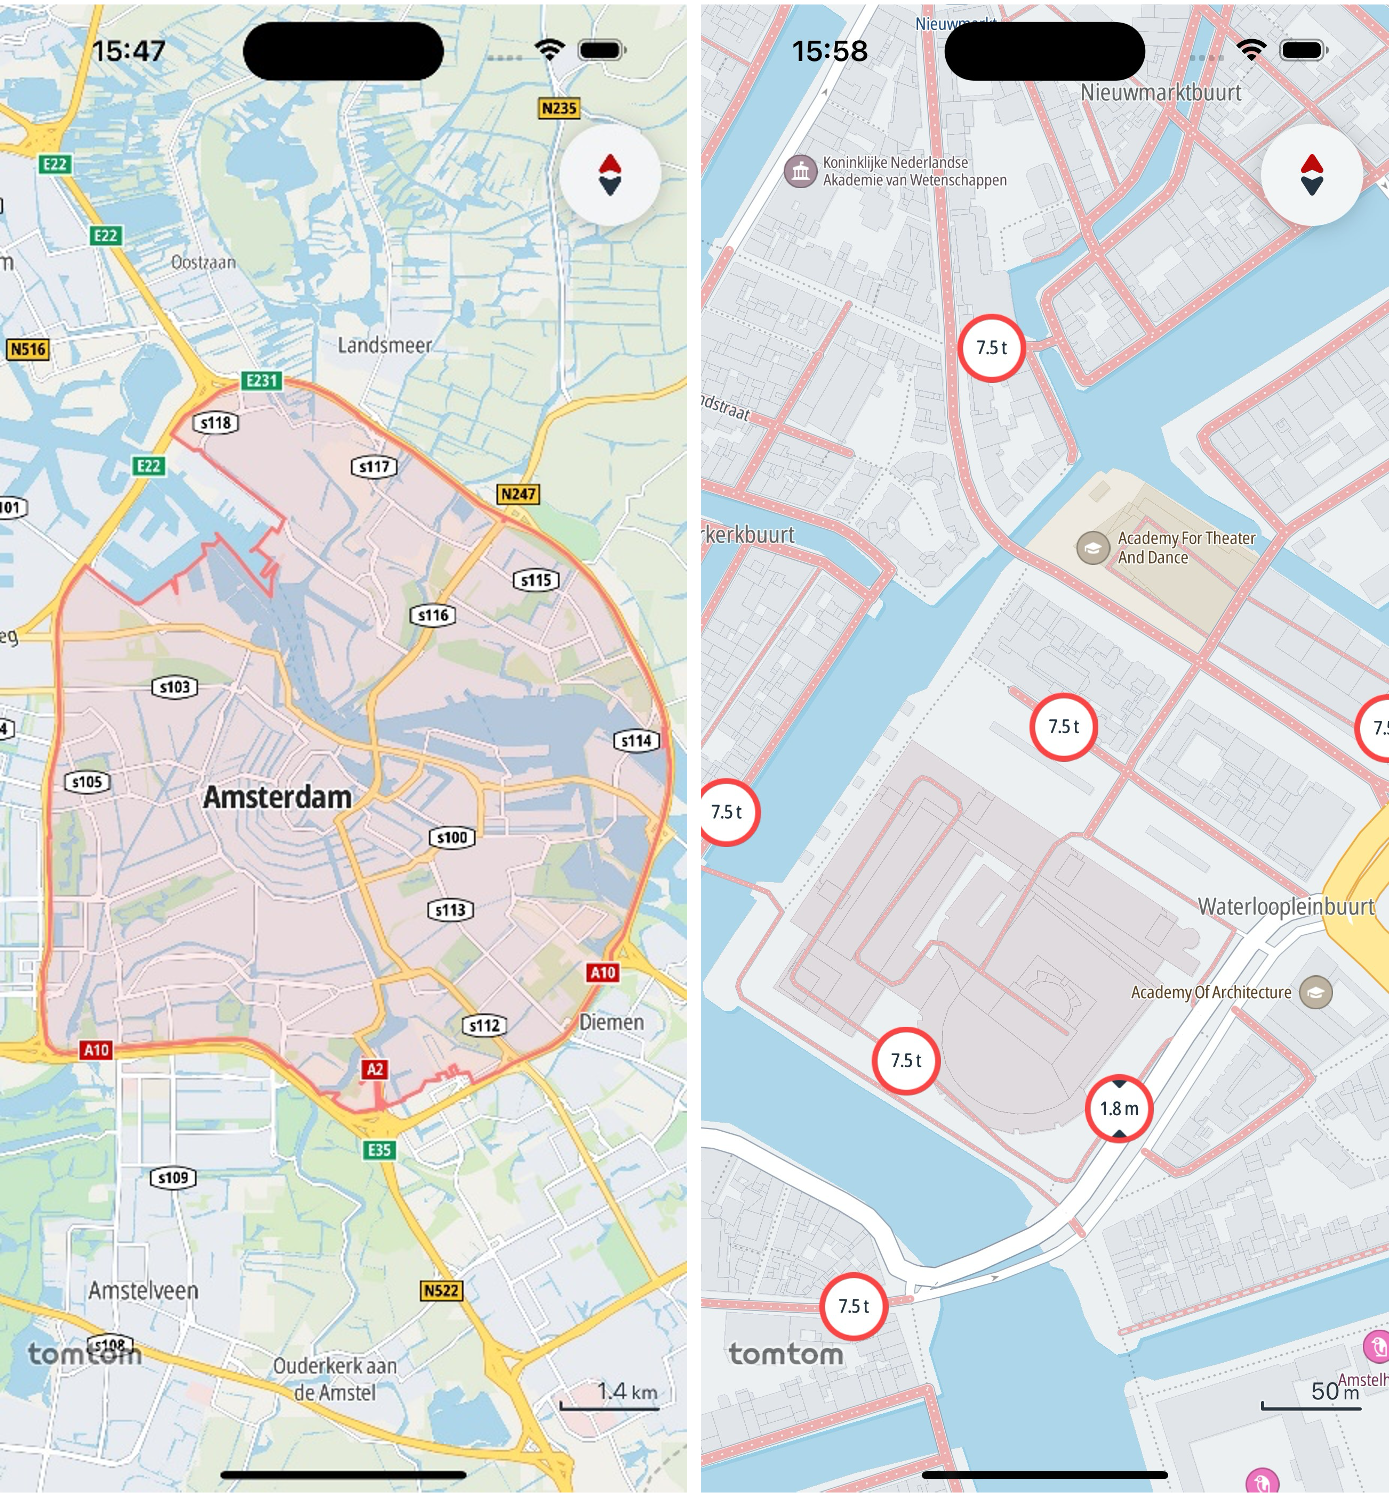
}Step 3: Showing Vehicle Restrictions on the Map
Next, we will showcase the vehicle restrictions on the map for the vehicle created in the previous section.
By employing the following code, restriction icons will be visible on the map upon zooming in.
func mapView(_ mapView: MapView, onMapReady map: TomTomMap) {
    do {
      try map.showVehicleRestrictions(vehicle:VehicleProvider.myTruck)
    } catch {
      print("Failed to show vehicle restrictions: \(error)")
    }
} 
Step 4: Routing Service
In this step, we will generate a route tailored to the truck specifications. Initially, we will construct
RoutePlanningOptions using the origin and destination coordinates. Subsequently, we will employ the "RoutePlanningOptions" instance to plan a route.
To streamline all routing-related operations, we will establish a RouteService class, including the essential functions within its scope.
import TomTomSDKRoute
import TomTomSDKRoutePlanner
import TomTomSDKRoutePlannerOnline
import TomTomSDKRoutingCommon

class RouteService {
    let routePlanner: OnlineRoutePlanner

    init(routePlanner: OnlineRoutePlanner) {
        self.routePlanner = routePlanner
    }
}

extension RouteService {
    enum RoutePlanError: Error {
        case unableToPlanRoute
    }

    func createRoutePlanningOptions(
        from origin: CLLocationCoordinate2D,
        to destination: CLLocationCoordinate2D
    ) throws -> TomTomSDKRoutePlanner.RoutePlanningOptions {
        let itinerary = Itinerary(
            origin: ItineraryPoint(coordinate: origin),
            destination: ItineraryPoint(coordinate: destination)
        )

        return try RoutePlanningOptions(
            itinerary: itinerary,
            vehicle: VehicleProvider.myTruck
        )
    }

    func planRoute(routePlanningOptions: RoutePlanningOptions) async throws -> TomTomSDKRoute.Route {
        return try await withCheckedThrowingContinuation { (continuation: CheckedContinuation<TomTomSDKRoute.Route, Error>) in
            routePlanner.planRoute(options: routePlanningOptions, onRouteReady: nil) { result in
                switch result {
                case let .failure(error):
                    continuation.resume(throwing: error)
                case let .success(response):
                    guard let route = response.routes?.first else {
                        continuation.resume(throwing: RoutePlanError.unableToPlanRoute)
                        return
                    }
                    continuation.resume(returning: route)
                }
            }
        }
    }
}
Step 5: Planning a Route
To proceed, we will designate an origin and destination point featuring a truck-specific vehicle restriction, such as height limitation, and then plan a route using the codes developed in the previous section. For demonstration purposes, we will select a bridge with a height restriction of 2.5 meters.
Before undertaking this task, we will establish a controller class to oversee all these modules, including the map and routing functionalities. This controller class, named NavigationController, will be instantiated in the TruckNavigationApp SwiftUI view to govern the operations. Additionally, we will integrate a button to facilitate route planning.
@main
struct TruckNavigationApp: App {
var body: some Scene {
WindowGroup {
ZStack(alignment: .top) {
TomTomMapView()
}
.ignoresSafeArea(edges: [.top, .bottom])
Button("Plan Route") {
navigationController.planRoute()
}.padding()
}
}
let navigationController = NavigationController()
}
class NavigationController {
convenience init() {
let routeService = RouteService(routePlanner: OnlineRoutePlanner(apiKey: Keys.ttAPIKey))
self.init(routeService: routeService)
}
init(routeService: RouteService) {
self.routeService = routeService
}
let routeService: RouteService
}
extension NavigationController {
func planRoute() {
let origin = CLLocationCoordinate2D(latitude: 52.26734, longitude: 4.78437)
let destionation = CLLocationCoordinate2D(latitude: 52.2707, longitude: 4.79428)
let options: RoutePlanningOptions
do {
options = try routeService.createRoutePlanningOptions(from: origin, to: destionation)
} catch {
print("Invalid planning options: \(error.localizedDescription)")
return
}
Task {
do {
_ = try await routeService.planRoute(routePlanningOptions: options)
} catch {
print("Failure on planning route: \(error.localizedDescription)")
return
}
}
}
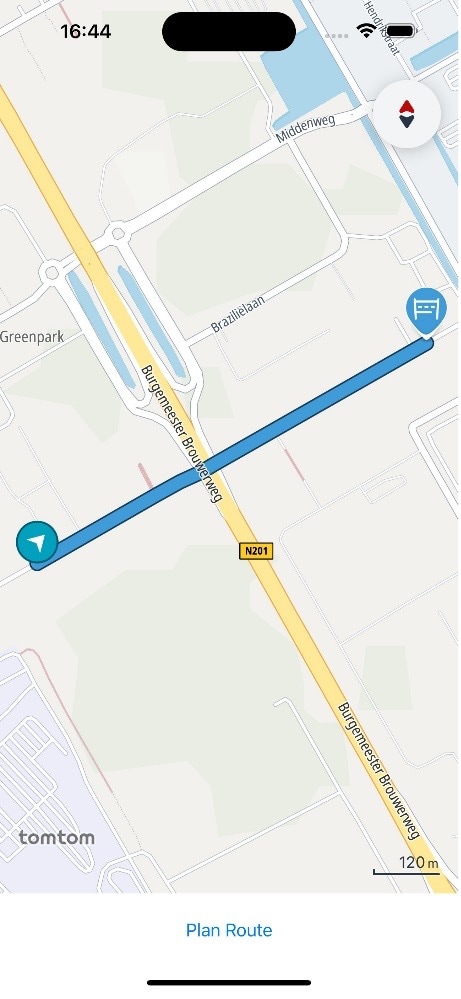
}Step 6: Visualizing the Planned Route on the Map
Upon successfully planning a route with the specified origin and coordinates, accounting for the truck's dimensions and vehicle restrictions, our final task is to visualize the planned route on the map. We will utilize a publisher to expose a method for external callers to publish elements. The "NavigationController" incorporates the "displayedRouteSubject" publisher, which we will observe through the observe method in the "MapCoordinator" by passing the "NavigationController" instance to it.
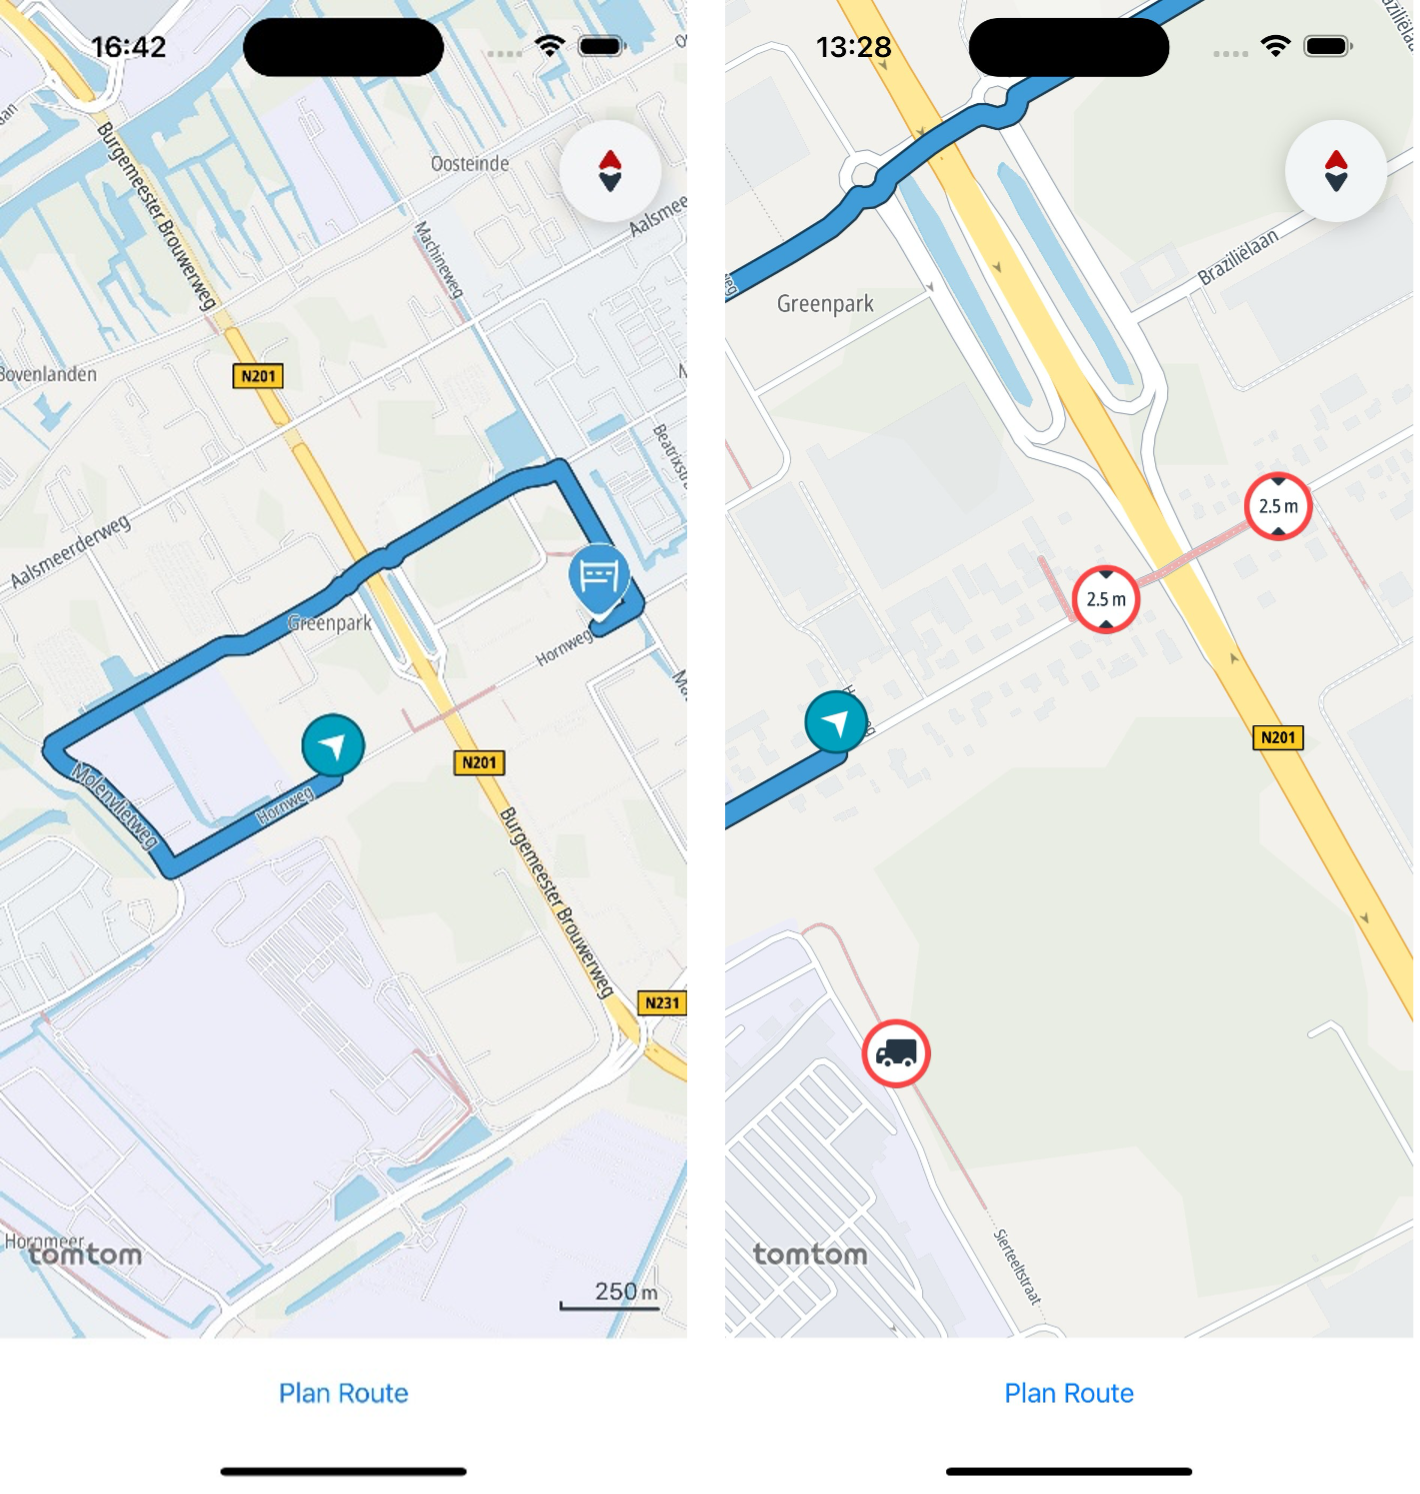
For a comprehensive test, you can experiment with different vehicle heights, such as 2 meters, for the exact origin and destination. You will observe that the planned route differs due to the (previously-mentioned) 2.5-meter height restriction on the road.
Conclusion
Implementing truck-specific routes in the Nav SDK is crucial to addressing the unique challenges in the fleet and logistics domain. We have provided a comprehensive guide, including project setup, vehicle dimension definition, vehicle restriction display on the map, routing service creation, route planning, and visualizing the planned route on the map, accompanied by code examples.
The Navigation SDK toolkit helps developers to integrate truck-specific routing capabilities into their applications, ultimately contributing to safer and more efficient fleet and logistics operations. We invite developers to explore the code examples and try TomTomʼs Navigation SDK to enhance applications with navigation solutions tailored for trucks and other fleet vehicles.
Project Codes
The complete collection of project codes can be found below and in this Github repository. Feel free to copy and try it out.
Happy mapping!
import Combine
import CoreLocation
import SwiftUI
import TomTomSDKCommon
import TomTomSDKMapDisplay
import TomTomSDKRoute
import TomTomSDKRoutePlanner
import TomTomSDKRoutePlannerOnline
import TomTomSDKRoutingCommon

@main
struct TruckNavigationApp: App {
    var body: some Scene {
        WindowGroup {
            ZStack(alignment: .top) {
                TomTomMapView(navigationController: navigationController)
            }
            .ignoresSafeArea(edges: [.top, .bottom])

            Button("Plan Route") {
                navigationController.planRoute()
            }.padding()
        }
    }

    let navigationController = NavigationController()
}

final class MapCoordinator {
    init(
        mapView: TomTomSDKMapDisplay.MapView,
        navigationController: NavigationController
    ) {
        self.mapView = mapView
        self.navigationController = navigationController
        observe(navigationController: navigationController)
    }

    private let mapView: TomTomSDKMapDisplay.MapView
    private var map: TomTomSDKMapDisplay.TomTomMap?
    private let navigationController: NavigationController
    private var cancellableBag = Set<AnyCancellable>()
}

struct TomTomMapView {
    var mapView = TomTomSDKMapDisplay.MapView(
        mapOptions: MapOptions(
            mapStyle: .restrictionsStyle,
            apiKey: Keys.ttAPIKey
        )
    )

    let navigationController: NavigationController
}

extension TomTomMapView: UIViewRepresentable {
    func makeUIView(context: Context) -> TomTomSDKMapDisplay.MapView {
        mapView.delegate = context.coordinator
        return mapView
    }

    func updateUIView(_: TomTomSDKMapDisplay.MapView, context _: Context) {}

    func makeCoordinator() -> MapCoordinator {
        MapCoordinator(
            mapView: mapView,
            navigationController: navigationController
        )
    }
}

enum VehicleProvider {
    static let myTruck = Truck(
        dimensions: try? VehicleDimensions(
            weight: Measurement.tt.kilograms(8000),
            axleWeight: Measurement.tt.kilograms(4000),
            length: Measurement.tt.millimeters(8340),
            width: Measurement.tt.millimeters(4650),
            height: Measurement.tt.millimeters(3445),
            numberOfAxles: 3
        )
    )
}

extension MapCoordinator: TomTomSDKMapDisplay.MapViewDelegate {
    func mapView(_: MapView, onMapReady map: TomTomMap) {
        do {
            self.map = map
            try map.showVehicleRestrictions(vehicle: VehicleProvider.myTruck)
        } catch {
            print("Failed to show vehicle restrictions: \(error)")
        }
    }

    func mapView(
        _: MapView,
        onStyleLoad result: Result<StyleContainer, Error>
    ) {
        switch result {
        case .failure:
            print("Style loading failure")
        case .success:
            print("Style loaded")
        }
    }
}

class RouteService {
    init(routePlanner: OnlineRoutePlanner) {
        self.routePlanner = routePlanner
    }

    let routePlanner: OnlineRoutePlanner
}

extension RouteService {
    enum RoutePlanError: Error {
        case unableToPlanRoute
    }

    func createRoutePlanningOptions(
        from origin: CLLocationCoordinate2D,
        to destination: CLLocationCoordinate2D
    ) throws -> TomTomSDKRoutePlanner.RoutePlanningOptions {
        let itinerary = Itinerary(
            origin: ItineraryPoint(coordinate: origin),
            destination: ItineraryPoint(coordinate: destination)
        )

        return try RoutePlanningOptions(
            itinerary: itinerary,
            vehicle: VehicleProvider.myTruck
        )
    }

    func planRoute(routePlanningOptions: RoutePlanningOptions) async throws -> TomTomSDKRoute.Route {
        return try await withCheckedThrowingContinuation { (continuation: CheckedContinuation<TomTomSDKRoute.Route, Error>) in
            routePlanner.planRoute(options: routePlanningOptions, onRouteReady: nil) { result in
                switch result {
                case let .failure(error):
                    continuation.resume(throwing: error)
                case let .success(response):
                    guard let route = response.routes?.first else {
                        continuation.resume(throwing: RoutePlanError.unableToPlanRoute)
                        return
                    }
                    continuation.resume(returning: route)
                }
            }
        }
    }
}

class NavigationController {
    convenience init() {
        let routeService = RouteService(routePlanner: OnlineRoutePlanner(apiKey: Keys.ttAPIKey))
        self.init(routeService: routeService)
    }

    init(routeService: RouteService) {
        self.routeService = routeService
    }

    let routeService: RouteService
    let displayedRouteSubject = PassthroughSubject<TomTomSDKRoute.Route, Never>()
}

extension NavigationController {
    func planRoute() {
        let origin = CLLocationCoordinate2D(latitude: 52.26734, longitude: 4.78437)
        let destionation = CLLocationCoordinate2D(latitude: 52.2707, longitude: 4.79428)

        let options: RoutePlanningOptions
        do {
            options = try routeService.createRoutePlanningOptions(from: origin, to: destionation)
        } catch {
            print("Invalid planning options: \(error.localizedDescription)")
            return
        }

        Task {
            var route: TomTomSDKRoute.Route

            do {
                route = try await routeService.planRoute(routePlanningOptions: options)
                displayedRouteSubject.send(route)
            } catch {
                print("Failure on planning route: \(error.localizedDescription)")
                return
            }
        }
    }
}

extension MapCoordinator {
    func observe(navigationController: NavigationController) {
        navigationController.displayedRouteSubject.sink { [weak self] route in
            guard let self = self else { return }
            do {
                if let _ = try map?.addRoute(RouteOptions(coordinates: route.geometry)) {
                    map?.zoomToRoutes(padding: 32)
                }
            } catch {
                print("Failure on adding route to map: \(error.localizedDescription)")
                return
            }
        }.store(in: &cancellableBag)
    }
}