Building an offline navigation app
Offline functionality for Maps SDK and Navigation SDK for Android is only available upon request. Contact us to get started.
This tutorial shows how build a simple "offline" navigation application that requires no internet connectivity to work.
It uses the TomTom Maps and Navigation SDKs for Android. All components are in dedicated modules, available as separate AARs. The engines implement the same interface as their online counterparts but work off a locally stored map. For further information on how to use offline maps and enable map updates, see the Offline map setup.
Project setup
- Configure the project as described in the Project setup guide.
- In the
app/build.gradle.ktsfile, add dependencies to the Map Display, Routing, Location, Traffic, and Navigation modules.1val version = "1.0.0"2implementation("com.tomtom.sdk.maps:map-display:$version")3implementation("com.tomtom.sdk.maps:style-provider-offline:$version")4implementation("com.tomtom.sdk.maps:data-provider-offline:$version")5implementation("com.tomtom.sdk.datamanagement:data-store-updater:$version")6implementation("com.tomtom.sdk.datamanagement:nds-store:$version")7implementation("com.tomtom.sdk.datamanagement:nds-store-updater:$version")8implementation("com.tomtom.sdk.maps:traffic-data-provider:$version")9implementation("com.tomtom.sdk.location:provider-android:$version")10implementation("com.tomtom.sdk.location:provider-simulation:$version")11implementation("com.tomtom.sdk.location:provider-map-matched:$version")12implementation("com.tomtom.sdk.navigation:navigation-offline:$version")13implementation("com.tomtom.sdk.navigation:ui:$version")14implementation("com.tomtom.sdk.routing:route-planner-offline:$version")15implementation("com.tomtom.sdk.traffic:client:$version") - Retrieve the TomTom API key from the
BuildConfigfield:private val apiKey = BuildConfig.TOMTOM_API_KEY
Providing access to map
Map data must be stored at an accessible location on the device. The ndsStorePath must point to the directory where the map data is stored (e.g. ROOT.NDS), and keystorePath to the keystore SQLite file used to decrypt the map.
If the map data is placed in the external storage, you need to adapt your application for the required permissions. Learn more in Permissions and access to external storage
1val path = requireNotNull(getExternalFilesDir(null))2ndsStore = NdsStore.create(3 context = this,4 NdsStoreConfiguration(5 ndsStorePath = path.resolve(RELATIVE_NDS_STORE_PATH),6 keystorePath = path.resolve(RELATIVE_KEYSTORE_PATH),7 accessPermit = NdsStoreAccessPermit.MapLicense(OFFLINE_MAP_LICENSE_TOKEN)8 )9).fold(10 { it },11 {12 Toast.makeText(13 this,14 it.message,15 Toast.LENGTH_LONG16 ).show()17 throw IllegalStateException(it.message)18 }19)
Displaying a map
Once access to the offline map is established, you can proceed with map initialization. To initialize a map, prepare the FragmentContainerView for the map. The map will be displayed within this layout.
1<androidx.fragment.app.FragmentContainerView2 android:id="@+id/map_container"3 android:layout_width="match_parent"4 android:layout_height="match_parent" />
Use MapFragment to display the map. MapOptions is required to initialize it. To use the offline map, provide an offline-specific DataProvider instance using TileOfflineDataProviderFactory. This instance should be passed to TomTomMapConfig as an alternative source for tiles.
Optionally, you can configure the map by setting other properties of the MapOptions object. Learn more about it in the Map Configuration guide. Finally, add the MapFragment to the container you created earlier.
1TomTomMapConfig.customDataProvidersFactoryFunction = {2 listOf(TileOfflineDataProviderFactory.createOfflineDataProvider(ndsStore))3}4val mapOptions = MapOptions(5 mapStyle = StyleDescriptor(6 StyleUriProvider.ONBOARD_BROWSING_LIGHT,7 StyleUriProvider.ONBOARD_BROWSING_DARK,8 StyleUriProvider.ONBOARD_LAYER_MAPPING,9 StyleUriProvider.ONBOARD_LAYER_MAPPING10 ),11 mapKey = apiKey12)13val mapFragment = MapFragment.newInstance(mapOptions)14supportFragmentManager.beginTransaction()15 .replace(R.id.map_container, mapFragment)16 .commit()
Any interaction with the map, such as adding a marker or drawing a route, is made via the TomTomMap object. Since map initialization can take a while, retrieving the TomTomMap object has to be done asynchronously. Keep the instance of it for further actions.
1mapFragment.getMapAsync { map ->2 tomTomMap = map3 enableUserLocation()4 setUpMapListeners()5}
Showing user location
Showing the user’s location is crucial in a navigation application. To do this, the application has to use the device’s location services, which requires the appropriate permissions. The Android system requires the user to grant ACCESS_FINE_LOCATION and ACCESS_COARSE_LOCATION permissions.
On devices that run Android 6.0 or higher, you must request permissions at runtime. See how to grant location permissions in the Android permissions document.
Refer to the Building a navigation app tutorial for additional details.
Generating a route
This section describes how to calculate a route between two locations using the appropriate parameters for navigation purposes. You can find more details about calculating a route in the routing module documentation. A good place to start is the Quickstart guide. It also shows how to display a route on the map.
The entry point for the routing service is the RoutePlanner interface. OfflineRoutePlanner can be used to perform routing using the offline map.
routePlanner = OfflineRoutePlanner.create(ndsStore = ndsStore)
The routing request is configured using RoutePlanningOptions. The origin point of the route is the current location of the user, which is taken from the TomTomMap object.
You can also find the latest location using the
LocationProviderobject.
For a better user experience during navigation, set some of the parameters:
InstructionPhoneticsType- This specifies whether to include phonetic transcriptions in the response.ExtendedSections- This specifies whether to include extended guidance sections in the response, such as sections of type road shield, lane, and speed limit.ProgressPoints- This specifies whether to include progress points in the response.
1val userLocation =2 tomTomMap.currentLocation?.position ?: return3val itinerary = Itinerary(origin = userLocation, destination = destination)4routePlanningOptions = RoutePlanningOptions(5 itinerary = itinerary,6 guidanceOptions = GuidanceOptions(7 phoneticsType = InstructionPhoneticsType.Ipa,8 extendedSections = ExtendedSections.All9 ),10 vehicle = Vehicle.Car()11)
The prepared RoutePlanningOptions object is used as a parameter to the request method. The second parameter is RoutePlanningCallback. It is used to return the result from the routing request.
routePlanner.planRoute(routePlanningOptions, routingCallback)
The RoutePlanningCallback itself has two methods. One is triggered if the request fails. The second one returns the routing results. The RoutePlanningResponse contains a list of calculated routes. This tutorial uses only one calculated route.
1private val routingCallback = object : RoutePlanningCallback {2 override fun onSuccess(result: RoutePlanningResponse) {3 route = result.routes.first()4 route?.let { drawRoute(it) }5 }67 override fun onFailure(failure: RoutingFailure) {8 Toast.makeText(this@MainActivity, failure.message, Toast.LENGTH_SHORT).show()9 }1011 override fun onRoutePlanned(route: Route) = Unit12}
Now the returned Route has to be drawn on the map. RoutePlanningOptions, which specifies the appearance of the route, is used for this. Then the RoutePlanningResponse object is added to the TomTomMap. Finally, you can show the overview of the added routes using the TomTomMap.zoomToRoutes(Int) method.
The padding parameter is expressed in pixels. Learn more about adding a route to the map in the Route Planning and Driving document.
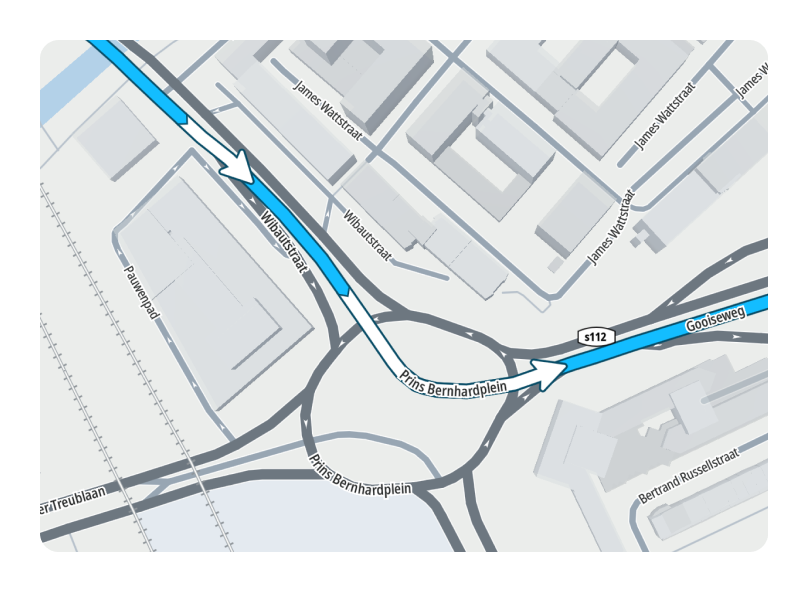
For the build of a navigation app, the instructions can be drawn on the route in form of arrows that indicate maneuvers. To do this, map the Instruction object provided by the routing to the Instruction object used by the map.
During navigation, you need to update the progress property of the drawn route to display the next instructions.
1private fun Route.mapInstructions(): List<Instruction> {2 val routeInstructions = legs.flatMap { routeLeg -> routeLeg.instructions }3 return routeInstructions.map {4 Instruction(5 routeOffset = it.routeOffset6 )7 }8}
1val instructions = route.mapInstructions()2val geometry = route.legs.flatMap { it.points }3val routeOptions = RouteOptions(4 geometry = geometry,5 destinationMarkerVisible = true,6 departureMarkerVisible = withDepartureMarker,7 instructions = instructions,8 color = color,9 tag = route.id.toString()10)11tomTomMap.addRoute(routeOptions)12if (withZoom) {13 tomTomMap.zoomToRoutes(ZOOM_TO_ROUTE_PADDING)14}
Starting navigation
The TomTom Navigation SDK provides turn-by-turn navigation. Learn more about it in the Turn-by-turn navigation guide. It can be used with the provided user interface components or your custom ones. This tutorial uses the default Navigation UI in a form of the NavigationFragment.
Initialize the TomTomNavigation object. This object is used to interact with navigation. The simplest way to initialize the offline navigation is to use the OfflineTomTomNavigationFactory.create(Configuration) method and keep all optional configuration properties set to default values. To customize the navigation during initialization you have to provide additional configuration using com.tomtom.sdk.navigation.offline.Configuration.
1tomTomNavigation = OfflineTomTomNavigationFactory.create(2 Configuration(3 context = this,4 ndsStore = ndsStore,5 ndsMapUpdater = ndsStoreUpdater,6 locationProvider = locationProvider,7 routePlanner = routePlanner8 )9)10tomTomNavigation.preferredLanguage = Locale.US
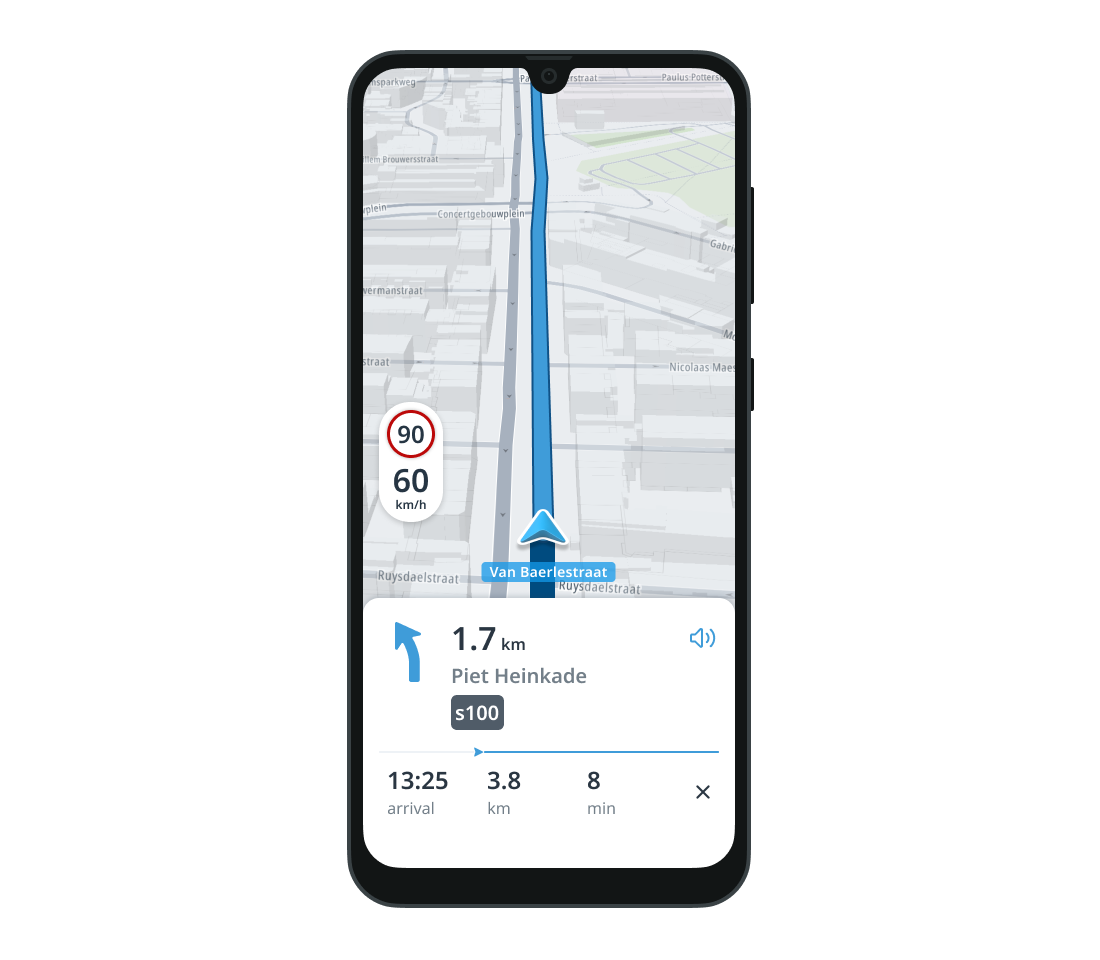
Create the NavigationFragment and add it to your XML layout using the FragmentManager. This fragment wraps TomTomNavigation and provides the UI to show upcoming maneuvers, remaining distance, Estimated Time of Arrival (ETA), current speed, and speed limit. Note that you have to set the previously-created TomTomNavigation object to the NavigationFragment before using it.
Disposal of
TomTomNavigationis not handled by theNavigationFragment. You have to callTomTomNavigation.close()on your own once the navigation is no longer needed.
1<androidx.fragment.app.FragmentContainerView2 android:id="@+id/navigation_fragment_container"3 android:layout_width="match_parent"4 android:layout_height="wrap_content"5 app:layout_constraintBottom_toBottomOf="@+id/map_container" />
1val navigationUiOptions = NavigationUiOptions(2 keepInBackground = true3)4navigationFragment = NavigationFragment.newInstance(navigationUiOptions)5supportFragmentManager.beginTransaction()6 .add(R.id.navigation_fragment_container, navigationFragment)7 .commitNow()
navigationFragment.setTomTomNavigation(tomTomNavigation)
To start the turn-by-turn navigation, you need a Route object along which the navigation will be done and the RoutePlanningOptions used during the route planning. Combine them using a RoutePlan object and call the NavigationFragment.startNavigation(RoutePlan) method.
1private fun startNavigation(route: Route) {2 val routePlan = RoutePlan(route, routePlanningOptions)3 navigationFragment.startNavigation(routePlan)4}
Add a RouteClickListener to the map view to start the navigation once the user taps on the route, if navigation is not already running.
1private fun isNavigationRunning(): Boolean = tomTomNavigation.navigationState != NavigationState.Idle23private val routeClickListener = RouteClickListener {4 if (!isNavigationRunning()) {5 route?.let { route -> startNavigation(route) }6 }7}89private fun setUpMapListeners() {10 tomTomMap.addRouteClickListener(routeClickListener)11}
Use NavigationFragment to configure the map to provide the best user experience. NavigationFragment uses NavigationListener to update the navigation state.
navigationFragment.addNavigationListener(navigationListener)
1private val navigationListener = object : NavigationFragment.NavigationListener {2 override fun onStarted() {3 tomTomMap.cameraTrackingMode = CameraTrackingMode.FollowRouteDirection4 tomTomMap.enableLocationMarker(LocationMarkerOptions(LocationMarkerOptions.Type.Chevron))5 setMapMatchedLocationProvider()6 setSimulationLocationProviderToNavigation()7 setMapNavigationPadding()8 }910 override fun onStopped() {11 stopNavigation()12 }13}1415private fun setSimulationLocationProviderToNavigation() {16 // For testing purposes the SimulationLocationProvider is used17 val oldLocationProvider = tomTomNavigation.locationProvider18 route?.let {19 locationProvider = createSimulationLocationProvider(it)20 tomTomNavigation.locationProvider = locationProvider21 oldLocationProvider.close()22 locationProvider.enable()23 }24}
Once navigation is started, the camera is set to follow the user position, and the location indicator is changed to a chevron. To match raw location updates to the routes, use MapMatchedLocationProvider and set it to the TomTomMap.
1val mapMatchedLocationProvider = MapMatchedLocationProvider(tomTomNavigation)2tomTomMap.setLocationProvider(mapMatchedLocationProvider)3mapMatchedLocationProvider.enable()
You can observe the route changes in the navigation session using:
The listeners redraw the route when it’s recalculated after a replanning. Redrawing requires removing the current routes and drawing a new one.
1private val activeRouteChangedListener by lazy {2 ActiveRouteChangedListener { route ->3 tomTomMap.routes.forEach {4 if (it.tag == route.id.toString()) {5 it.color = RouteOptions.DEFAULT_COLOR6 } else {7 it.color = Color.GRAY8 }9 }10 }11}1213private val routeAddedListener by lazy {14 RouteAddedListener { _, _, routeAddedReason ->15 if (routeAddedReason !is RouteAddedReason.NavigationStarted) {16 drawRoute()17 }18 }19}2021private val routeRemovedListener by lazy {22 RouteRemovedListener { route, _ ->23 tomTomMap.routes.find { it.tag == route.id.toString() }?.remove()24 }25}
Do not forget that you need to add them to the TomTomNavigation object:
1tomTomNavigation.addRouteAddedListener(routeAddedListener)2tomTomNavigation.addRouteRemovedListener(routeRemovedListener)3tomTomNavigation.addActiveRouteChangedListener(activeRouteChangedListener)
Set the bottom padding on the map to uncover the chevron in the navigation panel. The padding sets a safe area of the MapView in which user interaction is not received. Set the value in the dimens.xml resource file:
<dimen name="map_padding_bottom">263.0dp</dimen>
and retrieve it using:
1private fun setMapNavigationPadding() {2 val paddingBottom = resources.getDimensionPixelOffset(R.dimen.map_padding_bottom)3 val padding = Padding(0, 0, 0, paddingBottom)4 tomTomMap.setPadding(padding)5}
Stop the navigation process using NavigationFragment.stopNavigation(). This hides the UI elements and calls the TomTomNavigation.stop() method.
navigationFragment.stopNavigation()
Don’t forget to reset any map settings that were changed, such as camera tracking, location marker, and map padding.
1tomTomMap.cameraTrackingMode = CameraTrackingMode.None2tomTomMap.enableLocationMarker(LocationMarkerOptions(LocationMarkerOptions.Type.Pointer))3tomTomMap.setPadding(Padding(0, 0, 0, 0))
Remember to close
TomTomNavigationif it is no longer needed to release resources.
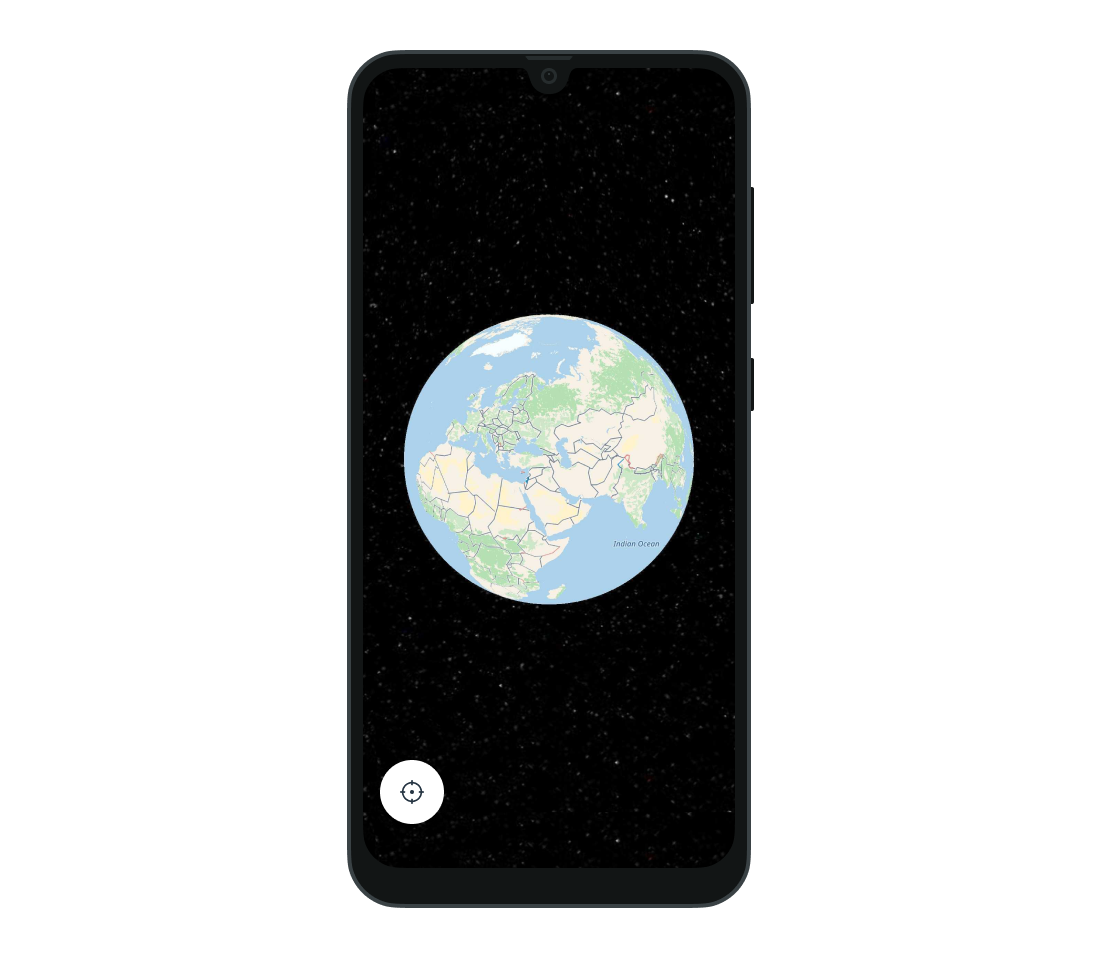
Run the application. You should see a globe showing the user’s location. Set the destination point with a long press. If you want to start navigation along the drawn route, tap it. Navigation should start with a guidance panel and voice instructions.
Next steps
The TomTom Navigation SDK allows you to customize the appearance of the map and its overlays, use your own Navigation UI components, or provide a custom implementation of certain navigation behaviors. See the following guides for more information: