Migrate from Mapbox
This tutorial contrasts features of the Mapbox SDK and TomTom SDKs. It uses a simple navigation application created using both the Mapbox and TomTom SDKs to highlight these differences. The application displays the user’s location on a map. It also allows the user to enable and disable a traffic layer on the map. When the user does a long tap on the map, the app draws a marker at the selected location. Next, the app calculates a route from the user’s location to the selected destination and displays it on the map. Finally, the app performs navigation along the route. During navigation, the app provides information about upcoming maneuvers, the estimated time and distance remaining on the trip, and speed limits.
Prerequisites
This tutorial does not discuss the configuration of Mapbox SDK in the project. The following steps describe how to prepare your project to use the TomTom SDKs:
- Install Android Studio if you don’t already have it.
- Make sure to use Gradle in your project. We are no longer supporting Maven. Contact us if your project is using Maven instead of Gradle.
- Create a new project or open an existing one. Make sure that the minimum SDK API level is set to at least 26 (Android 8.0 "Oreo") by making the following changes in the
androidblock of your app’sbuild.gradle.ktsfile.1android {2 defaultConfig {3 minSdk = 264 }5} - To prevent duplication of the
libc++_shared.sofile in your Android Gradle build, add the following packaging option to theandroidblock of your app’sbuild.gradle.ktsfile.1android {2 packaging {3 jniLibs.pickFirsts.add("lib/**/libc++_shared.so")4 }5}
This ensures that only one copy of libc++_shared.so is included in the build output, addressing the issue of multiple copies from different sources.
Configuring project dependencies
-
Add a maven block to your
settings.gradle.ktsfile to specify the URI for repositories.tomtom.com.1dependencyResolutionManagement {2 repositoriesMode.set(RepositoriesMode.FAIL_ON_PROJECT_REPOS)3 repositories {4 google()5 mavenCentral()6 maven {7 url = uri("https://repositories.tomtom.com/artifactory/maven")8 }9 }10} -
Verify that everything works as expected by adding a Maps SDK dependency to the
build.gradle.ktsfile of your application module. For example,com.tomtom.sdk.maps:map-display. Synchronize the project.val version = "1.0.0"implementation("com.tomtom.sdk.maps:map-display:$version") -
Get your TomTom API key from the TomTom Developer Portal. To find out how, refer to the How to get a TomTom API key guide.
-
Store the TomTom API key to a project property in your project
gradle.propertiesfile. Replaceapi_key_placeholderwith the actual TomTom API key.tomtomApiKey=api_key_placeholder -
Declare the tomtomApiKey variable within the
build.gradle.ktsfile, outside of theandroidblock.val tomtomApiKey: String by project -
Map the TomTom API key property to a custom field of the gradle
BuildConfigclass in theandroidblock of your app’sbuild.gradle.ktsfile.1android {2 buildFeatures {3 buildConfig = true4 }5 buildTypes.configureEach {6 buildConfigField("String", "TOMTOM_API_KEY", "\"$tomtomApiKey\"")7 }8}To use the TomTom API key in your application code, it is sufficient to access the newly added
BuildConfigfield.val apiKey = BuildConfig.TOMTOM_API_KEY
Now that you’ve completed the project setup, here is what you can do next.
- If you don’t have an API Key visit the How to get a TomTom API Key site and create one.
- Create fields with the API Keys in your module’s
build.gradle.kts, which will be used later in the application:1android {2 defaultConfig {3 resValue("string", "mapbox_access_token", "YOUR_MAPBOX_ACCESS_TOKEN")4 buildConfigField("String", "MAPS_API_KEY", ""YOUR_API_KEY"")5 buildConfigField("String", "ROUTING_API_KEY", ""YOUR_API_KEY"")6 buildConfigField("String", "NAVIGATION_API_KEY", ""YOUR_API_KEY"")7 }8}
Displaying a map
Mapbox
To display a map using the Mapbox Maps SDK for Android, complete the following steps:
- Add the maps dependency in your module’s
build.gradle.kts.implementation("com.mapbox.maps:android:10.3.0") - In the XML layout, provide the
MapViewmap interface.1<com.mapbox.maps.MapView2 android:id="@+id/mapView"3 android:layout_width="match_parent"4 android:layout_height="0dp"5 app:layout_constraintBottom_toTopOf="@+id/configuration_view"6 app:layout_constraintEnd_toEndOf="parent"7 app:layout_constraintStart_toStartOf="parent"8 app:layout_constraintTop_toTopOf="parent" /> - Finally, get the instance of the map in the activity/fragment.
1mapView = binding.mapView2mapboxMap = mapView.getMapboxMap()3mapboxMap.loadStyleUri(Style.MAPBOX_STREETS)
TomTom SDKs
To display a map using the TomTom SDKs, perform the following steps:
- Add the Map Display module dependency to the module’s
build.gradle.kts.implementation("com.tomtom.sdk.maps:map-display:1.0.0") - Provide a container within which the map will be displayed to the XML layout.
1<androidx.fragment.app.FragmentContainerView2 android:id="@+id/map_container"3 android:layout_width="match_parent"4 android:layout_height="0dp"5 app:layout_constraintBottom_toTopOf="@+id/configuration_view"6 app:layout_constraintEnd_toEndOf="parent"7 app:layout_constraintStart_toStartOf="parent"8 app:layout_constraintTop_toTopOf="parent" />
- In the activity/fragment, configure
MapOptionsand initializeMapFragment. Place that instance in the container you prepared in the previous step.1val mapOptions = MapOptions(2 mapKey = BuildConfig.MAPS_API_KEY3)4val mapFragment = MapFragment.newInstance(mapOptions)5childFragmentManager.beginTransaction()6 .replace(R.id.map_container, mapFragment)7 .commit() - Every interaction performed on the map is handled using the
TomTomMapobject. To get the map instance set anMapReadyCallbackto theMapFragment.1mapFragment.getMapAsync { map ->2 this.tomTomMap = map3 showUserLocation()4 showTraffic(configurationView.trafficSwitch.isChecked)5 handleTrafficSwitch()6 handleMapLongClick()7}
Showing user location
The next step is showing the user location on the map. To do this, Android requires the user to grant permissions for ACCESS_FINE_LOCATION and ACCESS_COARSE_LOCATION. On devices that run Android 6.0 or higher, you must request permissions at runtime. Check how to grant location permissions in Android by visiting here.
Mapbox
To show the user’s map location in the Mapbox SDK, enable the location plugin.
1val locationPlugin = mapView.location2locationPlugin.updateSettings {3 this.enabled = true4 this.locationPuck = locationPlugin.createDefault2DPuck(requireContext())5}6locationPlugin.addOnIndicatorPositionChangedListener(onIndicatorPositionChangedListener)
Observe the indicator position changes to get the latest updated user location.
1private val onIndicatorPositionChangedListener = OnIndicatorPositionChangedListener {2 lastUserLocation = it3}
TomTom SDKs
Use LocationProvider to display the user location in the TomTom SDKs. Provide the initialized engine to the TomTomMap instance and enable it to start updating the location. Then set the location marker that will show the user location on the map. If you want to read more about LocationProvider implementations see the Built-in Location Provider guide.
1locationProvider = AndroidLocationProvider(context = requireContext())2tomTomMap.setLocationProvider(locationProvider)3locationProvider.enable()4tomTomMap.enableLocationMarker(LocationMarkerOptions(LocationMarkerOptions.Type.Pointer))
Use the last known location provided by LocationProvider as the user’s current location.
val origin = locationProvider.lastKnownLocation?.position ?: return
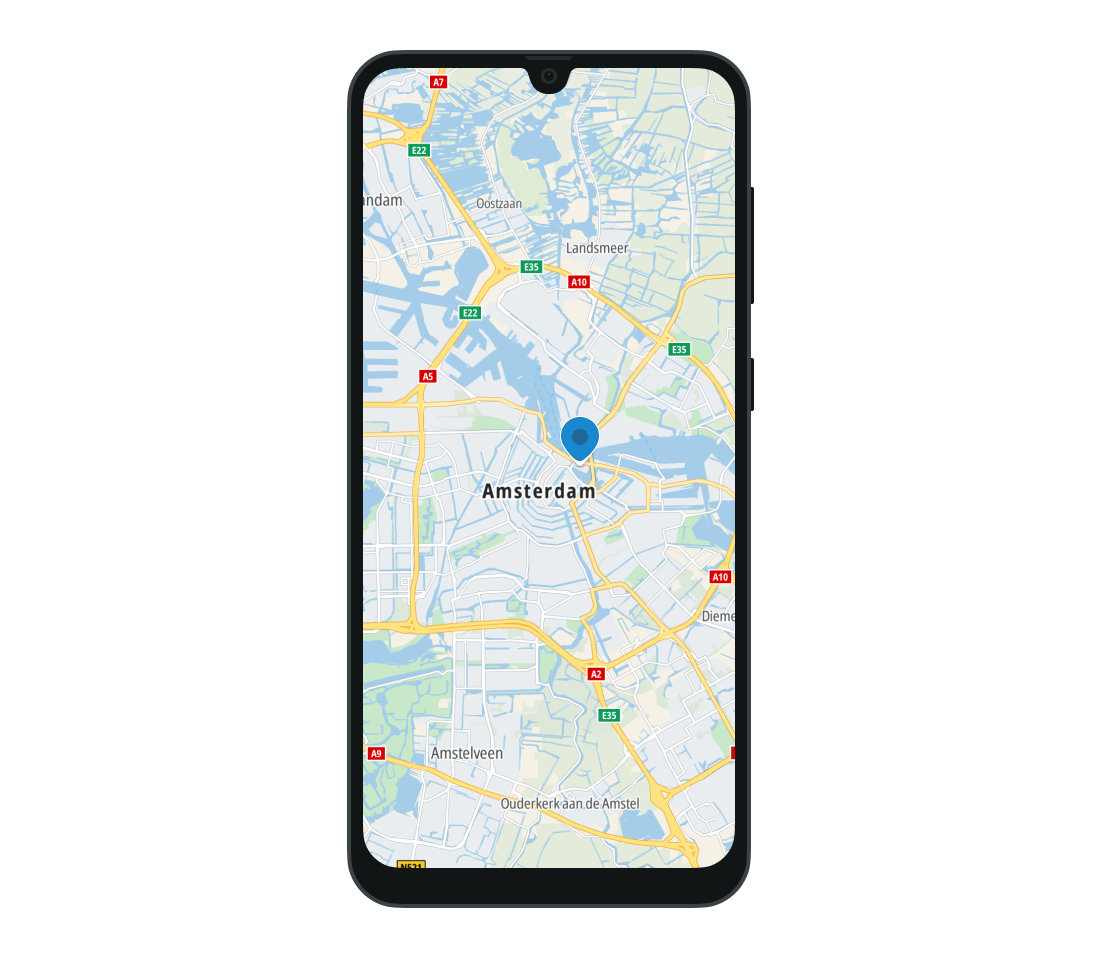
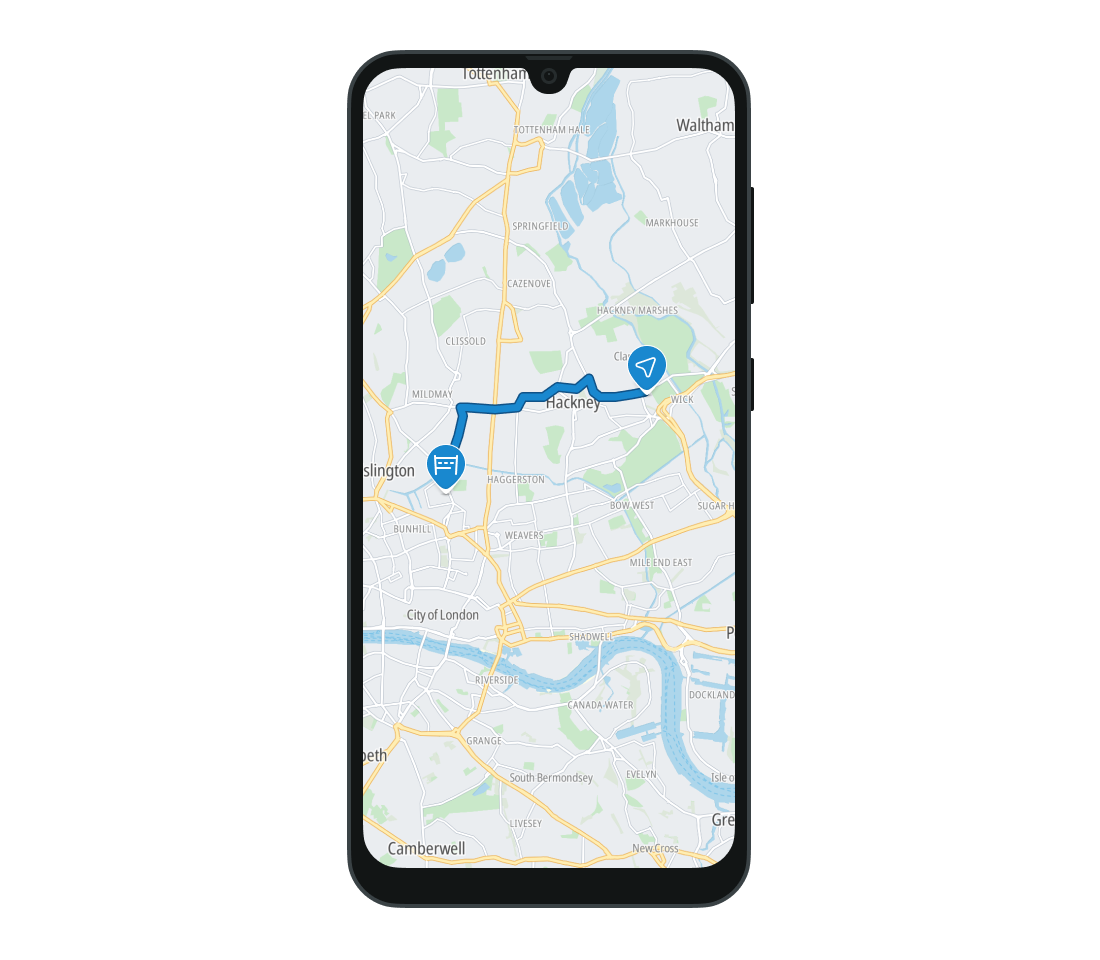
Adding a marker
This section describes how to add a marker to the map where the user has performed a long click.
Mapbox
The gestures in the Mapbox SDK are handled by the GesturesPlugin. To detect a long click on the map, set the listener to the plugin.
1mapView.gestures.addOnMapLongClickListener { point: Point ->2 if (mapboxNavigation.getNavigationSessionState() == NavigationSessionState.Idle) {3 displayMarker(point)4 requestRoute(point)5 }6 true7}
To operate on markers, start by creating a point annotation manager on the map instance.
annotationManager = mapView.annotations.createPointAnnotationManager()
Use PointAnnotationOptions to specify the marker configuration. Then use the manager to add it to the map.
1val icon = BitmapFactory.decodeResource(2 resources,3 com.tomtom.sdk.map.display.common.R.drawable.ic_sdk_tt_compass4)5 ?: return // Mapbox does not provide default marker6annotationManager.deleteAll()7val pointAnnotationOptions = PointAnnotationOptions()8 .withPoint(point)9 .withIconImage(icon)10 .withIconColor(Color.RED)11annotationManager.create(pointAnnotationOptions)
TomTom SDKs
In the TomTom SDKs, gestures performed on the map are observed by setting various callbacks. In this tutorial, the MapLongClickListener is used. The usage of other gesture listeners is similar.
1tomTomMap.addMapLongClickListener { coordinate: GeoPoint ->2 if (!isNavigationRunning) {3 displayMarker(coordinate)4 requestRoute(coordinate)5 }6 true7}
To display a marker at the selected coordinates, first define its options using the MarkerOptions class. The configured marker is then added to the TomTomMap instance. You can read more about markers in the Working with markers guide.
1tomTomMap.clear()2val markerOptions = MarkerOptions(3 coordinate = coordinate,4 pinImage = ImageFactory.fromResource(com.tomtom.sdk.map.display.common.R.drawable.ic_sdk_tt_compass)5)6tomTomMap.addMarker(markerOptions)
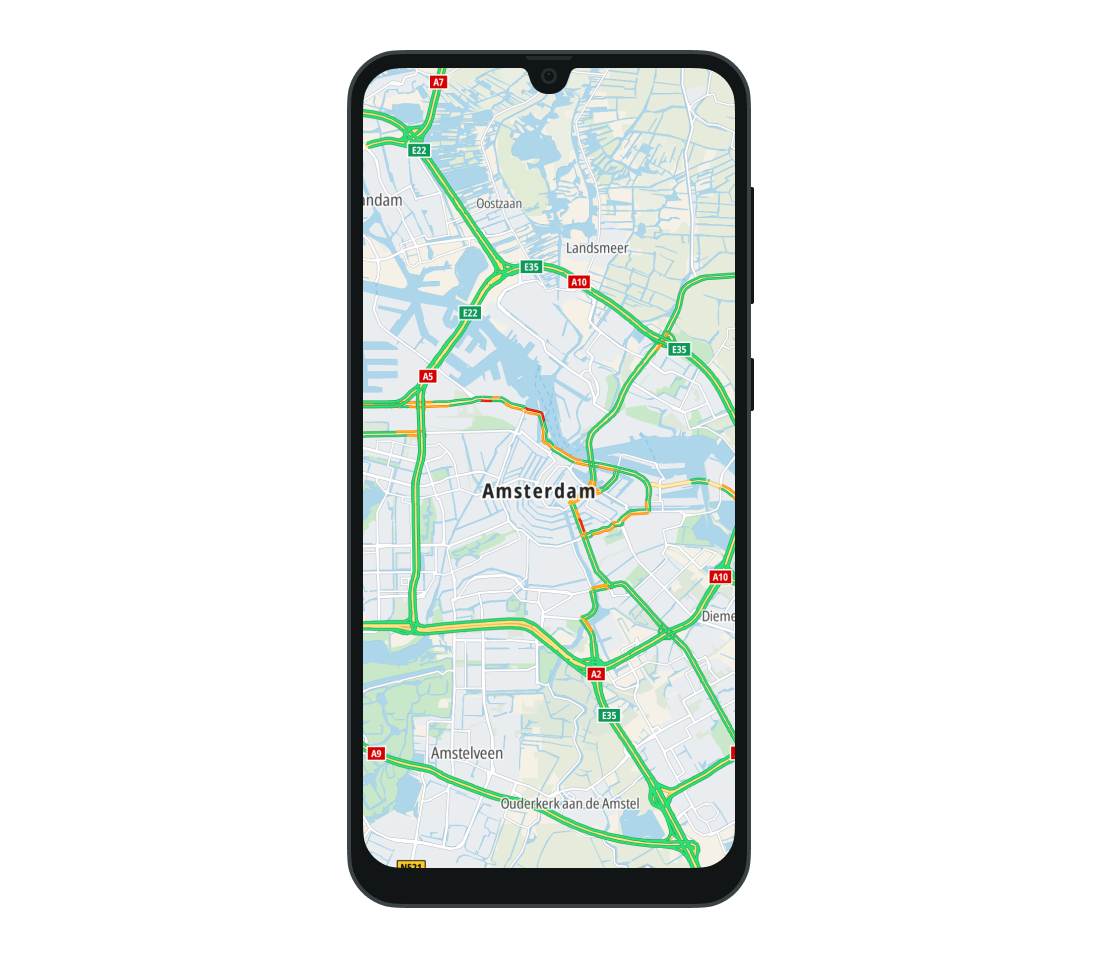
Showing a traffic layer
Both the TomTom and Mapbox SDKs support displaying traffic flow on the map. Flow is indicated by different colors on roads, depending on the degree of delay.
Mapbox
To show traffic on the map in the Mapbox SDK, load the special map style that contains that feature.
1if (!showTraffic) {2 mapboxMap.loadStyleUri(Style.MAPBOX_STREETS)3} else {4 mapboxMap.loadStyleUri(Style.TRAFFIC_DAY)5}
TomTom SDKs
In the TomTom SDKs, traffic flow is shown as a layer on the map.
TomTom SDKs also support showing traffic incidents.
1if (!showTraffic) {2 tomTomMap.hideTrafficFlow()3 tomTomMap.hideTrafficIncidents()4} else {5 tomTomMap.showTrafficFlow()6 tomTomMap.showTrafficIncidents()7}
Drawing a route
This section describes how to calculate and draw a route from the user’s location to a destination selected with a long click.
Mapbox
To plan a route between the chosen points, initialize MapboxNavigation.
1val navigationOptions = NavigationOptions.Builder(requireContext())2 .accessToken(getString(R.string.mapbox_access_token))3 .locationEngine(replayLocationEngine) // Add simulation location engine4 .build()5mapboxNavigation = if (MapboxNavigationProvider.isCreated()) {6 MapboxNavigationProvider.retrieve()7} else {8 MapboxNavigationProvider.create(navigationOptions)9}
Use the RouteOptions class to prepare the routing request. After the configured request is performed, the result is returned via RouterCallback.
1val origin = lastUserLocation ?: return2val routeOptions = RouteOptions.builder()3 .applyDefaultNavigationOptions()4 .coordinates(origin = origin, destination = destination)5 .build()6mapboxNavigation.requestRoutes(7 routeOptions,8 object : RouterCallback {9 override fun onCanceled(routeOptions: RouteOptions, routerOrigin: RouterOrigin) = Unit1011 override fun onFailure(reasons: List<RouterFailure>, routeOptions: RouteOptions) {12 (requireActivity() as MainActivity).showToast(getString(R.string.routing_request_failed))13 }1415 override fun onRoutesReady(routes: List<DirectionsRoute>, routerOrigin: RouterOrigin) {16 mapboxNavigation.setRoutes(routes)17 drawRoutes(routes)18 enableNavigation()19 }20 }21)
If the call is successful the returned routes are drawn on the map. Before drawing the routes on the map, initialize MapboxRouteLineApi and MapboxRouteLineView. Define the route style using MapboxRouteLineOptions.
private val routeLineApi: MapboxRouteLineApi by lazy { MapboxRouteLineApi(routeLineOptions) }private val routeLineView: MapboxRouteLineView by lazy { MapboxRouteLineView(routeLineOptions) }
Once the previous classes are initialized you can render the calculated route on the map.
1private fun drawRoutes(routes: List<DirectionsRoute>) {2 val routeLines = routes.map { RouteLine(it, null) }3 routeLineApi.setRoutes(routeLines) { routeDrawData ->4 mapboxMap.getStyle()?.let { mapStyle ->5 routeLineView.renderRouteDrawData(mapStyle, routeDrawData)6 }7 }8}
TomTom SDKs
To request a route requires a RoutingApi object, which is an access point to the routing functionalities. To create it use the OnlineRoutePlanner class.
routePlanner = OnlineRoutePlanner.create(requireContext(), BuildConfig.ROUTING_API_KEY)
The routing request is configured similarly to the Mapbox SDK using the RoutePlanningOptions class. The RoutePlanningOptions object is provided to the routing request. The result of the call is returned via RoutePlanningCallback.
1val origin = locationProvider.lastKnownLocation?.position ?: return2val routePlanningOptions = RoutePlanningOptions(3 itinerary = Itinerary(origin = origin, destination = destination),4 guidanceOptions = GuidanceOptions(5 phoneticsType = InstructionPhoneticsType.Ipa,6 extendedSections = ExtendedSections.All7 )8)9routePlanner.planRoute(10 routePlanningOptions,11 object : RoutePlanningCallback {12 override fun onSuccess(result: RoutePlanningResponse) {13 tomTomMap.removeMarkers()14 result.routes.firstOrNull()?.let {15 drawRoute(it)16 tomTomMap.zoomToRoutes(64)17 routePlan = RoutePlan(it, routePlanningOptions)18 }19 }2021 override fun onFailure(failure: RoutingFailure) {22 (requireActivity() as MainActivity).showToast(getString(R.string.routing_request_failed))23 }2425 override fun onRoutePlanned(route: Route) = Unit26 }27)
If the routing call is successful, you can draw the Route on the map. To draw it, configure the RouteOptions object, which specifies the appearance of the route, and add it to the TomTomMap.
1private fun drawRoute(route: Route) {2 val geometry = route.geometry3 val routeOptions = RouteOptions(4 geometry = geometry,5 departureMarkerVisible = true,6 destinationMarkerVisible = true7 )8 tomTomMap.addRoute(routeOptions)9}
Read more about routing in the Planning routes guide.
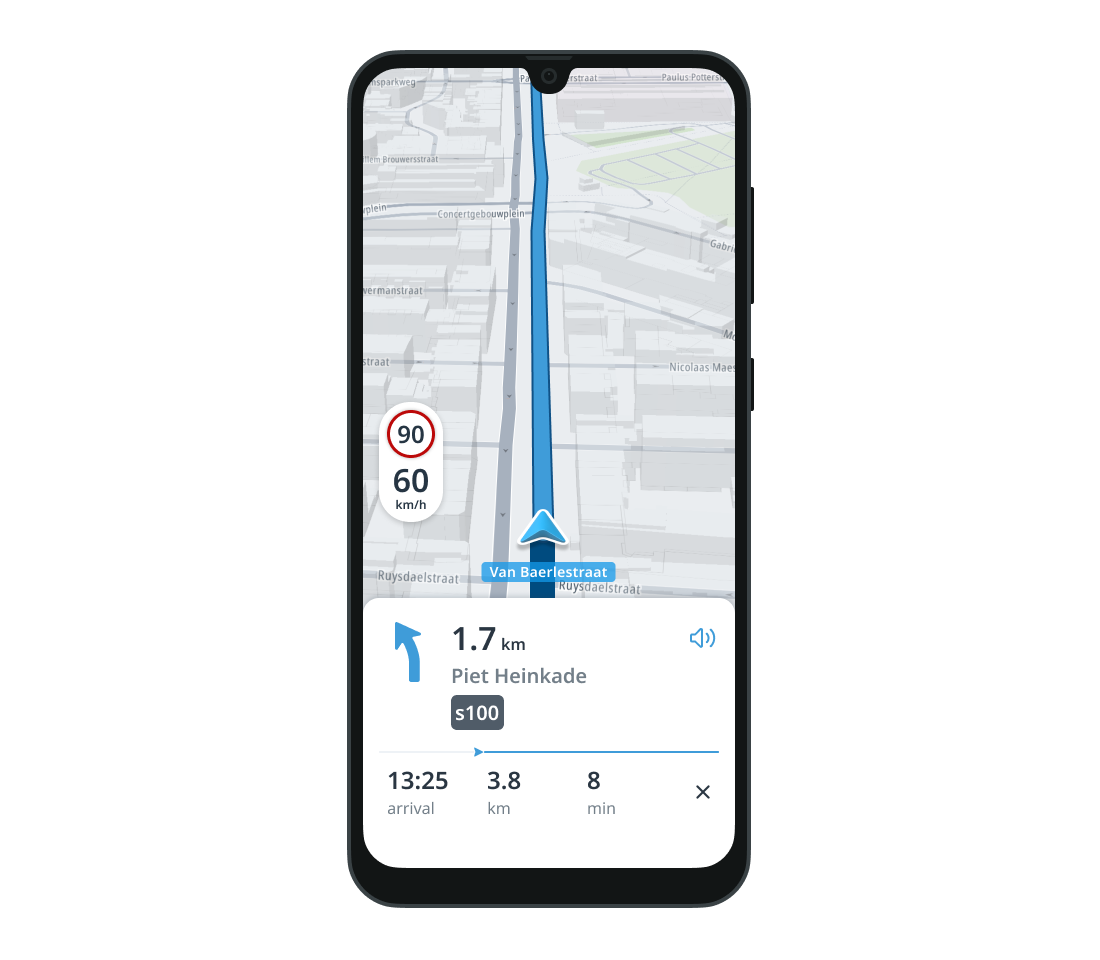
Navigation
The last part of this tutorial is about navigation along the previously calculated route. Navigation shows the current speed limit, the next maneuver, and the estimated time and distance remaining for the trip. For the purposes of this tutorial, navigation is simulated in both cases. To use real location data for navigation you must replace LocationProvider with one that provides real data.
Mapbox
Only the main functions of Mapbox SDK navigation are described. The entry point to navigation is the MapboxNavigation class. An instance of it was already created for planning a route. The ReplayLocationProvider was provided during initialization. This engine is responsible for simulating location updates.
Set the route returned by the routing request to navigation. The route defines a list of coordinates along which navigation is performed.
mapboxNavigation.setRoutes(routes)
Once the route is set to navigation, you can start the trip session.
1mapboxNavigation.startTripSession()2setChevronLocationPuck()3navigationCamera.requestNavigationCameraToFollowing()4startLocationSimulationUpdates(route)5showNavigationComponents()
Navigation UI components must be configured and initialized separately. This tutorial only discusses the maneuver component, which displays the next action and the distance to it.
First, add the maneuver view to the layout.
1<com.mapbox.navigation.ui.maneuver.view.MapboxManeuverView2 android:id="@+id/maneuver_view"3 android:layout_width="match_parent"4 android:layout_height="wrap_content"5 android:visibility="gone"6 android:layout_margin="4dp"7 app:layout_constraintEnd_toEndOf="parent"8 app:layout_constraintStart_toStartOf="parent"9 app:layout_constraintTop_toTopOf="parent" />
Then you can access the view in the activity/fragment.
maneuverView = binding.maneuverView
Once the maneuver view is ready, update it with the upcoming maneuvers during the navigation session. To do this, MapboxManeuverApi must be initialized.
1private val distanceFormatter: DistanceFormatterOptions by lazy {2 DistanceFormatterOptions.Builder(requireContext())3 .unitType(UnitType.METRIC)4 .build()5}67private val maneuverApi: MapboxManeuverApi by lazy {8 MapboxManeuverApi(MapboxDistanceFormatter(distanceFormatter))9}
Maneuvers are updated depending on the progress along the route. This means that the progress must be observed and the related data supplied to the maneuver API. Then the view is updated.
1private val routeProgressObserver = RouteProgressObserver { routeProgress ->2 viewportDataSource.onRouteProgressChanged(routeProgress)3 viewportDataSource.evaluate()4 displayManeuver(routeProgress)5 displayTripProgress(routeProgress)6}7private fun displayManeuver(routeProgress: RouteProgress) {8 val maneuvers = maneuverApi.getManeuvers(routeProgress)9 maneuverView.renderManeuvers(maneuvers)10}
Each of the navigation UI components is handled in a similar way. Some of them need different listeners, to observe different navigation data.
TomTom SDKs
This tutorial contains a superficial description of navigation. If you want to learn more about how to use the Navigation SDK, you can read the guides. A good place to start is Navigation quickstart guide.
The entry point to interact with navigation is the TomTomNavigation class. Therefore it must be initialized before starting a trip session. This application uses SimulationLocationProvider to simulate navigation. It can be replaced with any other LocationProvider. Read about different types of `LocationProvider`s and how they work in the TomTom SDKs in the Built-in Location Provider guide.
1navigationTileStore = NavigationTileStore.create(2 context = requireContext(),3 navigationTileStoreConfig = NavigationTileStoreConfiguration(4 apiKey = BuildConfig.NAVIGATION_API_KEY5 )6)7val routeGeometry =8 routePlan?.route?.geometry?.map { GeoLocation(position = it) } ?: return9val simulationStrategy =10 InterpolationStrategy(routeGeometry, currentSpeed = Speed.metersPerSecond(20.0))11locationProvider = SimulationLocationProvider.create(simulationStrategy)12tomTomNavigation = OnlineTomTomNavigationFactory.create(13 OnlineConfiguration(14 context = requireContext(),15 navigationTileStore = navigationTileStore,16 locationProvider = locationProvider,17 routePlanner = routePlanner18 )19)
Summary
This tutorial instructed you on how to move a basic app from Mapbox’s SDKs to TomTom’s SDKs. Now you can enrich your app with TomTom’s features and functions.
If you want to learn more, take a look at our other tutorials: